

Welcome to This Is How We Do It, a series wherein we’ll be discussing projects both inside the home and out and explaining, you know, how we do it.
Summer is a verdant, bountiful time of growth and plenty; a time when for many of us, it’s totally feasible to walk out into your backyard or nearby green area to pluck a few fresh mint leaves for your drink. Unfortunately, as summer draws to a close, so does that possibility; whether you’re gathering fresh herbs from a garden, a window ledge of potted plants, or foraging wild herbs from around your neighborhood, that door is closing with the season. So it’s getting to be time to preserve those lil guys so you can enjoy them all year round. Here are two ways to do that!
I am not a Certified Herb Person, and it’s totally possible that there are ways in which my approach can be improved. If you have tips, please do share them in the comments!

Dry and preserving herbs
Time: Maybe 15-20 minutes
Materials
Herbs of your choosing
Scissors or garden shears
Twine or string (preferably not treated or coated in anything)
Coat hanger(s), wire if possible, and potentially nails to hang it from
A baking pan or wire cooling rack that you can live without for a few weeks
For leafy herbs
1. Gather your herbs
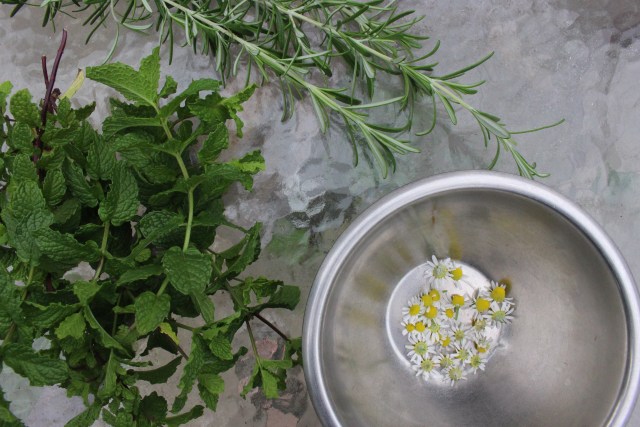
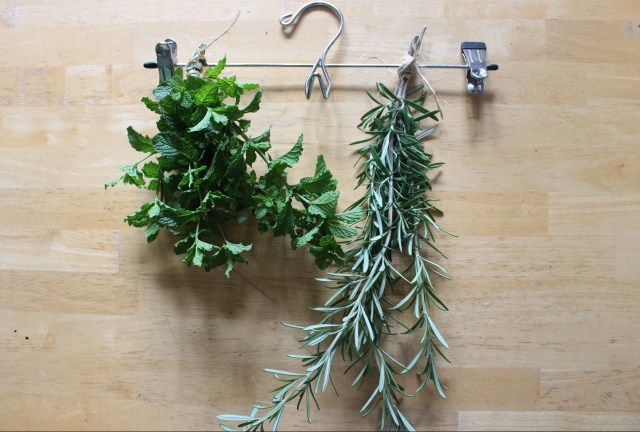
I’m using rosemary, mint and chamomile for this example. In the case of rosemary and mint, the part of the plant we want to use is the leaf, so I’m just harvesting whole stems to keep all the leaves in one place. In the case of chamomile, the part I want is the flower and cone, so I’m just grabbing that off the top of the stem and placing them carefully in a bowl.
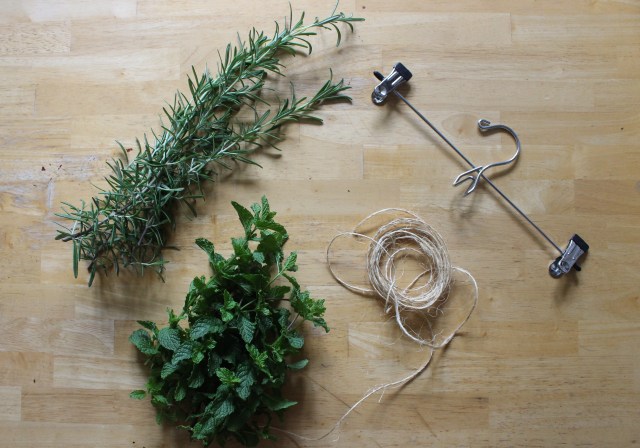
2. Gather your other materials
You’ll need a clear workspace, your coat hanger/s, scissors, twine and of course herbs. For this part, you just need any stemmed, leafy herbs you have — like my rosemary and mint or thyme, sage, parsley, etc.
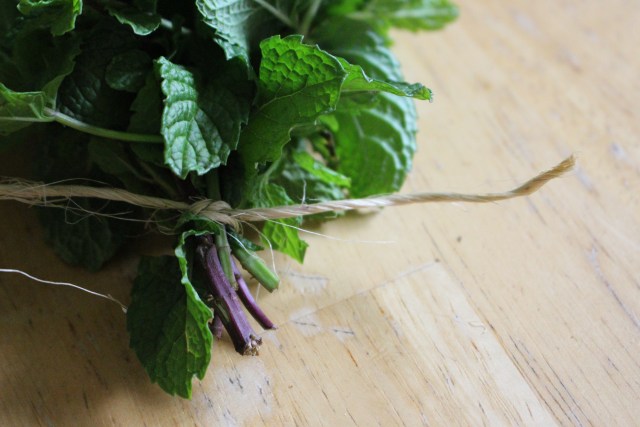
 3. Bundle your herbs and tie them up
First, it’s easiest if the bottom few inches of your stems are clear of leaves because then you can see what you’re doing, so feel free to strip the very ends of your stems. Once you’ve done that, cut a length of twine about eight inches or so; bundle one kind of herb together, as much as will comfortably fit in one bundle without being totally crushed together, and tie it together by the end stems. Full disclosure, my knotwork is not great — my Girl Scout troop unfortunately focused more on arts and crafts than useful skills — and this still works pretty well for me, so don’t stress.
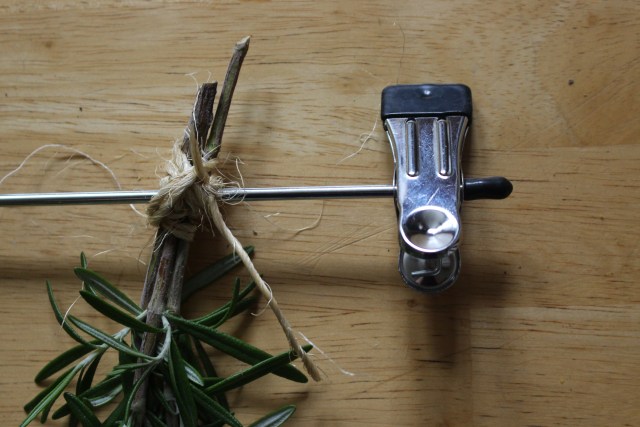
Next, using the same twine that’s already attached to your herbs, tie the end of your little bouquet tightly against the long edge of your coat hanger. By trial and error, I have figured out that the easiest way to do this is to tie the bundle in the middle of your length of twine, leaving two long ends, and then laying your coat hanger over the knot on your herb bundle and using the two long ends of twine to tie more knots over the wire.
Once done, you should have X number of upside down bouquets securely tied to your coat hanger. Don’t crowd these guys together; the whole point is that they need air in order to dry, so get more than one coat hanger if you need to.
4. Hang them up
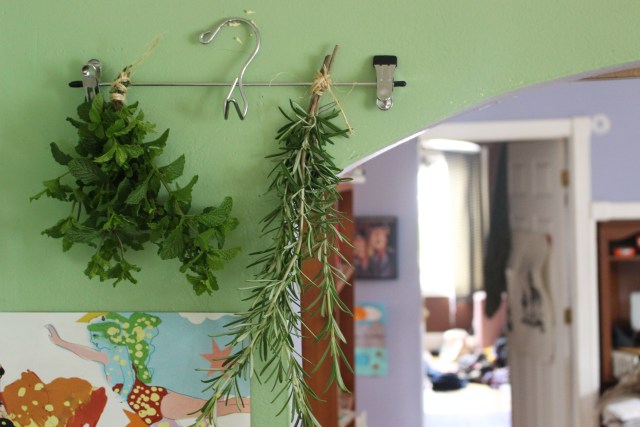
They’ll need to be somewhere where they won’t be disturbed for a few weeks, and also preferably somewhere that gets good airflow. I chose this spot on my kitchen wall, because the kitchen probably gets the most fresh air in the house. It would have been nice to find someplace where the herbs were exposed to air on all sides, like a doorframe, but none of the doorframes in my apartment are really viable options.
These just have to hang out for several weeks, or until they’re totally dehydrated. You don’t have to actively do anything; just let them chill out. You can test whether they’re done by pulling off a single leaf; if you can bend it at all and the leaf stays whole, give it more time.
Once they’re done, you could just throw them in a container as is, although that’s not very space-efficient. Probably what you’ll want to do is remove the leaves and store them in a jar or bag and toss the stems — you can harvest the leaves pretty quickly by pinching the stem at the far end (the end that would have been closer to the sky than the ground while the herb was growing) and just running your fingers all the way to the other end; the leaves should shuck off pretty easily.
For flowery herbs
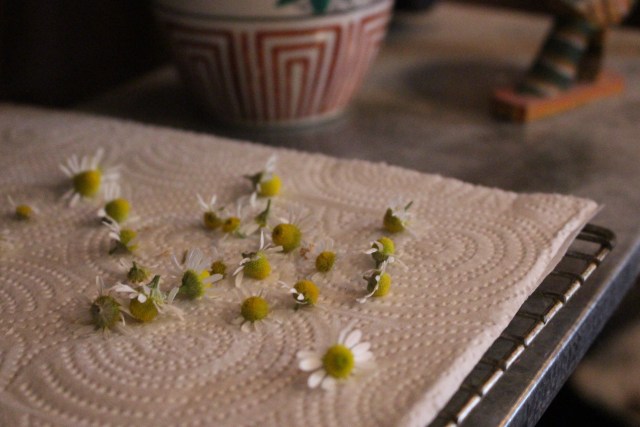
Remember the chamomile flowers I harvested? I’m gonna dry those too, and it’s an even easier process. You can also preserve other herbs and plants like lavender and rose like this.
1. Spread your herb out on a flat, dry surface
I chose this wire cooling rack and put it on a shelf in my office, one of the few surfaces in the apartment that the cats have not demonstrated an interest in jumping onto. I covered it with a paper towel so that the smaller flowers wouldn’t fall through the gaps in the wire, although in retrospect cheesecloth would probably have provided better aeration.
2. Wait for them to dry
That’s it! That’s literally the whole process. This, too, will probably take a few weeks. When the flowers are thoroughly dry, you can move them to a jar or other storage container.
After the drying process, your herbs are ready for use in a number of applications — cooking, making herbal teas, even medicinal uses like tinctures or infused oils. (A note: if you are going to try an infused oil — which is awesome! I recommend it — you need to make extra double sure your herbs are 110% dried, because any water content at all in the oil can cause botulism, for real.)
Join me later in the season when I maybe take a stab at harvesting echinacea root! Or not, we’ll see.


Comments
rachel. this is my herb garden. i needed this so bad i cant even tell you with words so i had to include a photo. every time i look at it, i think about how all that beauty and glory will be dead in a couple months. now i can look at it with hope for the future! thank you so much!
Um your garden looks amazing! Will you tell me what’s growing in it? What are you using everything for? I’m very impressed!!
oh gosh well there are so many it’s actually kind of embarrassing? there are 24 plants total I think with some duplicates. I didn’t expect everyone to live but they are all thriving except for the cilantro which went to seed about a month ago but we got fresh coriander seeds out of the deal so that was exciting! we have all the basic ones like oregano, rosemary, sage, parsley (curly and flat-leaf), thyme, dill, sweet basil etc. then we have lots of mint! pineapple mint, kentucky colonel mint, chocolate mint, apple mint, spearmint just all the mint. we were told we would regret this but everyone has stayed in their lane quite nicely. then we have different basils: dwarf bush, purple, thai, and lemon. we also have pineapple sage which tastes like bubblegum it’s amazing. tarragon, lemon balm, sorrel…there is winter and summer savory. oh and lemongrass! that is the tall grassy looking plant on the right. we have all the herbs…just all of them. I work on a farm so I got a lot of the extra plant starts from the greenhouse. I was a little excited to have my own herb garden does it show? #nochill
I like to make herb salts and herb syrups for cocktails. i also love making pesto out of different herb mixtures. given that we have so many, one of my favorite things to do is cut them, bag them, and leave them for ppl I like on their front doors. I really feel like all those episodes of the victory garden my parents made me watch as a kid are finally paying off and i just want to provide for the community you know? I am now excited to dry a lot of them and give them away as presents!
this is amazing and beautiful, what an herb garden!
@lomy Giving away herbs as presents is THE BEST IDEA. Like, even if it’s an herb they’ve never tried, they can have a fun time experimenting with the new flavors.
aww thanks so much, aks and dante! I am glad the gift idea resonates with someone else because I wasnt sure if people would get that excited about receiving a sack of dried herbs. I know I would be excited, but I’m also a person with over twenty herbs in my backyard you know?
This is great! I’m always letting half-bunches of herbs go to waste. Rachel, are you just the most organised and together person in the world of people, togetherness and organisation?
Great advice! I find that herbs preserve nicely in the freezer as well. Small ziploc bags are useful for that.
Great! I have a ton of sage, it kind of took over my garden this year. I found this recipe for electuaries, which are medicinal or herbal honeys which you can eat as a paste or stir into tea.
http://pixiespocket.com/2012/01/lets-talk-about-what-is-an-electuary.html
If one wanted to make bunches of herbs, like bunches/sticks of lavender or sage, would you do this when they’re already dry? That seems like it would make a mess.
If I’m going to make a bunch (ie sage/lavender) I tie it all together when the herbs are fresh, like wrap the string and criss cross it around the length of the bunch so that it’s all contained and then hang it/let it sit until its dry, and tighten/re-do the string if necessary.
Thanks this was really helpful! :)
I hope that an article about echinacea root is forthcoming…
also this was great. i dry a lot of sage and throw it all my storage boxes/bags/pockets in clothes I rarely wear… and then I forget that I put them there and everything ends up smelling lovely
Nice article! Drying herbs was one of the first things I started to do to try to preserve my garden all year long. They make a nice small gift too.
An additional tip that I have found helpful is to take a plain brown paper bag, punch some small holes on all sides for air flow, then place each bunch of herbs in their own bag. Tie the bag closed at the cut end of the stems and hang just as described in the article. This helps prevent dust and small insects from getting at your herbs while they are drying.
if you don’t have any viable doorways but you’re fine with putting nails in the wall, it would be super easy to put up a clothesline between two walls to hang herbs from…