Welcome to This Is How We Do It, a series wherein we’ll be discussing projects both inside the home and out and explaining, you know, how we do it.
I wrote you a poem:
shelves are cool
shelves are neat
build them from IKEA
or find them in the street
shelves up high
and shelves down low
when your floor piles
have got to go
shelves can be short
shelves can be tall
here’s how you make
a shelf on the wall
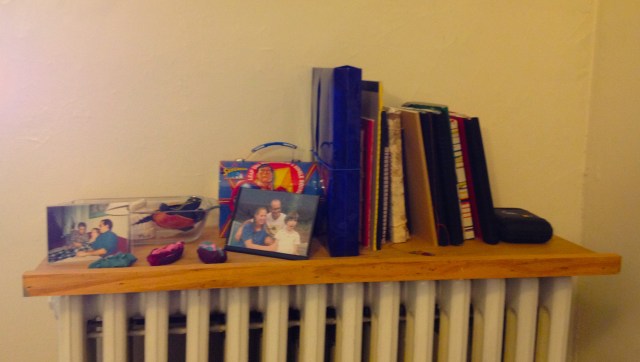
In early August, I moved into a new apartment, which is DELIGHTFUL, but my room’s storage offerings are a bit limited. I decided I needed a shelf above the radiator to put all my old journals for easy reference when I feel the need to tap into some late teens/early twenties emotional strife.
And so I found a board on the street, because you can find great boards on the street, and I placed it atop my radiator, where it sat very nicely. But the thing about a radiator is that once it is no longer muggy Philadelphia summer, the heat will turn on, and the radiator will get very hot. I hear it’s not really recommended to leave a plywood board holding a bunch of notebooks directly atop a very hot piece of cast iron. I needed to get the shelf from the radiator to a secure spot on the wall above it. Maybe you are in a similar situation. Or maybe you are trying to find an alternative storage solution to the very nice piles you have amassed around your bed. Whatever your shelf needs are, this post will help you satisfy them.
How to build a simple shelf using wall brackets
Time: 1 hour, not including time spent feeling overwhelmed at the hardware store and time spent debating with yourself over whether or not you found a stud
Tools
- drill
- screwdriver
- stud-finder
- level
- pencil
- tape measure
- vice grip (if necessary)
- safety glasses
I borrowed the stud-finder from my neighborhood’s tool library, and I also could have borrowed all the other tools I needed if I didn’t already have them. Does your neighborhood have a tool library? Joining a tool library is a great way to be able to DIY if you can’t afford your own tools or if you don’t have space for them.
Materials
- wooden board
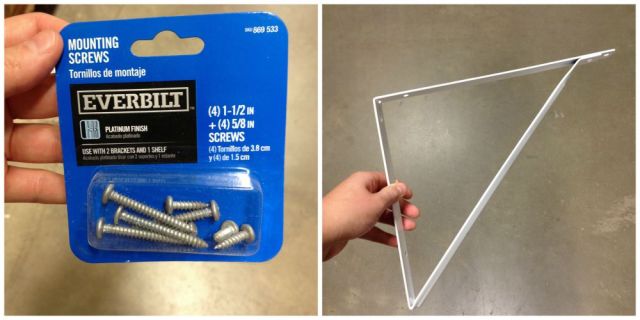
- 2 brackets
- 8 mounting screws (4 long ones, and 4 short ones)
With the board and brackets, there are various options. I happened to come across an excellent sturdy plywood board with a lip, discarded on the curb down the block. It had some paint and spackle dried onto it, so I sanded it down and washed it and it was in great shape. I could have stained it and finished it, but that wasn’t a critical step for this shelf that’s just being used to hold books and trinkets.
That being said, buying a fresh board would have still been pretty cheap. Home Depot will cut their lumber down to the size that you need for free, and I’m sure other places offer similar services.
As for the brackets, it’s important to get ones that are sized properly for the width of the board, and that will support the weight of whatever the shelf will hold. These brackets I bought are built to hold way more than will ever be put on this shelf, unless suddenly I start collecting miniature anvils.
As for the screws, sometimes they come with the brackets. My brackets didn’t include them, but there were a set of mounting screws sold right beside the brackets I bought, specifically made to fit them correctly.
Ok, do you have all your stuff? Was it very cheap? All in all, the materials for this project cost me about $10. Fancier materials for fancier shelves exist, but I’m going for functional over fancy. If you want a fancy shelf, this tutorial should still be helpful. Let’s get started.
Step 1: Find the studs
First things first, where are your studs? Not that kind of stud. The studs that are wooden boards holding up the wall behind the plaster or drywall.
I used a stud-finder from my tool library, which was pretty hard to use, and I’ve been told are “basically useless” on plaster walls anyway. HOWEVER, my roommates and I had surprisingly good success using this! I used the stud finder, then double-checked by using the “knocking” method. I marked the stud with a pencil, then I found another one. Here’s a helpful resource for different ways to find studs without a stud finder.
I drew a level line between the two studs – this was about two inches below where I wanted my shelf to be, so that I could drill my brackets in using screws on the line, because that gave me more accuracy than trying to measure down from where I wanted the shelf.
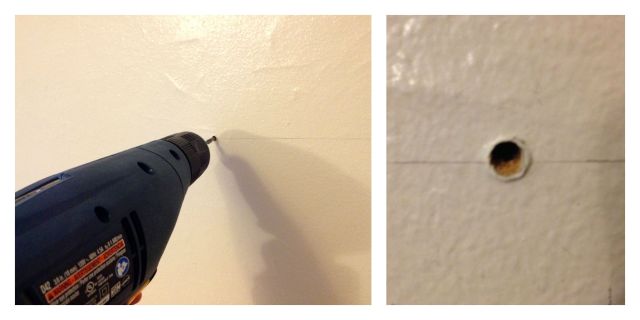
At Cee’s suggestion, before I started trying to screw things into the wall, I drilled a hole in the wall with my teensiest drill bit to make sure my stud-finding had been accurate. It was!
And as a sidenote, you have other options besides studs. For drywall, you can use anchors, and for plaster walls, you can use bolts to make sure your shelves stay up and hold what you need them to hold. I thought about using bolts, but then I consulted with our construction expert (it’s Cee again) and decided finding studs would be more straightforward, with less potential for disaster. You need to pick one of those options, though; you can’t just indiscriminately screw a thing into the wall without knowing what’s behind it. That’s okay for, like, calendars. With a shelf, if you don’t plan ahead, it will fall down and mess up your wall, and that is not the goal here.
Step 2. Secure the brackets
Once I knew where the stud was, I used my larger bit to make a pilot hole for the screw. It’s important to make your pilot hole as long as the screw, but with a bit that is slightly thinner than the screw, so its thread will still grip into the wood. A lot of packets of screws will advise on how large a bit to use for the pilot hole, but you can also just check by stacking the bit and the screw, side-by-side, and making sure you can see the thread of the screw on either side of the bit.
I got the top screw started, and then before drilling a pilot hole for the bottom screw, I checked to make sure the bracket was level.
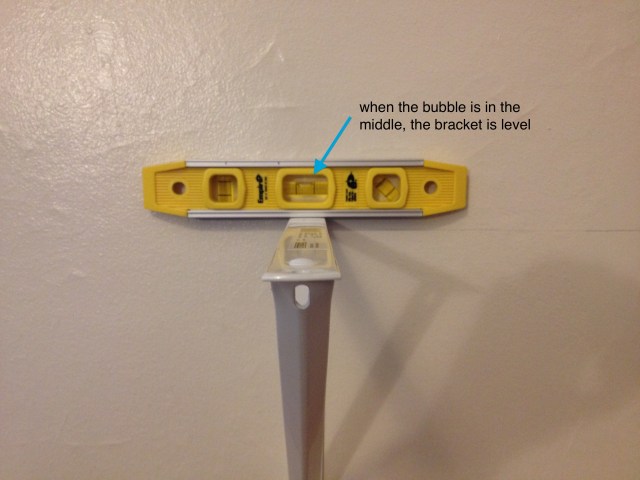
Then I marked where the second screw pilot hole would go and moved the bracket aside to drill it.
This is where the design of these brackets became a huge pain in the ass. The hypotenuse of the bracket triangle made it impossible to use a screwdriver to secure the brackets! I used a vice grip and a Phillips head drill bit to create a right-angle screwdriver. It worked, but it was extremely annoying.
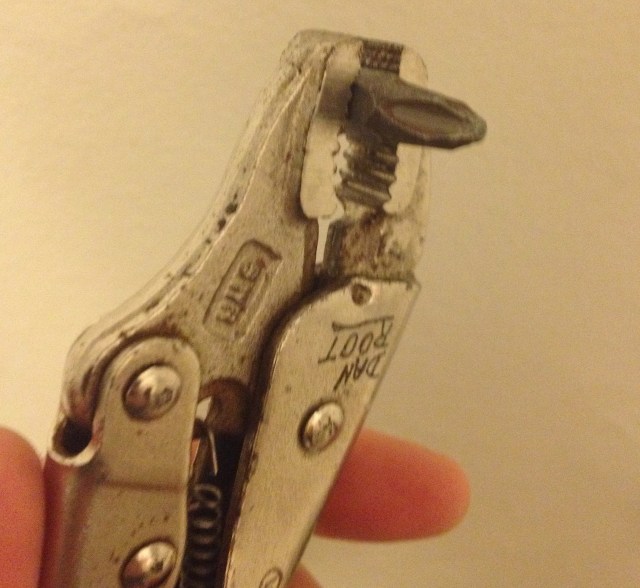
Repeat with the second bracket.
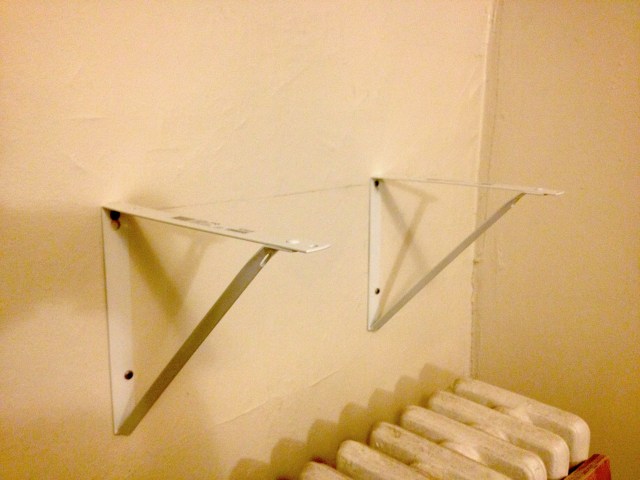
Step 3. Put a Board on It
Once I had my two brackets secured to the wall, I placed the board on top and centered it. I used pencil to mark where the screws would go into the board, and then took it off to drill pilot holes in the wood. Again, I was totally screwed (puns!) by the bar that went across, and had to do some very awkward twisting with the makeshift right-angle screwdriver.
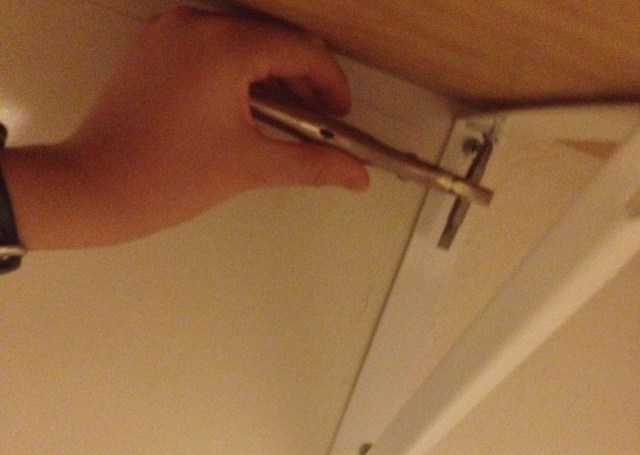
There are different designs for brackets that don’t have the awkward bar. I’d pick one of those instead.
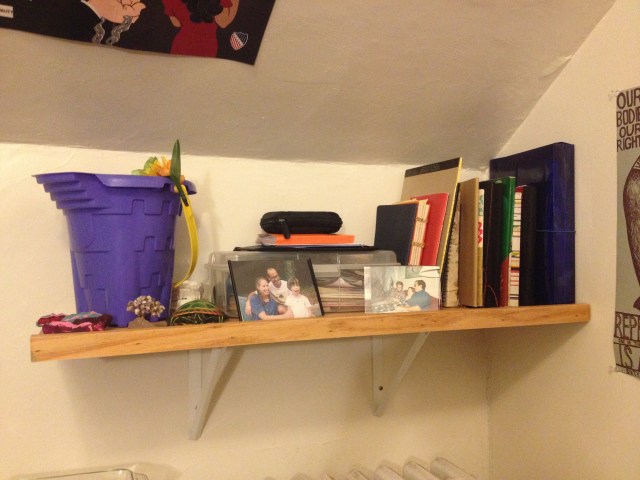
But after a while finagling the screws, I had a brand new sturdy shelf secured to my wall, ready to hold my stuff safely above my radiator.
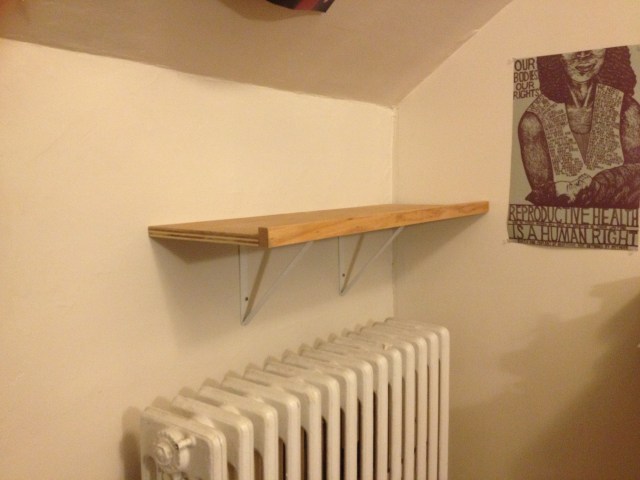
You probably want to do some measuring to make sure your shelf comes out even and the weight is well distributed across your brackets. I live in an apartment that is a converted attic and literally nothing measures out neatly, so what I did was to place the brackets on first, based on where the studs were. Then I measured the board and centered it on top of the brackets. It fit neatly into the corner of the room.
Good job! You made a shelf!





Comments
This is EXACTLY what I needed, thank you!
you’re welcome!
If I could think of one person in my life who would have a tiny anvil collection, it’s you.
i mean, it’s not like i’m opposed to the idea.
MADDIE IS SO THE BEST. MADDIEEEEEEEEEEEE and shelves.
VIVIAN and shelves
oh my gosh, this will be so helpful so soon! I was just about to build a shelf. Thank you!!
good luck!!
This is the most accessible instructable I’ve ever read.
!! i’m glad. maybe next time i’ll get into it with some molly bolts.
I love that poem! And I love that you wrote a poem for an article about how to build a shelf!
mey, mey!
hip hooray!
so glad you liked
my poem today!
<3
Haha! This made me so happy!
Excellent! I have a pile of shelves that I haven’t put up because I couldn’t figure out how to do it by myself. I was attaching the brackets first and then trying to attach them to the wall which does NOT work unless you have someone else to hold it. This method makes much more sense!
brackets first, always!! good luck with your shelves!
start your own! i mean, i know that’s a big endeavor, but i also think it’s cool because there are actually a lot of guides out there that tool libraries have created to help other people start them up: http://westphillytools.org/want-to-start-a-new-tool-library/
saving this immediately because i need so many shelves i have so many floor piles!
shelves for days!
DONT HATE ON MY BED PILES OK?!
BUILD A SHELF. OR SEVEN.
i really hope everyone built a shelf over the weekend and will post pics here.