

You Can Eat Local During The Winter Too
Sadly, we moved away from New Orleans last fall, and we now live in Chicago. This presented a few problems for our local diet. Chicago, like most places in the U.S., has a very limited selection of produce in the winter. Farmers mainly sell the stuff that holds up in storage: winter squash, onions, apples, and root vegetables. Unfortunately, you can only eat so many beets without making a break for the grocery store. So this winter, about half our food has come from local sources, and the rest has come from a conventional grocery store.
It doesn’t have to be this way. If you eat locally through a whole growing season and you plan things out right, you can set yourself up to have a really great winter. In June and July, you can make jams or freeze whole berries for pie. In August, you can make jars of tomato sauce or stewed tomatoes. When animals start producing their best milk in the summer, you can make some hard cheese (yes, you can do that at home). When the hot peppers start rolling in, you can make a few bottles of hot sauce.
So our goal this year is to put in the effort during the summer, and end up with a pantry full of preserved local food for the winter. We have already spent some time learning different preservation methods, and we’re excited to employ them on a new season of produce. Chicago has several wonderful local foods stores, where we will be getting some of our food. The rest (hopefully most!) of our food will come our garden plot. Chicago is known as a hotbed of urban farming and community gardens, and we snagged one of the last open plots in the city. We can start planting things in mid-April, though we have already started a bunch of seeds indoors so we are ready when spring really starts. So far, we are planning to grow cucumbers, tomatoes, lima beans, sweet peppers, hot peppers, broccoli, chives, onion, lettuce, arugula, radishes, carrots, potatoes, and some berries. With a little luck, a lot of our projects this summer will feature food from our own garden!

Preserved, my new column, will document our journey. Each month, I will highlight some fun ways to use and preserve some locally grown food that is in season for me, and probably for most of the U.S. I will cover the basics of preserving food by fermenting, pickling, canning, and freezing. Some of the recipes will be for immediate consumption, some can sit around until December. By the end of the year, you should have all the tools you need to make the most out of your local produce and to stock your pantry full of delicious DIY preserves.
Let’s start with a simple recipe for dill pickles.
How To Make Refrigerator Dill Pickles
The last time I was at my local food co-op, they had several baskets of beautiful pickling cucumbers. I couldn’t resist buying a bag full to make some dill pickles. This recipe is incredibly simple, but the results are impressive. In just a few days, you will have perfect dill pickles. And they look so beautiful floating in a jar with dill and garlic that they make great gifts!
For this recipe, the most important component is obviously the cucumber. Make sure you get a pickling cucumber, the ones that are shorter, curved and bumpy. They have a thin skin, so the brine soaks in more easily, and they tend to retain their crunch much better than salad cucumbers.

To make about 3 pint-size jars of pickles, all you need is:
+ six to eight cucumbers, depending on the size (shorter is better so they fit more easily into the jar)
+ six cloves of garlic
+ fresh dill
+ 1/2 cup of distilled white vinegar
+ 3 tablespoons of kosher salt
+ 3 cups of water
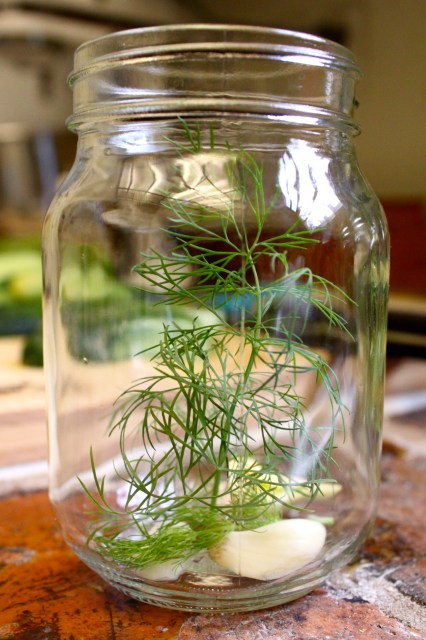
First, cut the cucumbers into spears. You can leave them whole if you want, but I prefer the classic look of spears. Next, cut all six cloves of garlic in half. Place four garlic halves and several sprigs of dill into each jar.
Put about eight cucumber spears in each jar (depending on the size of the cucumbers). The jar should be fairly full, but don’t pack them in like sardines. Prepare the brine mixture of vinegar, water, and kosher salt. Stir to dissolve the salt. Fill each jar to the top, so that all the pickle spears are submerged. It’s easier to arrange the dill decoratively at this point, so if you plan to give the pickles as gifts, you can wait until the end to put the dill in the jar.
Seal the lid tightly, and put in the fridge. In a few days, you will have pickles! For your next attempt, try adjusting the amount of garlic and dill to get a different flavor.


Comments
Yes, and thank you, to all of this, I’m looking forward to all the recipes!!! For people in New York, I am compelled to share: Quinciple is a weekly box of food (and a small start-up) that has changed my food life forever. It has has produce, but also selections of local meat, fish, cheese, bread, eggs and beans/legumes/grains etc. You can pick it up all over Brooklyn, and in some areas they deliver via bike. The box includes recipes too, and their web site has information about all their farms and producers! Just had to get that off my chest.
So looking forward to reading more of this feature!!
Thanks for reading! I am super excited to have a place to share our food adventures.
And now I definitely just really want to make dill pickles. And go visit the local farmer’s market.
Sarah! I am The Most Excited to read this and eat pickles and mostly to see your face back on Autostraddle again. I can’t wait to learn how to preserve everything!
It’s good to be back!
Girl, you are an angel. This is perfect.
I will be waiting eagerly for your next post!
Okay, I was so excited that I made my comment before I went to the second page.
We should talk! I’m from Chicago and I’ll be here for the summer, but I spend most of the year in Puerto Rico working on an organic farm with my partner.
I would love to exchange knowledge.
We should definitely chat! We are growing food organically for the first time, and we can use all the pointers we can get.
Yay! How can I contact you?
Hi Sarah! I live near Chicago. What local food stores do you use during the winter? I’m trying to get more local food and less Big Ag in my diet.
Hi Sara! I really love Green Grocer near Ashland and Grand. They have a good variety of local products, including eggs, meat (Gunthorp Farms has the most humane practices), and produce. They also have some non local organic produce and a good beer selection. So at least you can support a local business while buying non-local items! They have a summer CSA you should look into, and they also deliver. If you go, mention it’s your first time and you get $5 off!
Great, thanks!
Hey, Sara! I’m Monet (girlfriend of Sarah). We shop at Green Grocer during the winter. It’s quite small, but it has most of what we need. They offer a wintertime CSA, but we didn’t do it this year. I recently learned about another market called Green City Market, which is open on Saturdays during the wintertime.
Hope that helps!
Whoops, didn’t see Sarah’s comment before I posted.
Can you tell we really like Green Grocer??
Ha, I can. I’m familiar with some of the local options in terms of buying farm-raised meat, but I wasn’t sure about the grocery options. I appreciate the info!
I’m so excited for this column!! We’re planning to start preserving food once we actually live somewhere (instead of my cousin’s living room… eventually one of us will get a job and we can live in a cheap little apartment on our own, right?!), so this series is perfect.
Also, PICKLES.
I didn’t realize that Whole Foods wasn’t local, because I think the one by my house mostly gets local produce(rarely shop there as TJ is better). Then again I’m in California where we grow most fruits year round somewhere in the state.
One thing we learned when we tried to start eating local is that almost all of the produce we non-Californians consume comes from California. That’s where the environmental impact comes in: everything must be shipped across the country. It’s also one of the reasons that most of the produce the rest of us find in grocery stores is genetically modified: it needs to retain its shape and stay “fresh” through the (sometimes long and arduous) shipping process.
What’s that they say again about the best coast?… :O)
i am so glad AS has provided a safe space to talk about a huge emotional struggle in my life: homemade pickles. pickles are such a challenge for me! it’s frustrating because they look so simple, but i have tried several times with several recipes and i am always let down with my results. maybe growing up in the rural South and having a childhood full of the absolute best homemade pickles has ruined me for good? i am going to try this for sure because hope springs eternal and i want some damn pickles, but i am not sure i can take another disappointment. have you by any chance pickled other things using this recipe? bc i have a lot of radishes and even more turnips.
i am excited for this column! i love local food culture and can’t wait to learn more about your experiences in chicago.
I use Mrs. Wages Kosher Dill pickle mix and it is outstanding. One of these days, I will try making them from scratch.
I haven’t yet pickled anything else with this particular recipe. But I really want to try pickling radishes soon. I had some Moroccan spiced pickled radishes & carrots at a restaurant a few months ago, and I’m still thinking about them. If I can find some radishes at the store this week, they might show up as the next post!
I love eating local! I live in the SF Bay Area so I’m totally spoiled when it comes to climate and things being available year round.
For those that are interested in sodas, and looking for a local alternative, you may have access to local purveyors that cook down their berries and other fruits into a concentrate. I use Hidden Star Orchards around here and their concentrates are fantastic! Pomegranate, Blueberry, and Cherry concentrates are all available on Good Eggs and at local farmer’s markets. I just add a little bit to the bottom of a glass with ice and sparkling water! It’s the best soda I’ve ever had. Maybe add a little lemon juice, bitters, or mint, if you’re feeling adventurous :).
I am SO EXCITED about this. This is exactly what I need right now! I just moved to the Seattle area and I have three garden boxes in my yard that I’m growing stuff in and a local market down the street. And I think I have a little dill plant growing next to my garage. Because I didn’t know what fresh dill looks like, but what is growing there looks an awful lot like what you put in those jars.
I’m so excited I get to learn and explore about this stuff with you!
We just started growing dill from seed, and our tiny little plant is pretty fragrant. So if you rub the leaves, the smell should give it away.
What are you growing in your boxes? I think my plans for our 4×8 bed are a bit ambitious, but we’ll have to see how it turns out.
It appears that it is not a dill plant unfortunately.
One of them has some onions that were growing already, in addition to some mystery sprouts that may or may not produce something edible, so I’m kind of waiting to see where those head. And then I’ve planted some spinach, a strawberry bush, heirloom tomatoes, a few more onions of my own. And I have some cantaloupe started inside and a summer squash mix waiting for warmer weather.
And I was so inspired by this post that I signed up for a produce box today!
I absolutely LOVE this new column and I can’t wait to read more. Food and its’ preservation make me way too excited. I’m super jealous of you and your partner eating locally, gardening, and preserving food because that’s basically a dream of mine. I’m super excited about this, people!