Welcome to the gazillionth installment of Make A Thing, where we make handmade gifts for people. Or ourselves. Or our cats. Mostly our cats.
Header by Rory Midhani
Hey thing makers! For the next two weeks, just for funsies, Hansen and I will be switching columns. So you’ll be making a thing with me and she’ll be helping you steal lesbian icons’ style.
I have two big obsessions right now: pretty boxes and washi tape. Pretty boxes are an old favorite: I have a lot of things and I need a place to put them. I’m obsessed with organizing and sub-organizing. But I hate that most organization systems that are cheap are ugly and that in turn decorative boxes have a huge mark up. To make matters worse I just moved which means I’m taking things out of packing boxes only to put them in to new boxes. I’d really rather be reusing and/or upcycling all these cardboard boxes!
Washi tape is my brand new life changing obsession. Washi is Japanese paper made from wood pulp, and washi tape is adorable masking tape made from washi and acrylic adhesive. Because, like masking tape, washi tape can be removed and restuck, it’s ideal for crafting. It’s also cute. Like really really cute. Plus many of the patterns are designed such that you can overlap the tape and line up the pattern to create one big pattern!
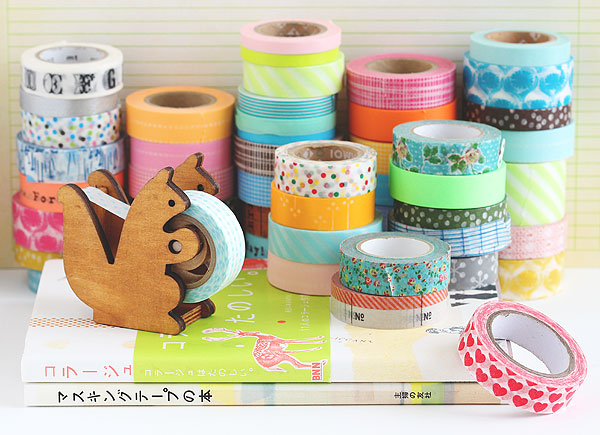
(Via Sideoatsandscribbles.wumple.com)
With washi tape and boxes of my mine I’ve created a bunch of simple, useful, and cute boxes from cardboard boxes that would have otherwise been thrown out. This week we’ll look at the simplest examples of the wonders of washi tape on boxes, and next week we’ll take it a step further with the magic of washi tape + graze boxes to make a jewelry and trinket box. Yes, you read that right.
Small Striped Gift Box
I get a lot of jewelry in cardboard gift boxes, but I just throw them out when I transfer that jewelry in my big jewelry box. Then I buy small pretty boxes to give gifts to other people in. This cycle has got to end. This tutorial would work for any size of gift box with a lid, though it might take longer.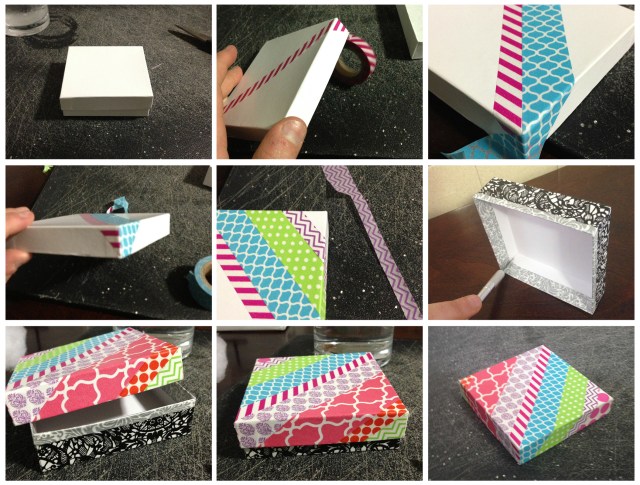
Supplies Needed:
+ Washi Tape
+ Cardboard box with lid
+ X-Acto knife
Level of Difficulty: Easier than picking a gift to go inside.
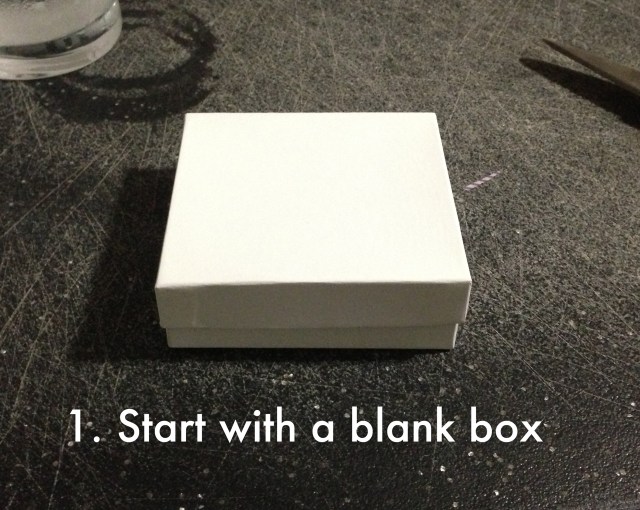
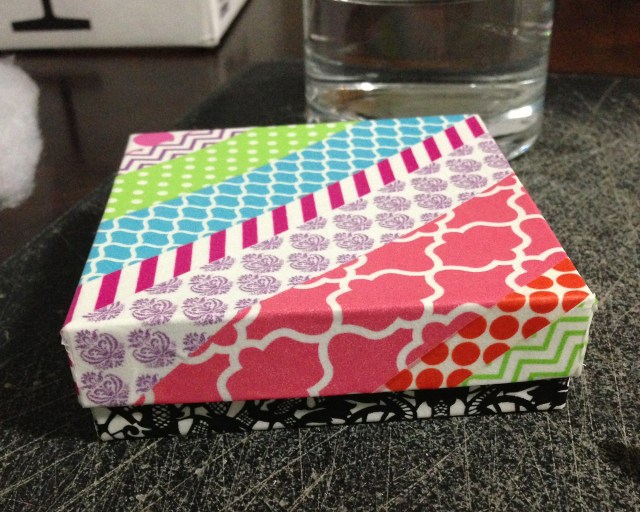
Start with a plain gift box. If it’s tan cardboard that’s totally fine but remember washi tape is semi-translucent and the background will show through.
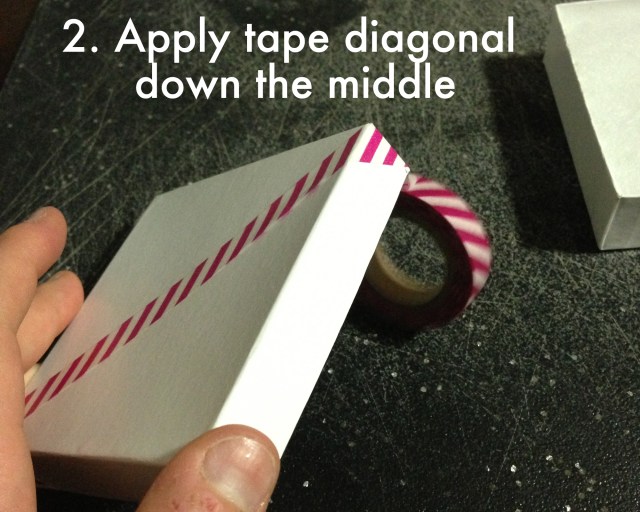
Choose a washi tape pattern to be in the middle and apply it to the box top on a diagonal. It is easier if you have it cross the box from the left face of the corner to the right face of the opposite corner instead of exactly down the middle. Fold the tape over the lip and stick to the underside of the box top.
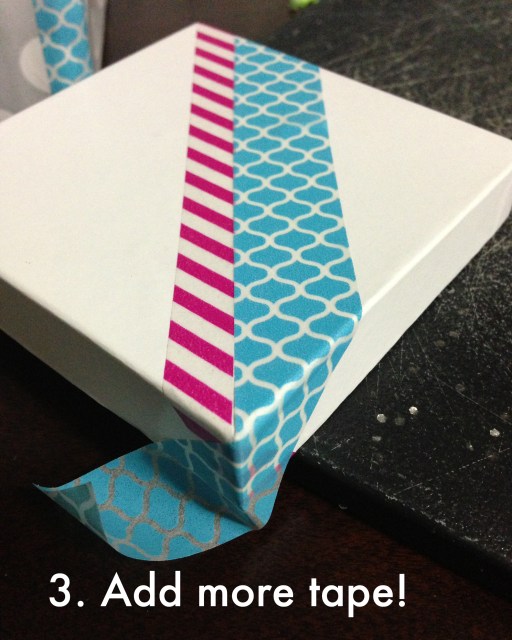
Add a strip of a different tape right along side the first.
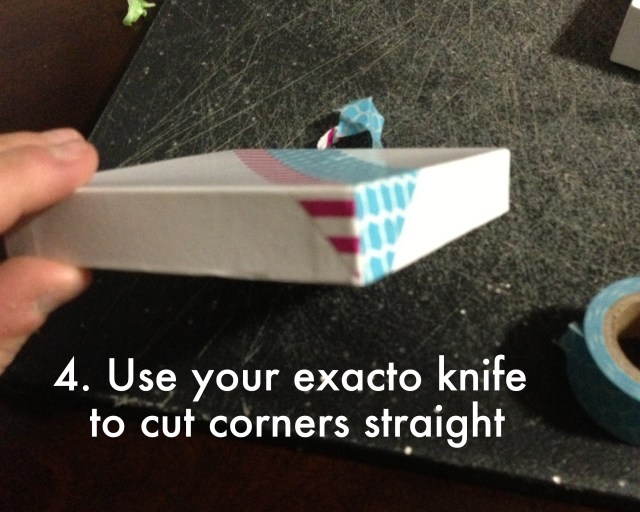
Use your x-acto knife to make tapes touch neatly at the corners. Do this by cutting along the corner deep enough to pierce the tape but not so deeply as to pierce the box. You can also leave the corners overlapping. This looks cool in a different way!
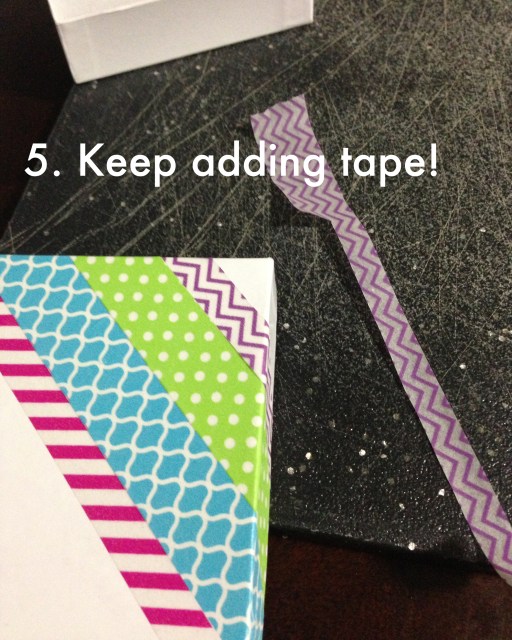
Keep adding tape! It looks cool if you vary color, pattern and width of the tapes. It also looks cute if you keep the pattern the same but just change the color. Or keep the color the same and just change the pattern. Follow your heart.
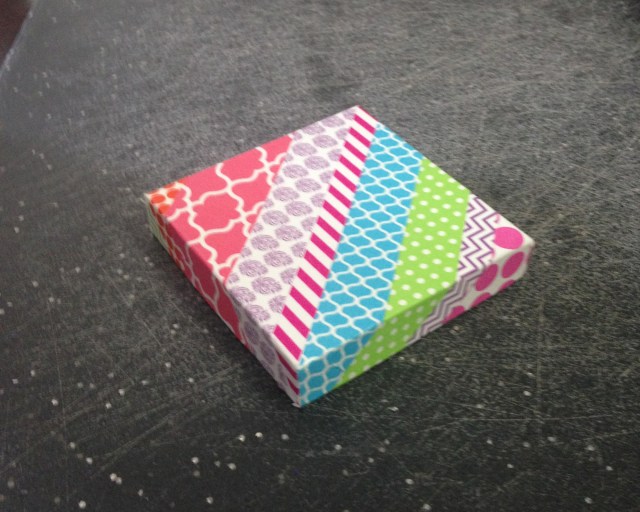
Once it’s finished, take a moment to admire the top. Doesn’t it look awesome! You’re so good.
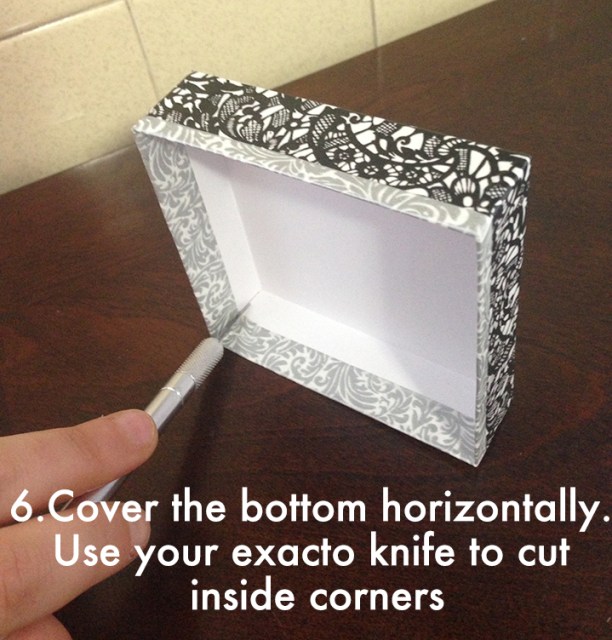
Cover the bottom of the box with washi tape horizontally. Use a coordinating or contrasting color. I used a contrasting color because I’m cool like that. When you reach the top of the box fold the tape over the top edge. Use your exacto knife to cut the inside corners so the tape folds over nicely.
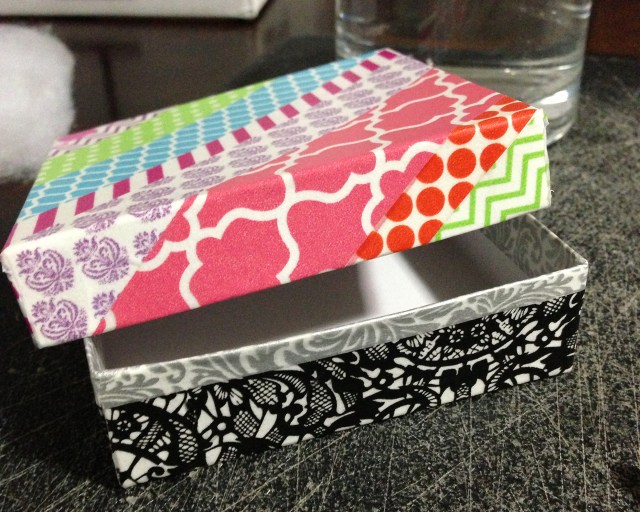
Admire how pretty your box looks!
Storage Box
I need a lot of storage boxes in my life. I’m a naturally messy person but I have a cutesy clean aesthetic. I solve this by having everything messy but inside of boxes so that no one knows. Unfortunately storage boxes are like $10-30 a pop depending on the size and I refuse to pay that much. In theory I’d like to cover my moving boxes with fancy wrapping paper (which I buy at TJ Maxx for $2 a roll) but I always HATE how the edges look. I’m bad at making them line up. That’s where washi tape comes in!
Supplies Needed:
+ Washi Tape
+ Moving box
+ Wrapping paper
+ Mod Podge (I used satin finish)
+ Exacto knife
Level of Difficulty: Easier than actually cleaning your room
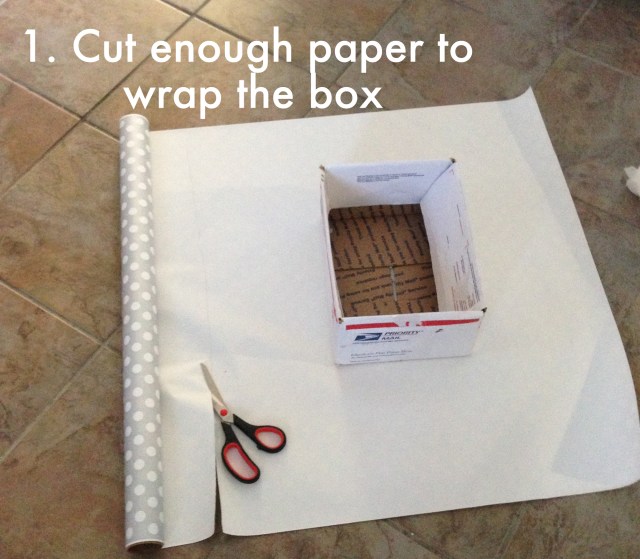
Cut enough paper out to cover the box like you’re wrapping it like a gift.
Cut off the lid flaps and trace around the base of the box. Cover the box with wrapping paper, adhering it with mod podge. I’m really bad at this, and you probably know how to do this better, but here’s how I do it: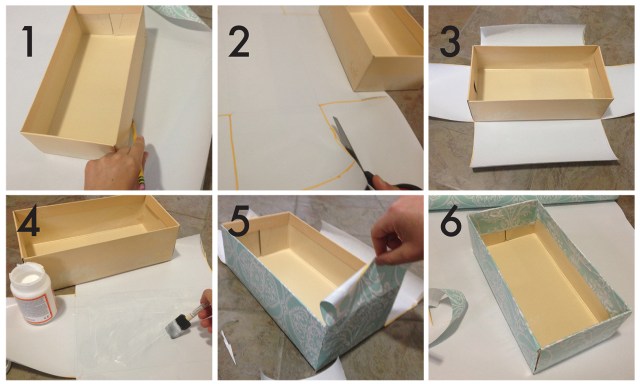
Go ahead and cover the box with a million layers of mod podge and then let that dry.
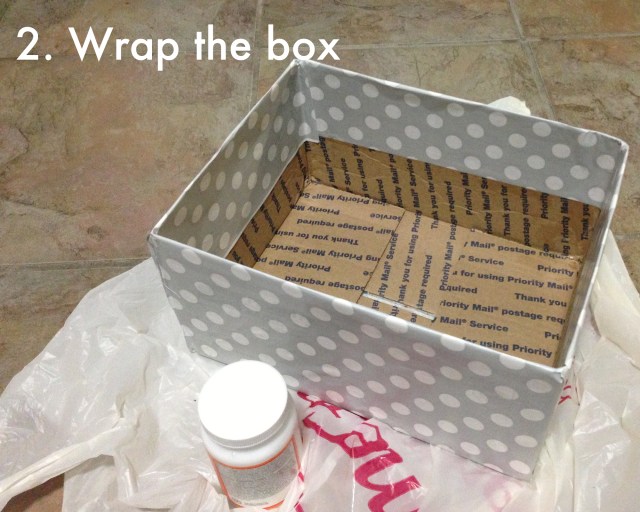
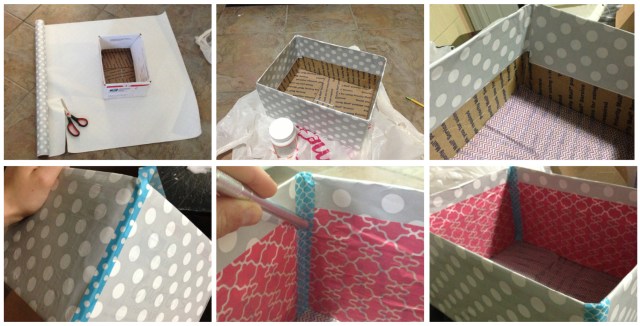
Cover the base and sides of the box with washi tape. I used different patterns for these but you can use the same if you want it to be less chaotic looking. For the sides, either wrap all the way around the sides and then either use a pencil tip to press in the edges or just wrap the tape to each edge. We’re going to cover this inside corner.
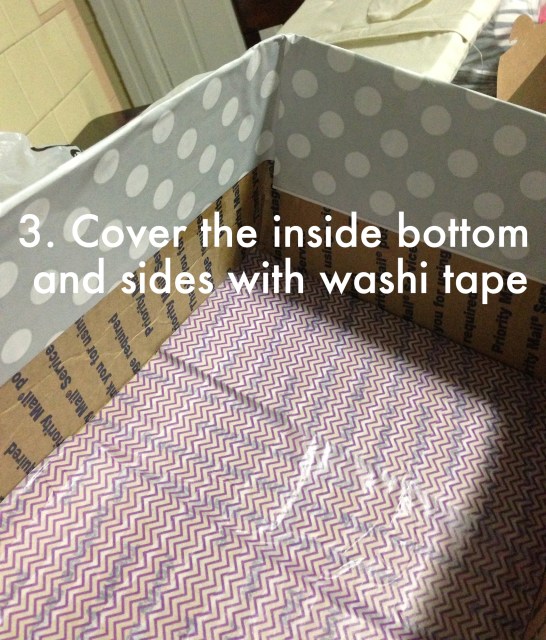
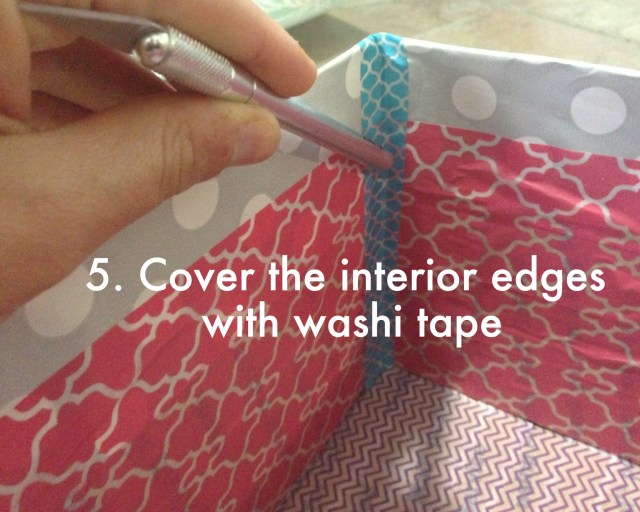
Cover the hideous edges with a different color washi tape! Use tape thick enough to wrap the edges.
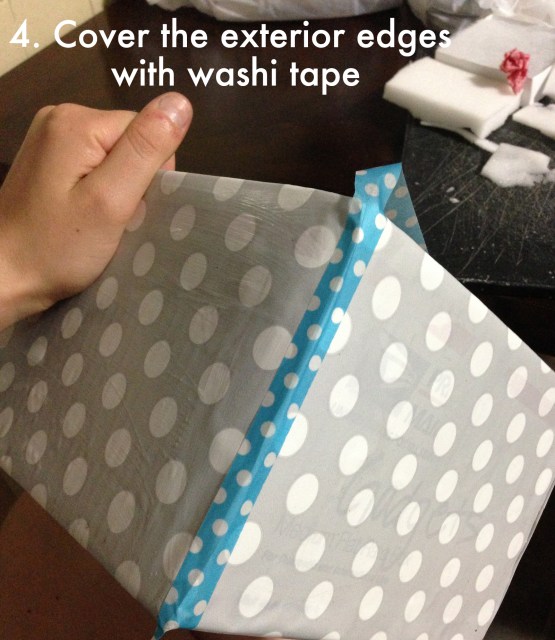
Go all the way underneath the box, using your exacto knife to cut the tape so it folds nicely under the bottom of the box.
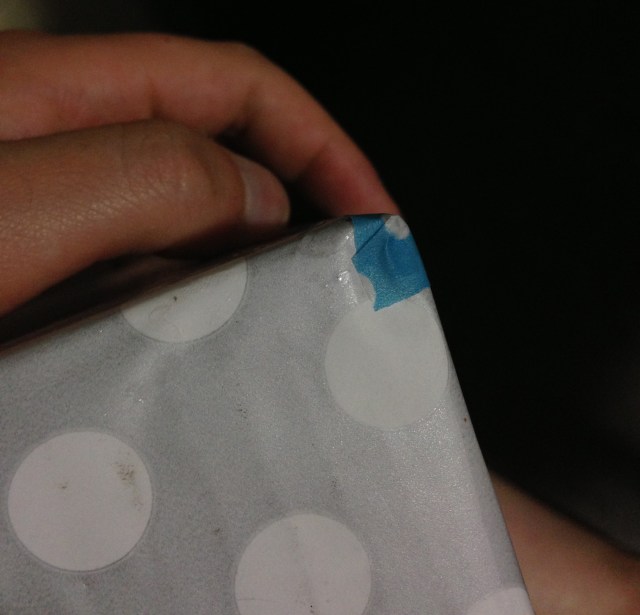
If this isn’t working out for you, you can also make an X with the tape under the bottom.
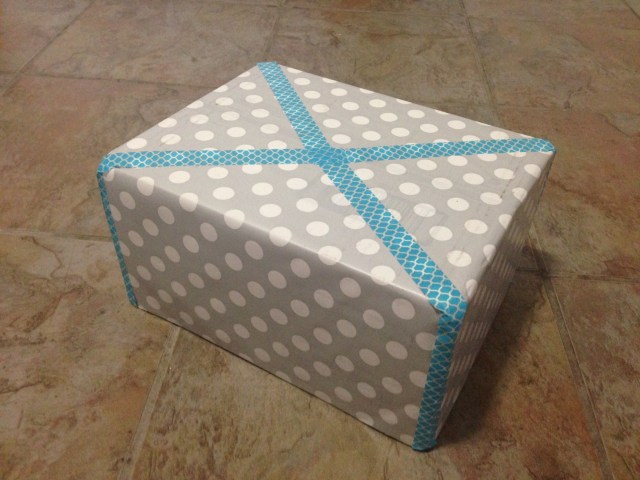
Stretch the tape over the top and down the inside corner. Use something pointy to get the tape all the way in the edges. Stick the tap on the inside flat against the bottom. Either lift the bottom tape to cover the edging or use an exacto knife to cut the tape right at the bottom.
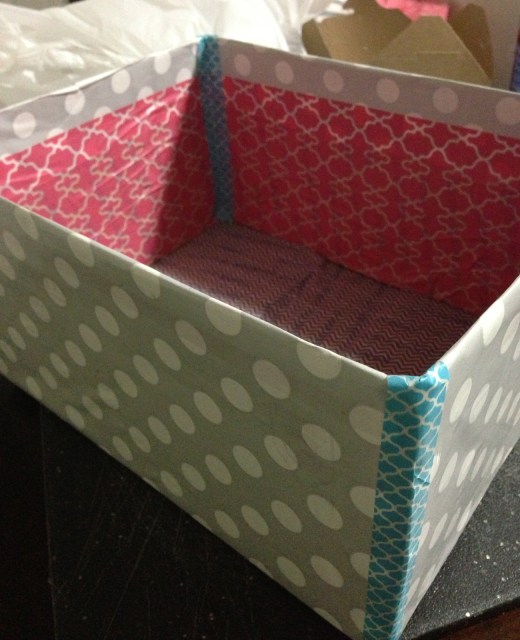
That’s it! Enjoy your box and fill it with all the decorative cupcake papers your sister-in-law gave you after her wedding.
Now that you’re washi tape experts, next week we’re going to makeover a graze box!


