

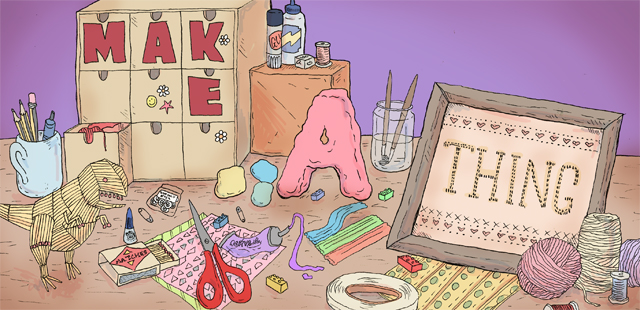
Welcome to the millionth billionth installment of Make A Thing, where we make handmade gifts for people. Or ourselves. Or our cats. Who doesn’t need something special in their life? Join in on the DIY fun and avoid the unnecessary consumerism of the world (and save a few dollars while you’re at it).
Header by Rory Midhani
Garlands usually make me think of Christmas, when my mom would hang this really ugly (hi Mom! I love you!) garland along our entertainment center. Maybe yours did the same thing. Maybe yours still does.
The other association I have with garlands is in twee settings, but rest assured, garlands aren’t just for Pinterest weddings and Skunkboy birthday party backdrops. They’re freaking adorable, but they don’t have to make you look like a manic pixie dreamgirl. Unless that’s the look you’re going for, I guess?
I decided to make the following garland based off of these two inspiration pieces:
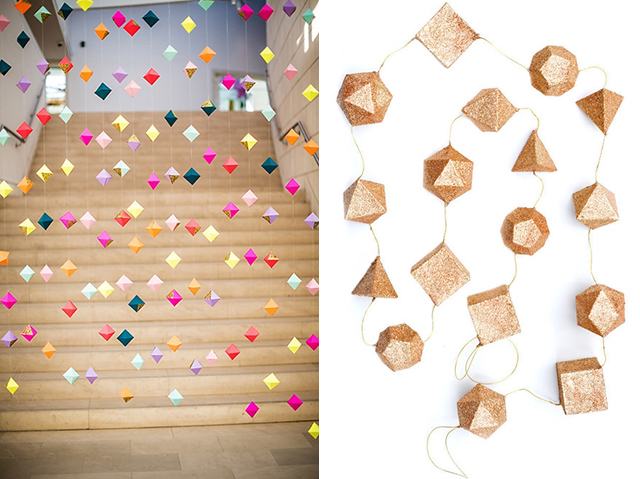
So, I stole used these ideas as inspiration and changed them into something of my own, using origami and glitter paint.
Supplies Needed:
+ Colorful cardstock paper (you can use regular paper if you’re not painting it)
+ Exacto knife
+ RULER (I finally bought a ruler, you guys!)
+ Glitter paint (I used the Martha Stewart brand in Sunstone)
+ Paintbrush
+ String, twine, yarn — whatever you choose to hang these with
+ Yarn needle (optional, but recommended)
Level of Difficulty: Easier than figuring out how to converse in a Google hangout with nine other people (hi, Sparkle Motion Rainbow Alliance!)
Pro Tip: I invited two of my best friends over, and along with my girlfriend, we made a crafting night out of making these in return for giving them alcohol. I strongly recommend you do the same. Call it team-building or something equally impressive, and then apologize to them a lot during the whole thing for giving them carpal tunnel syndrome.
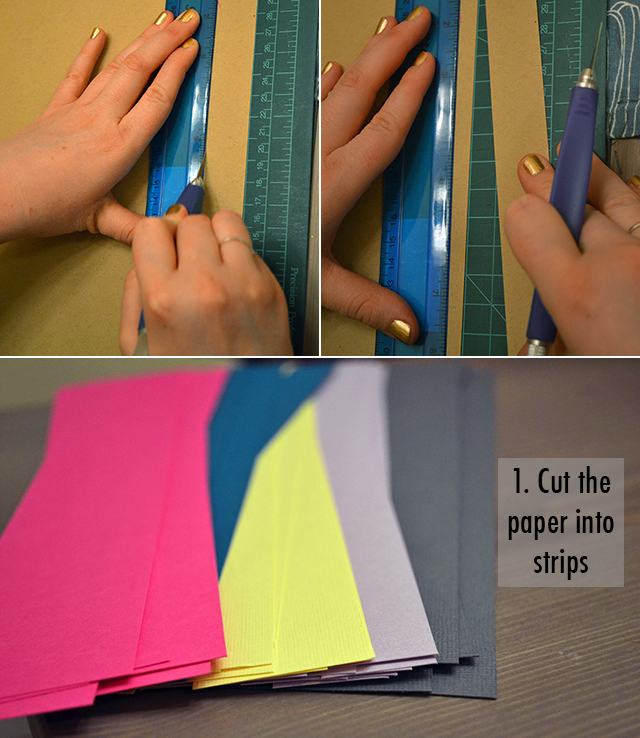
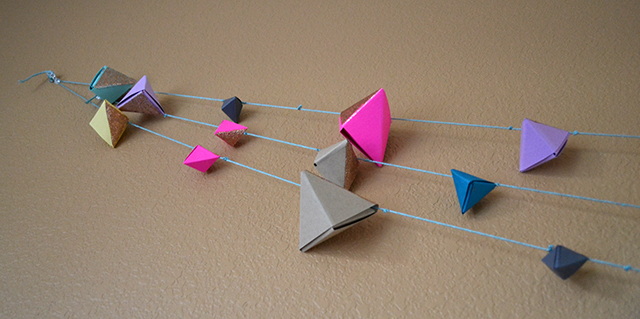
This part takes fo-reh-ver. Put on some Game of Thrones and get into a zone, because you’re going to be there for awhile. I cut mine into various different sizes, but found the ones over 1″ to be the easiest to fold, up to about 4″, which were impossible to fold. So stay in the 1.5″-3.5″ range and you’ll be happy.
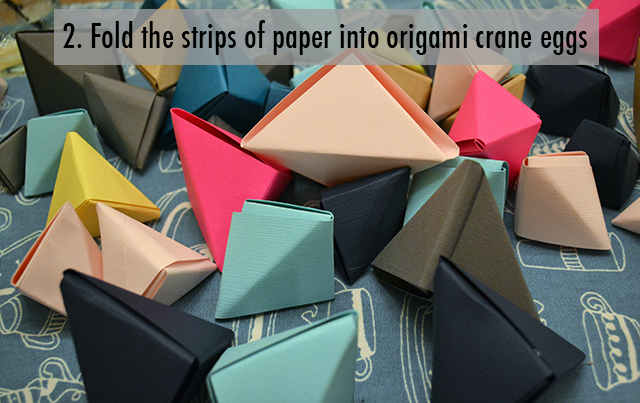
Rather than attempt to show you how to fold these, I’m just going to leave this right here:
They’re also called Love Knots, Google just told me. They’re really easy and pretty quick to make. I like to make them bigger than the tiny ones they fold in that video just because it means less folding and I’m lazy.
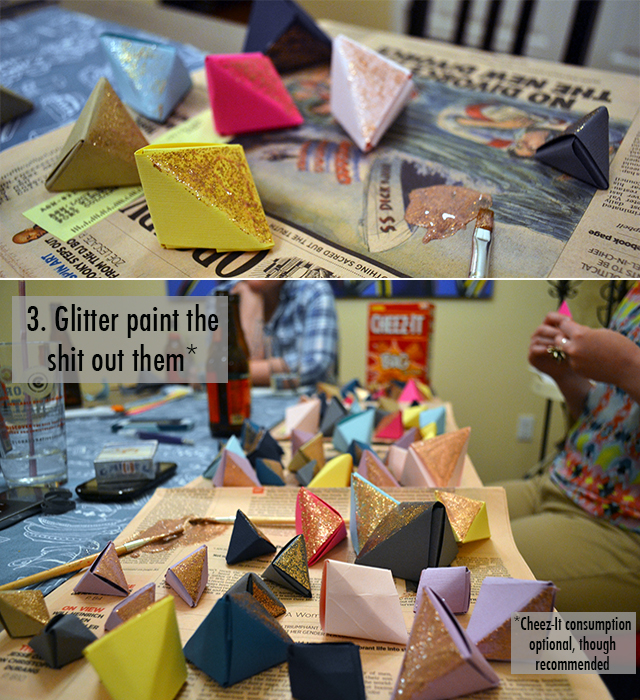
Now paint a side, any side. Or paint all the same side. Or paint it all. Or don’t paint it. Or just ditch the entire craft and eat Cheez-Its and drink Woodchuck. But if you do decide to paint, which I hope you do, use at least three coats for optimum prettiness.
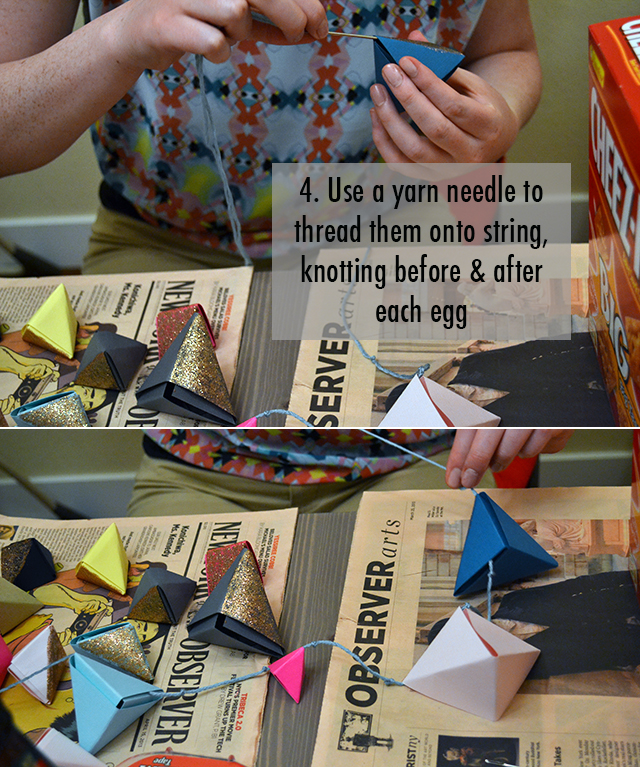
Let the paint dry, then string them on. Put a few knots in your yarn before and after just to secure them so they won’t all slide to one spot when you hang it up. I found that using a yarn needle (it’s big and dull, meant for weaving in ends/connecting granny squares on those afghans your Great Aunt always makes you) worked best for this task. I also just chose them at random and spaced them randomly on the string, but maybe you’re a particular kind of garland crafter.
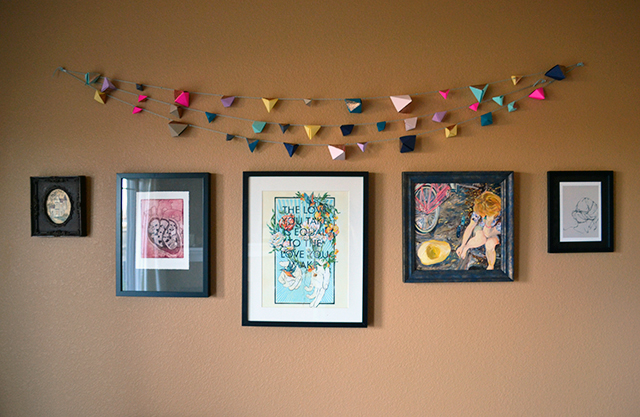
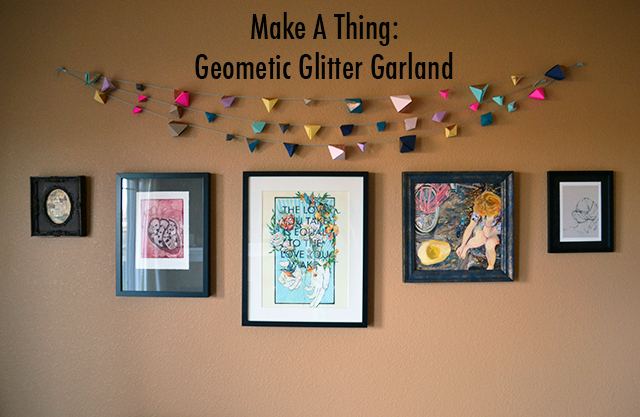
We made three strands to hang together over the gallery wall in the living room. I love our prints and paintings so much (why yes, that is a portrait of me after just having fallen off my bike) and the colors from the garlands compliment the colors in the pictures without being too distracting.
 Now I have a ton of extra little egg things. I think I’m going to go garland the entire house.


Comments
Oooooo fantastic! I’ve recently become a little origami obsessed (call it a OCD break from finals) and here is a useful application of this obsession! Beautiful!
I want to go to there.
Video’s and graphics?
Craft just got serious.
This might be my favorite Make a Thing so far, so cute!
But also, what brand/color is your gold nail polish?? It is perfection!
Oh why thank you! It was one of those cheap Maybelline Color Show ones in Bold Gold. It holds up. I’d recommend it.
I had the same nail polish on, as well! So much gold!
I actually woke up today and was like, “Man, my wrist hurts!” And then remembered we did those. I had carpal tunnel pretty bad in high school and it felt exactly the same.
So, you literally did give me carpal tunnel, which you had joked about.
I’m skeptical of these claims. I’m pretty sure we put you on painting duty after we watched how… well… you were folding them, so you must have only folded about two. I still have a cookie jar full of them to give you. I love you and thank you for helping my house look amazing.
The video could totally be one of those creepy/oddly relaxing ASMR YouTube videos. The plastic crinkling, the gentle motions, the instructional nature.
This will go perfect over my Tegan and Sara vinyl collection!
Did I just admit to having a T&S vinyl collection? Yup.
I love this, thanks for posting!
Nope and possibly way you bought ripped off. The Meizitang Botanical is simply a buch of herbs principally tarragon and psyllium husk to act as a filler and make you poop.
This is brilliant! Also congratulations on your ruler purchase. It looks to be a bit see through which I think is an excellent choice.