

Welcome to the another installment of Make A Thing, where we make handmade gifts for people. Or ourselves. Who doesn’t need something special in their life? Join in on the DIY fun and avoid the unnecessary consumerism of the world (and I promise you’ll save a few dollars while you’re at it).
Header by Rory Midhani
Legit screen printing is difficult and costly and not one of those Saturday morning DIYs that I prefer to do. Yeah, my lady friend has all of the supplies and a degree in printmaking to match but whatever, it’s like three thousand steps. Who wants to do that many things just to create a picture, you know? Not me.
So here’s a simplified version of screen printing for small batches of t-shirts that will impress your friends and loved ones and dogs and especially me.
Screen Printed T-Shirts
Supplies Needed: T-shirt or bag or dog sweater or anything you want your awesome design to be printed on, acrylic paint (fabric paint works, too, but acrylic paint will seriously stay on anything, just ask all of my undergrad clothing during my senior art project), embroidery hoop, pantyhose or tights, sharpie, mod podge, piece of cardboard (cereal boxes work great), an plastic card you won’t use anymore
Level of Difficulty: Just keep repeating to yourself, “Patience is a virtue” while the mod podge dries and you’ll be great.
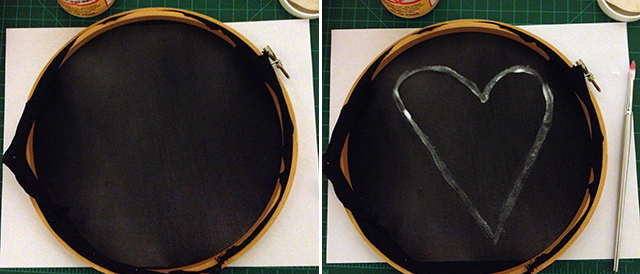
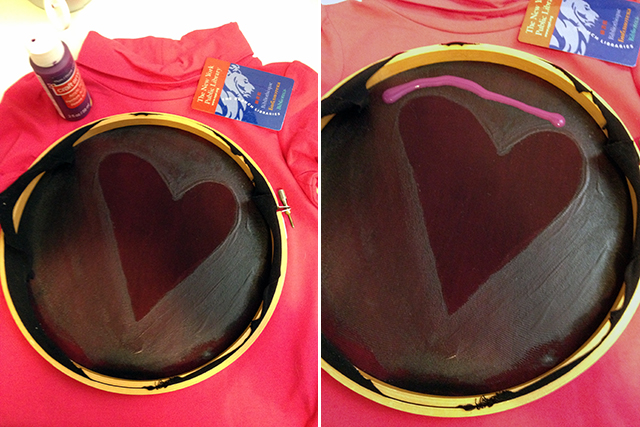
1. Stretch your pantyhose or tights over your embroidery hoop. I’d recommend using light colored hose because you can draw on it with sharpie or trace from a picture underneath, but the only extra pair of tights I had were black, so that’s what I went with. This is easiest if you cut your hose down one side of the leg and then stretch it tight inside of your embroidery hoop.
2. I freehanded my heart because I’m giving this shirt to a small child so it doesn’t have to be perfect. But maybe you’re really into things looking perfect. If so, trace a design in black sharpie before.
3. Paint mod podge all around the outside of your design where you don’t want the paint to be. Paint the mod podge to the very edges of your hoop.
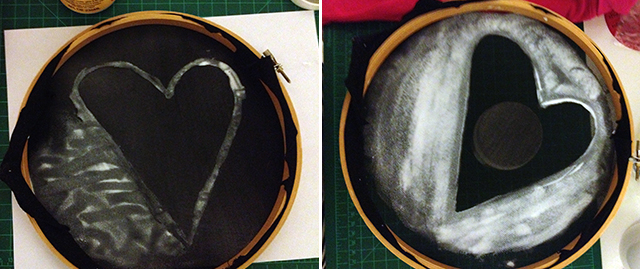
4. Let it dry. I balanced mine on top of my mod podge bottle with great success.
5. Now paint two or three more layers of mod podge, allowing them to dry in between coats. Patience is a virtue. I let mine dry overnight by basically forgetting about it, so I recommend this space-case approach, as well. Make sure you put tons of extra mod podge around the edges of your design to create smooth, clean lines. You can check on the layers by holding it up to the light to find any tiny holes that might not be smothered in mod podge.
6. Painting time! Lay out your t-shirt/fabric of any kind and put your piece of cardboard inside to make sure the paint doesn’t bleed through. Seriously, the side of a cereal box works perfectly for this job.
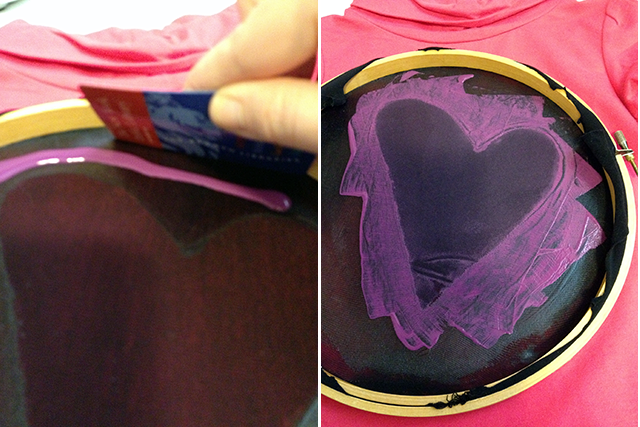
7. Put a line of paint at the edge of your design. Holding down the hoop, slowly start smearing the paint with your plastic card, in this case, a NYPL card I’ve been carrying around randomly for three years. Don’t be afraid to use too much paint, but hold down your hoop so you don’t get leaks. If your fabric creases at all, try to straighten it out with your card or be prepared to fix that part after you’re done.
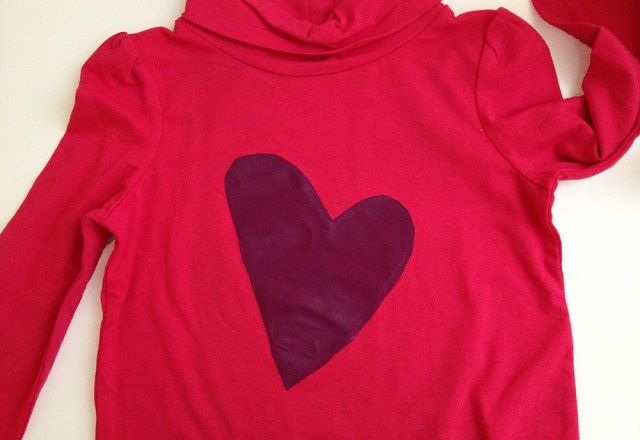
8. Now while your paint is still wet, lift up the screen and set aside. Doesn’t that look amazing? If your edges aren’t as perfectly clean as you’d like them, you can take a paint brush and touch them up, or you can fill in any weird creases your fabric might have gotten.
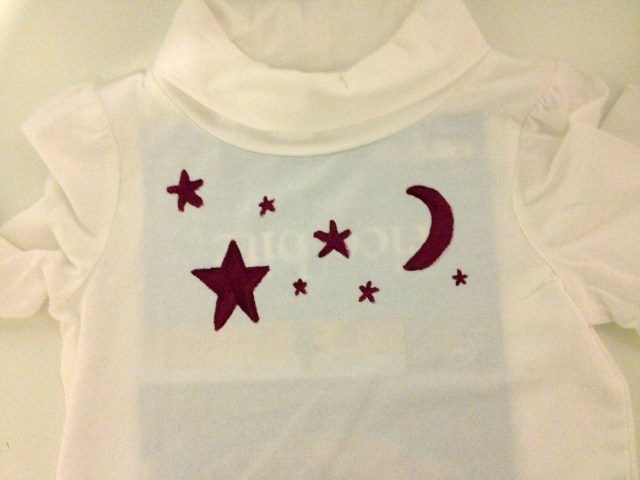
9. Let dry, then wash inside out before wearing! Ideally, the acrylic paint will stay on pretty well no matter how you wash it, but I recommend the inside out and cold water method.
Look at how professional and awesome your shirt/bag/table cloth/curtain/fabric of any kind looks! If you’d like to have some kind of design inside of your main design, for example, if I wanted a word within the big heart, all you do is mod podge the negative space. If you want to reuse your screen, make sure to wash it before the acrylic paint dries!


Comments
You can also get fabric medium (I think that’s what it’s called) to mix with the paint to make it stay extra through washes etc :)
Oh and that can be bought at an art store!
I am so happy that this exists now. I know what I will be doing in the coming weeks to avoid studying for finals!
For some reason I can’t log in o.O? Anyway, this is my attempt at the projects. https://sphotos-b.xx.fbcdn.net/hphotos-prn1/537760_498507386846859_438459239_n.jpg I definitely needed a smaller brush for the letters with the modgepodge but didn’t have one. It was fun though! And I’ll definitely try it again once I get better brushes.
This is so cool. I’m definitely going to do this during my winter break.
folks, this is awesome. but you know what’s way easier than screen printing? working with stencils. so easy. plus: no smudgy edges. just sayin’ ;)
Oh just you wait.
uh oh. is there a stencil post coming maybe?!
what i forgot to say though: so clever of you to use that frame. i never thought of that befor and was about to buy a screen printing kit..
anyway.. i’m sure your niece will love the shirt. it turned out super cute.
looking forward to whatever you guys have up your creative sleeves!
I do not own any mod podge, acrylic paint or an embroidery hoop, but I guess I know what my Christmas money will go on. Oh, my literally misspent youth.
They’re all pretty cheap items, and Michael’s usually has coupons on their website (same with JoAnn Fabrics).
This series, and the “Butch Please” one are my most favorite things. <3
Stop being so clever!
I am now going to do so much of this. SO MUCH. You have no idea. (I’ve wanted to do small runs of simple graphics with silkscreens, but I don’t have a light table set up, so this is LIFE SAVING ADVICE you’ve given me. Truly.)
Hansen, you are now officially a Patron Saint of Art. At least to me.
[…] Make A Thing: Easy Peasy Screen Printing – Autostraddle […]
Thank you for the article, this is an ingenious method!
You can also gently blowdry the mod podge to get the layers to dry faster. You’d really want to leave the last layer alone to dry completely to make sure things don’t come apart once the wet paint goes on, but in between taking a shortcut should be fine.
Now I can put YOU DO YOU on to ALL of my clothes.
I love the DIY section on here. I remember they came out with a personal home screen printer a few years ago called Yudu. Back then I wanted it so badly, but it was a little too pricey for me at the time. I think I’ll save money with the DIY method.
[…] Make A Thing: Easy Peasy Screen Printing – Autostraddle […]
I actually cannot wait for Make A Thing workshops with Hansen at A-Camp.
The prints actually look better than some professional t-shirt printing places. Thank you Hansen for the easy to follow steps!
Kids Clothes