

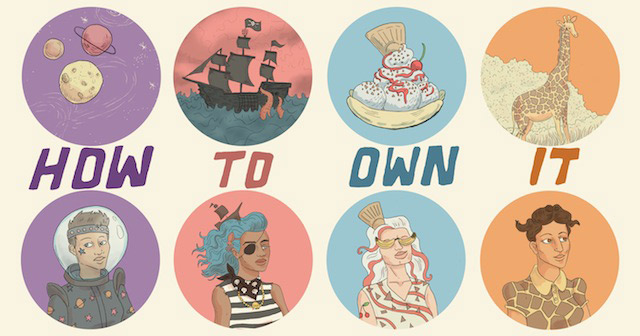
Hello beautiful, and welcome to How To Own It, where store-bought fashion meets DIY crafts. Each week I’ll be exploring an aesthetic theme, showing you some of the best ways to wear it and how to make it for yourself.
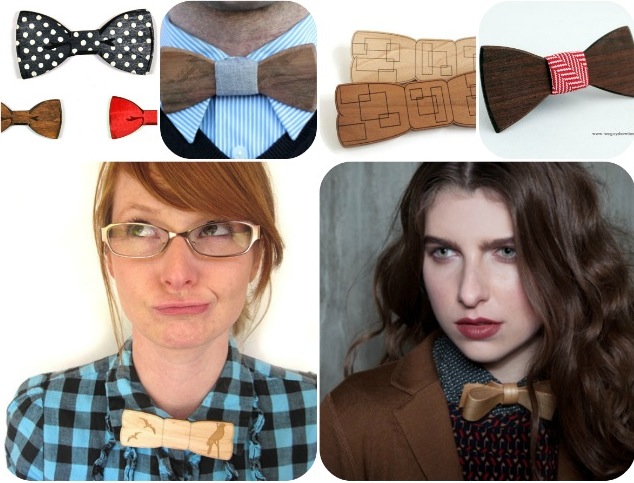
Here at Autostraddle, we love talking about bow ties. And why wouldn’t we? Bow ties are cute and dapper and fabulous all at once. We’ve even talked about how to wear bow ties without actually wearing a bow tie, and gave you some ideas for non-fabric bow ties to really shake things up. Since Laura already taught you guys how to sew your own bow tie back in September, I thought today would be a nice day to delve into some non-normative bow tie territory: the wooden bow tie. The wooden bow tie was included in Ali’s amazing post about nonconventional bow ties, and because I was so excited about it, I thought I’d add to the one she found for you. Look at all these cute ones!
Also: this week I’m debuting a super special surprise THIRD option for how to own this week’s thing! So keep reading.
DIY Pin-On Wooden Bow Tie
You will need:
A wooden paint stir stick
Sand paper
Heavy duty scissors
Higgins Ink in brown
Silver acrylic paint
Glue
2 pinbacks
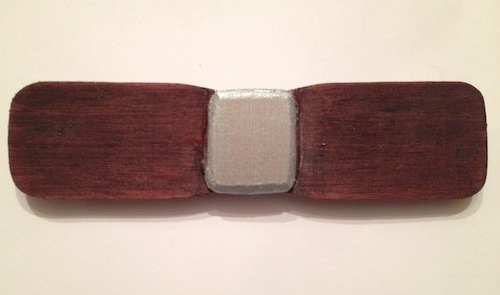
1. Have you ever noticed that the handle part of a wood paint stir stick kind of looks like a bow tie? Look again. This is going to be the base of our bow tie. Measure how long it is from the end to the center of the part that dips in a little bit. The bow tie should be symmetrical, so measure this same distance out on the other side and mark it. Using your heavy duty scissors, cut the paint stir, carefully making sure it doesn’t splinter.
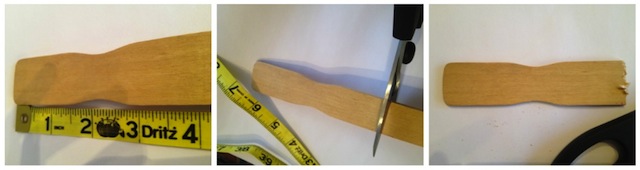
2. Use your sandpaper to smooth out the end you just cut. Round the corners so that they match the other side.

3. Use part of the rest of the paint stir to make the center of the bow tie. Hold it in the middle of the bow tie base to see how big you want it, then mark it, cut it, and sand it so that the edges are all rounded.

4. Paint the back of the bow tie with the brown Higgins ink. Dilute the ink in water if you want a lighter stain color (or, don’t do this step at all). Paint the center piece silver. Then, glue the center piece down using wood glue or rubber cement.
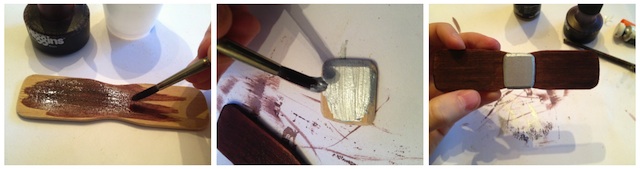
5. If you have a bow tie clip, go ahead and glue that onto the back. I used to two pin backs and glued them vertically, 2.5 inches apart.
I’m going to be honest with you: I love the way this turned out, but I’m never going to wear it. So, do you want it? I’m serious. I’ll send it to you. Tell me why you want to own a wooden bow tie in the comments section and/or send a tweet to @Gabrielle_Korn. If more than one person wants it, I’ll pick names from a hat in a week from today. If you leave a comment AND tweet at me, I’ll put your name in twice. I’ll also put your name in twice if you write me a haiku.
Sound good?
Want to know how to own a look? Email gabrielle@autostraddle.com or tweet to @Gabrielle_Korn.
Header by Rosa Middleton


Comments
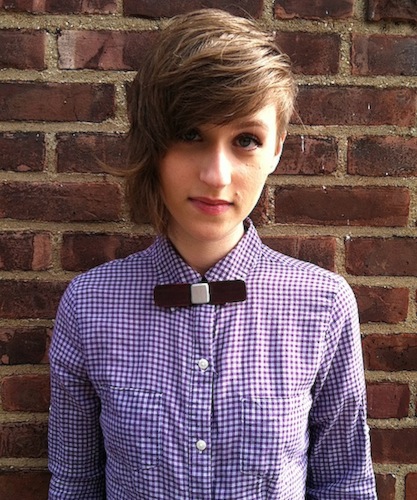
Purple shirt + DIY wooden bow tie
I am actually dying here
Now I am dead god damn it
Send this to me please
It will transform my wardrobe
Pretty pretty please
I don’t know Ashley
But her argument is sound:
Bow ties make hearts gay.
ASHLEY! You won the bow tie!!!! I just sent you an email.
Congrats!
<3
Just FYI, haiku is more than just a 5-7-5 syllable pattern; the important part is the ‘cut’, the juxtaposition of two ideas. From Wikipedia:
Haiku (俳句) is a very short form of Japanese poetry typically characterised by three qualities:
The essence of haiku is “cutting” (kiru).[1] This is often represented by the juxtaposition of two images or ideas[2] and a kireji (“cutting word”) between them, a kind of verbal punctuation mark which signals the moment of separation and colours the manner in which the juxtaposed elements are related.[3]
Traditional haiku consist of 17 on (also known as morae), in three phrases of 5, 7 and 5 on respectively.[4] Any one of the three phrases may end with the kireji.[5] Although haiku are often stated to have 17 syllables,[6] this is inaccurate as syllables and on are not the same.
A kigo (seasonal reference), usually drawn from a saijiki, an extensive but defined list of such words.
Modern Japanese haiku (現代俳句 gendai-haiku?) are increasingly unlikely to follow the tradition of 17 on or to take nature as their subject, but the use of juxtaposition continues to be honoured in both traditional and modern haiku.[1] There is a common, although relatively recent, perception that the images juxtaposed must be directly observed everyday objects or occurrences.[7]
Sorry, but as a student of Japanese poetry, it annoys me that people miss the most important part of the haiku form.
Roses are great but
Bow ties are better and yet
I received the first
Sooo this should be fixed. Huzzah!
Also, how intimidating is it to come after the comment above about how to haiku properly because inside all I can think is ‘I CAN’T JUXTAPOSE AT 8.20AM IN THE MORNING WHAT’
I don’t have a car
Home-o Depot is so far
Stirrers out of reach
:D
My lifelong dreams are:
Become a tree, and a true
Gentleman. Help me!
This bowtie is cute
But I suck at all crafts so,
Please send me that tie!
:)
Living in the city!
Wood bow-ties are so pretty
for a park picnic!
i’m needin’ to look
as ritzy as possible
wooden bow ties help
hahaha yeah idk
I’m all about the bow ties. Wear them all the time! Here’s my haiku:
Bow ties are so hot
Wear as often as you can
I want your freebie
Not a haiku expert!
We are so sharing your post with our readers! Thanks for this.
Awesome! Thanks!
I wore a bow tie
To my RA interview
This one is better.
Super dapper bow
It would look fabulous with
My polka dot shirt
I WONDER WHO WILL WIN THIS CUTE THING.
I need a bow tie
‘cuz I found mine one the bus
and this is real cute
(This may be entirely too late, but you did not set a time limit, so here goes.)
Insepector Javert
Has a heart made of wood, not
Stone, thus unmoved by
The most fevered pleas
Is he, even though collapsed
Suns are kinds of stars too
Someone said to me
Kurt Hummel would transform Stars
Love, law, resolute
So let me, in my
Mass of echolalia
Swirling songs around
Have this token of
‘You know your place in the sky’
Pinned above my heart