

Hi friends. I am here to tell you a triumphant story. Once upon a time I was browsing tumblr, staring at image upon image of gorgeous girls and gorgeous homes (whatever, don’t judge my tumblr dash) when suddenly I stumbled upon this image.
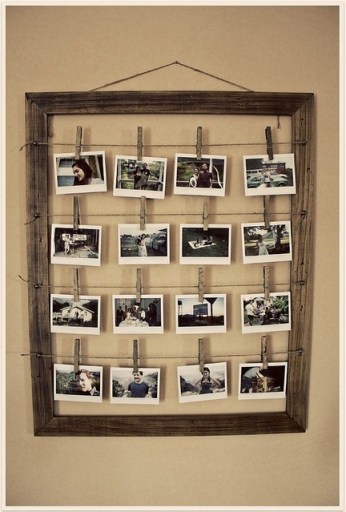
I’m always looking for new ways to display my photographs and I fell in love with the tiny clothespins immediately. Plus, I was about to move into a new apartment and was anxious to finally create the perfectly decorated bedroom. One thing was clear: I needed to own this frame. No, not just own it – I needed to make it.
This project is not particularly difficult, but collecting the materials took me a long time. Once I had all the necessary supplies the whole thing took about 45 minutes, plus all the time I spent after it was done bragging to my roommates and my girlfriend, which I’m sure wasn’t annoying at all. Now I want to tell you how to make this project so we can all have gorgeous handmade clothesline frames hanging above our beds and live happily ever after.
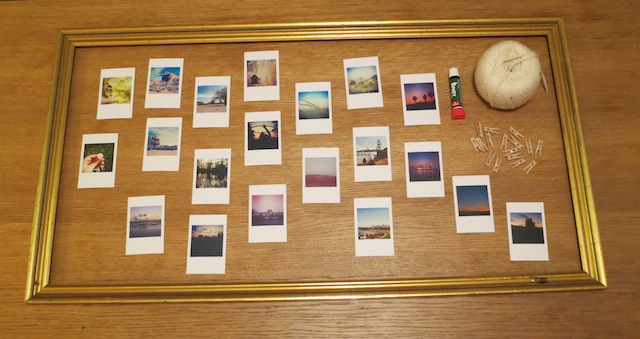
Here are the supplies you’ll need to make this crafting dream a reality:
One large frame
Twine
Krazy Glue
Tiny clothespins
A bunch of small photos
I found the frame easily enough at a local thrift store and my roommate let me use some of her twine. I actually used a gold Sharpie marker to color the twine, because it was originally white and I thought that would blend into the wall too much, and also I love to make my life difficult. I recommend buying the actual color twine you want – coloring 5 pieces of string with a Sharpie doesn’t even sound like a great idea in the beginning, but trust me, by the end it really doesn’t.
Tiny clothespins are way harder to find than you might think! I finally found them in a small art store in New Paltz, NY but if that extremely vague yet also specific tip doesn’t suit your needs you can buy them online.
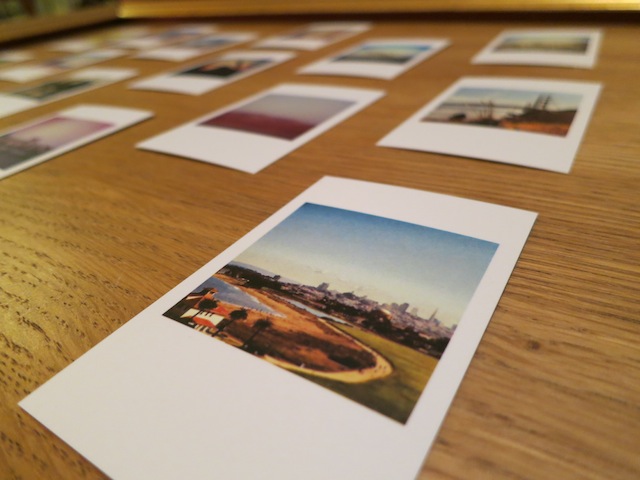
As for the photos, there are so many options. If you still shoot Polaroids or if you have an Instax, those photos are a great size for this project. If you have access to a printer, you can print photos any size you desire. Personally, I’m mildly obsessed with Printstagram, and I thought their method of printing Instagram photos with a Polaroid-esque white border on tiny card stock was complete perfection for this project. I wanted really specific landscape images in my frame though, so I actually uploaded photos I took pre-Instagram (some digital, some film) onto my Instagram account for the express purpose of printing these images for my clothesline frame. Mmhmm, I told you guys, I’m nuts! Basically this part of the craft involves a Big Decision on your part, so figure out what photos you’ll be using and how you want to print them, and then move on to the easy parts. This part of the project actually took me about four months, so feel free to take your time as I’m clearly not in a position to judge.
Okay, got all your supplies? Awesome. Let’s make this craft!
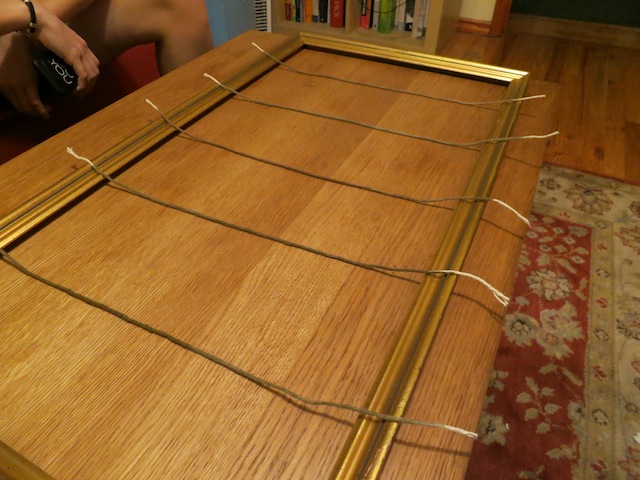
1. Based on the size of your frame and the size of your images, decide how many little clotheslines you’ll be able to fit. It’s a good idea to measure this before you do any gluing. I’m super particular so I had to measure everything a hundred times before I was satisfied, but you don’t have to do that. Once you’ve figured out how many clotheslines you can fit, cut the appropriate amount of twine (I had 5 clotheslines), flip the frame over, and mark where the clotheslines need to be glued down.
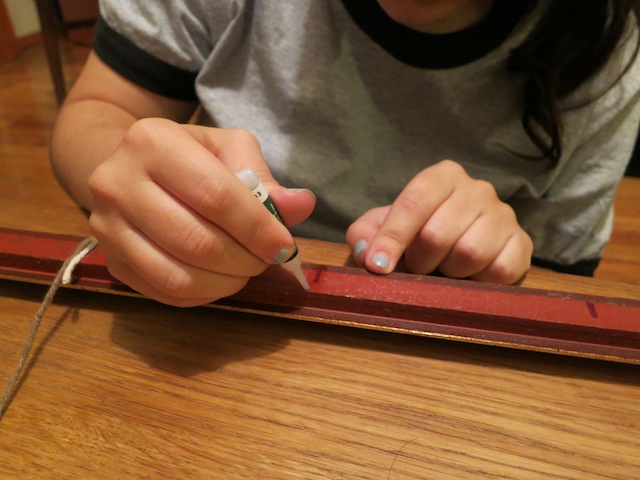
2. Carefully glue your twine into place. You don’t have to use Krazy Glue – I actually wish I had a glue gun – but the glue should be really strong because it’s going to have to hold up all your little lines and all your little images. I’m having a tough time using my words to describe my gluing method, but you can see the way I doubled the twine up in the image above, yes?
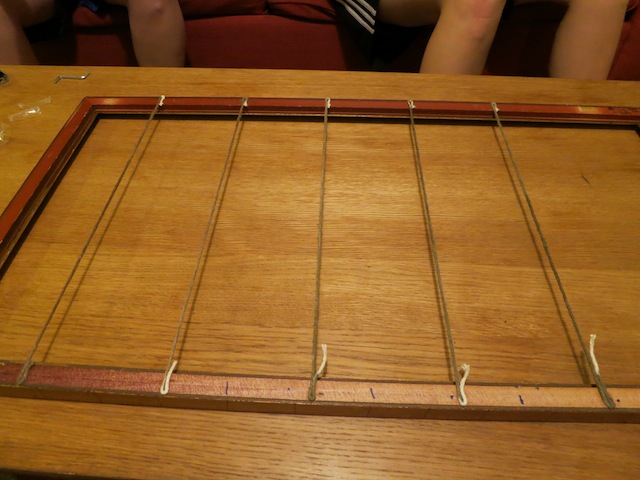
3. Your finished product will look something like this. Trim any excess twine from the edges so when you flip it over you just see a clean line of twine. You should probably use scissors here, but in a pinch you can definitely use a nail clipper. Don’t ask how I know this. Just trust me.
4. This is the best part! Organize all your images to your liking. Arrange, rearrange, then rearrange again! Take your tiny clothespins and hang each photo up in its spot. Squeal over the cuteness of it all.
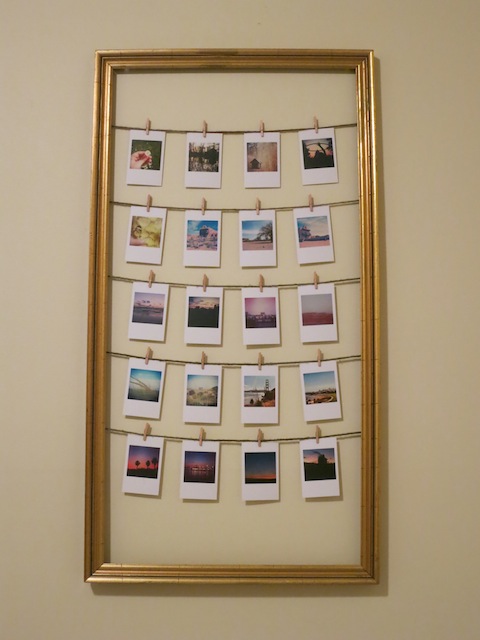
5. Tada! You’re done. You’ll notice the original inspirational frame has some twine at the top for hanging purposes, but personally I didn’t feel like my twine and Krazy Glue combo would be able to hold up the weight of my frame. I opted to put some hooks on the back of my frame and hang it on some sturdy nails, but you should do whatever makes you most comfy.
6. Go hang that sucker up and wait for the compliments to come pouring in!


Comments
what a nice frame you made vanessa! you are so good at decorating!
i trust you and also i want one!
This is excellent! I think I’m going to sort a bunch of pictures into mainly red, mainly orange, mainly yellow, etc. groups and do a rainbow version of this because rainbows and I can’t help myself.
this is a genius idea
I bought tiny clothespins at Michael’s a couple of months ago. I remember them not being in the aisle that actually made sense but they definitely had some! This is a great idea, I think I shall do it.
ohhhh maybe i just missed them, i tried blick & a.i. friedman’s and it didn’t seem like either of them had any, but admittedly i did not try michael’s because i just couldn’t handle going that far uptown #patheticnewyorkerproblems
I did a thing where I hung ribbon down the length of my wall and then used the tiny clothes pins to pin pictures to it. That way I didn’t have to make too many holes in the wall. I did the same project a few years ago on a much larger scale with different ribbon and larger clothespins and I liked it much better. All this to say, I think if one was to never find tiny clothespins, I think one would be okay.
nothing about the way Michael’s is organized makes sense. I found glitter in three different aisles last time I went. I guess Martha Stewart’s glitter didn’t play well with the others…
Glitter and yarn are typically the only things I can find at Michael’s.
Also dollar store, hollaaa.
This is extremely relevant to my interests. <3
I noticed you used both the phrases…
“This hangs above my bed now” and
“Go hang that sucker up and wait for the compliments to come pouring in!”
…which makes me think that “a clothesline frame” is actually code for some crazy sex thing that no one is telling me about. And now I’m tempted to actually make one of these so that everyone will think I know about it and someone will accidentally let me in on the secret.
Also, if you read all the previous comments with the thought that “a clothesline frame” is some crazy sex thing, the comments still all make sense. Which just deepens the conspiracy theory.
haha i pinky swear promise there is no secret innuendo to be found, but you’re right, this post gets a lot more scandalous if you pretend that “a clothesline frame” is a crazy sex thing ;)
Let’s nickname something crazy a “clothesline frame.” Brainstorming session?
Vanessa, I love you, and really wish you could narrate all of my crafting endeavors. This is such a great idea!!
Oooh! My girlfriend made me a version of this for Christmas. If you can’t find a frame, just do what she did, because she is so dang cute and who wouldn’t want to be like that?
https://plus.google.com/photos/112507384994534077224/albums/5830892798217275233?authkey=CNLI0rqTit611gE
She just used twine and nailed said twine into the wall with finishing nails. I cried. Just saying.
how lovely! personally I like yours more than the original.
thank you!! that’s such a nice compliment.
How attractive! I think I’ll do one of these, but I might substitute a few of the photos for physical items like a doodle/note/ticket stub/lock of my puppy’s fur/etc.
I have tiny hands too! Thank your for making me feel less alone.
do you make people recite the ee cummings poem “somewhere i have never traveled, gladly beyond” to you? because you should. it’s the best.
“nobody, not even the rain, has such small hands.”
Im in love with that frame!
your a wonder woman!
Oh wow, this is cool.
Guess it’s time to make a trip down to Hobby Lobby..
I seriously just checked this out on Pinterest like right now. Like, 2 minutes ago kind of now. And now AS teaches me how to make it.
Relevant Autostraddle is always relevant to my (p)interests.
It’s great to see that you have been stimulated by this article, it has been a great read and I am glad that you can take some usefull lessons away from it. B3 Aviator Leather Jacket
Your post is very informative and I have learned a great deal from it. Your written skills are impeccable and this is evident in your content, as well as the good use of grammar, punctuation, capitalization and spelling. b3 aviator brown leather jacket