

The only thing I love more than Festive Fucking Gourd Season is Tomatoganza, that wonderous season that spans the weeks between late August and September. Given that tomatoes are my favourite fruit and vegetable, I get over my autumnal woes by stuffing my face with those scarlet orbs as often as humanly possible: tomato tarts, tomato jam, curried pickled tomatoes, tomato fucking everything. Just get in my mouth already.
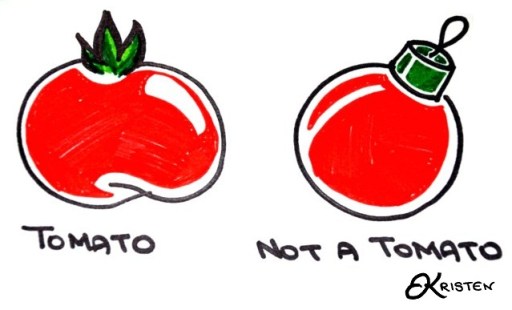
But gosh darnit, tomato season is only so long. Even though my handy dandy seasonal crop chart would have you believe that tomatoes are available year round, don’t be fooled! Winter tomatoes look just as shiny and spherical as Christmas balls and taste just as flavourless. Bah humbug.
Why not put ’em up? Given my chronicled obsession with food in jars, it only makes sense I would learn to can. I should apologize for posting this so late, but I’ve spent most of my free time making my way through tomato bushels, pretending I know how to do just that.
Want to join me? Have a canning party where a bunch of you split a bushel, a few flats of jars and an afternoon of work. It’s way more efficient when you have multiple hands to help.
Start by getting a shit ton of tomatoes. I’m a fan of Roma tomatoes as they are both firm and flavourful. You could try canning smaller (ie. cherry, grape, currant), but you might go insane peeling them. By all means, try other varietals and lemme know how it goes. When you’re at the market you will also need some basil, garlic, lemons and sea salt. I’m not going to give you absolute quantities, but err on the side of too much. (Plus you can always use your leftovers to make pesto!)
Kitchenny Things You Will Need:
- Your largest pot(s)
- A large bowl of ice water
- Tongs, slotted spoons and/or other grabby implements
- Mason jars and new lids. Make sure you thoroughly wash both with warm soapy water. Sterilize the jars by placing them in a pot of boiling water for at least a minute. Skip boiling the lids since you don’t want to activate the sealant.
- A flat of beer (Trust me on this one)
Optional Kitchenny Things:
- Wide-mouth funnel
- Jar lifter
- Magical magnetic lid picking up doodad
- (Or you can just buy them all in a set)
- More beers (pumpkin if you can grab it!)
The easiest way to speed through canning hell is to assign everyone stations. Here is our game plan.

Station 1. Cleaning and Prep.
Rinse those suckers. Have one person at the sink with a compost bucket and a paring knife. Cut off the leaves, core out the stem end and slice an X into its butt.
Station 2. Blanching and Peeling.
Bring a giant pot of water to a rolling boil and drop in as many tomatoes as you can without splashing yourself in the face. Simmer for about a minute or until the skins start to pop. Dump your tomatoes into your ice bath to halt the cooking process. You don’t need to chill them all the way down, you just need to get them out of the Hazardous Burning Molten Blob stage.
Once one is cool enough to handle, grab onto a bit of its peel and it should practically molt itself. If you’re having a bit of trouble, use a paring knife to start peeling away the skin or dump it back into the boiling water for another bath.
I have no idea what to do with tomato skins but I feel that they should be useful given that they’re full of fiber and lycopene. I dried mine out and will let y’all know if I ever come up with an idea. Or you could compost them like a normal person.
Station 3: Chopping and Filling
You could can your tomatoes whole, halved, chopped, diced, pureed, squished, etc. You also should decide whether you want to seed them or not. So many questions! Hopefully you haven’t had too many beers at this point. Figure out which tomato form works best in your kitchen so your Future Hungry Self gets to be super lazy.
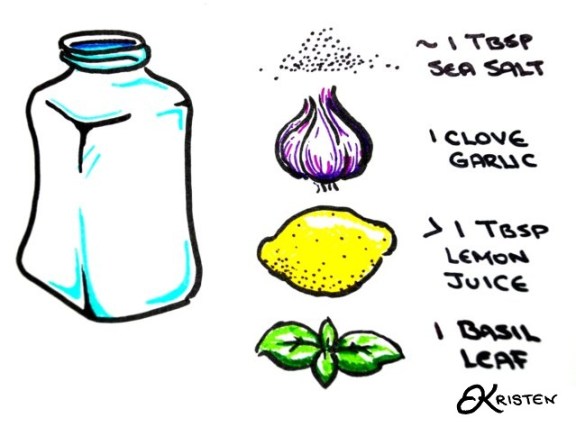
Divvy up the salt, garlic, basil and lemon juice between the jars and top it up with tomatoes. Easy. Peasy. You’ll want to leave at least a centimeter of headspace for the vacuum to form. Just fill it up to the base of the threaded neck and you should be fine.
Team Sterilizing!
Time to bring the team back together (pruny fingers and all!) I hate this part, because it gets to be tedious and you have to pay attention. But don’t worry, y’all will have a nice long break afterwards.
Cleanliness is key when creating a tight vacuum. Wipe the neck of each jar with a fresh rag or paper towel, making sure the threads are tomato goop-free. Remember those lids that you didn’t boil? Place one on top of each jar, taking care not to contaminate the side that comes in contact with your food. Gently screw on the ring to keep the lid in place.
Then time to start boiling! Fit as many jars in your pot as possible, keeping the jars submerged. The bottles need to process for about half an hour, so you have some time to kill while you wait. I highly recommend putting up your feet and cracking open some of those previously prescribed beers. After the bottles have finished sterilizing, leave them on your counter to cool to room temperature. If you’re a lucky person that has a pot (or enough pots) to fit all of your jars at once I am so jealous. Otherwise, time to put your next batch in until everything is finished.
By now you’ll be thoroughly knackered and asking yourself why you put yourself through this when buying canned tomatoes is so fucking simple. Before you attack me, just listen for a second. Did you hear that? Those random pops that make your exhausted mind debate whether you were making popcorn or preserving tomatoes? That popping is the sound of success and means you have successfully canned your own food! Now put a smile and reap the rewards of all your work! Or wait till December and crack open a can of summer to get over your wintry blues.
(Psst if your jars didn’t pop, unfortunately your food isn’t preserved. You could re-attempt the sterilization process with new lids or shove them in the fridge and eat them up!)


Comments
Best illustrations ever. Send me some canned goods?
Sarah, Torre and I are canning tomatoes this weekend, plus I have jams and such if you want! Also this is awesome and just in time for my 20lbs of tomatoes sitting in my fridge.
YES AND YES AND YES.
It goes a lot faster with a pressure cooker if you have one around! A friend and I canned 50 pounds of tomatoes we picked from our CSA’s fields and without a pressure cooker we probably would have thrown something! I love the dry farmed early girl tomatoes our CSA grows, they’re really tasty and this time of year I end up make a lot of bruschetta because they’re too tasty not to. Highly recommend that variety if you can find someone growing them! (Though romas are more supposed to be canning tomatoes apparently?)
Also remember that if you are staring at pounds of tomatoes and going “holy hell this is more than I can possibly stomach to can right now” just throw them all in a pot and start boiling them down and adding spices. If you add the right things, this will comprise the most epic tomato sauce that you can bust out like a ray of summer for something special during the months when we all are working through good tomato withdrawal.
Also I think it’s perfectly normal to have a love-hate relationship with canning. In that the process that makes me kind of hate myself, but being able to pull out canned goods later makes it totally worth it and makes me keep coming back for more.
(Also has anyone tried doing something like kale chips with the tomato skins? I’ve never tried it but it feels like if you really wanted to make something out of them, something similar should work!)
That was my theory too! I thought they would be like kale chips or sundried tomatoes… they were just kind of leathery? Still flavourful but not my favourite texture. A few blogs recommended making them into amazing tomato skin powder. I have yet to do that
I don’t can tomatoes because I hate cooked tomatoes, but I agree with you that winter tomatoes taste like supermarket and little else. So basically the only time I get to eat tomatoes is in the summer. It’s okay though because it makes them one more thing that special about summer!
I do can tons of fruit and jam and pickles every year though. I love that! I think the trick to canning not driving you crazy is to have all the right equipment. I have a special pot that’s like 18 quarts with a rack that fits right inside. I also have that kit for filling jars. It makes it so much easier you guys.
Sidenote – I really want to make these maple-bourbon pickles. Yummmmm. http://cupcakerehab.com/2012/03/bartender-ill-have-a-pickleback/
You should try reusable lids. They are BPA free and zero waste since the rubber rings are reusable for years and years. I use them for tomatoes, peaches, jelly, etc.
http://www.reusablecanninglids.com/
How many years have you used these guys? I’ve heard good things but mostly from first year users. I’m curious to hear how the reused lids keep. Also just generally hesitant about plasticizers and wish I heard more feedback about these –> http://www.weckcanning.com/. I see them, or things like them, more and more and I would like to give it a try but don’t have 4 years of trail period patience.
I like that the crop chart is in French. So it kills two birds with one stone for me: know when crops are available + brush up on French vocab!
Also do the canning instructions here work for summer veggies in general (or other summer veggies) or just tomatoes? Because I’m not a big tomato fan (I know, I’m weird).
[…] Get Baked: Canning Tomatoes, Duh Given that tomatoes are my favourite fruit and vegetable, I get over my autumnal woes by stuffing my face with those scarlet orbs as often as humanly possible: tomato tarts, tomato jam, curried pickled tomatoes, tomato fucking everything. Just get in … Read more on Autostraddle […]
Eating plant wombs, is it feminist? NO! Problematic!
I am just so glad to hear I am not the only one who loves canning (we call it bottling here). Although I haven’t done it in ages.
Wow! The blog is really good. Thanks for sharing it.