

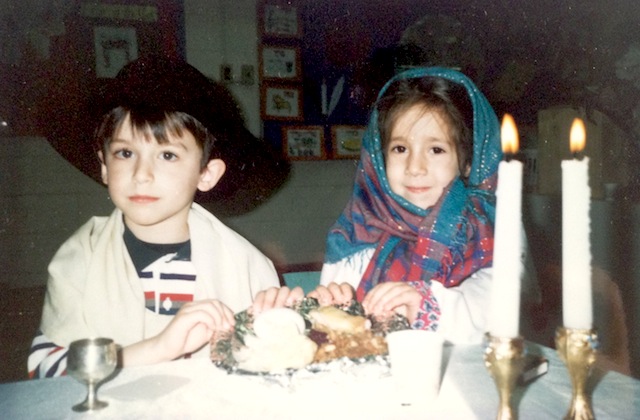
As you may know, I’m currently living with my parents, which means I get to steal all my mom’s amazing secret recipes and publish them on Autostraddle dot com (don’t worry I actually did get her consent even though some of these were legit secret until right now). Last week I taught you how to make the greatest honey cake of all time to celebrate Rosh Hashanah, and this week I’m going to teach you how to make a traditional South African yeast bun to celebrate the end of the Yom Kippur fast because it’s September and the Jewish holidays just keep coming!
For the non-Jews among us, Yom Kippur is “The Holiest Of Holy Holidays In The Whole Year” for Jewish people. I know this for a fact because of this song we used to sing at my Jewish Day School back in the day:
Just when it seems like a blur
It is time for Yom Kippur
It’s the holiest of holy holidays in the whole year
We don’t drink
We don’t eat
Don’t wear leather on our feet
And we contemplate the way we can improve the things we do!
Oy vey iz mir, oy vey iz mir, oy vey!
So uh, anyway, as you can see based on my very scientific knowledge, Yom Kippur is a big deal. No but for real, in Hebrew “yom” means “day” and “kippur” comes from a root that means “to atone,” so the day is, shockingly, known as the Day of Atonement. Technically we were supposed to start atoning last week, on Rosh Hashanah, for a ten day period know as the High Holidays in Judaism. Yom Kippur is the culmination of that period, and we mark the holiday with a 25 hour long fast and a lot of praying in synagogue. I actually don’t go to synagogue because it’s not really my jam, but a lot of Jews who also never go to synagogue do go for Yom Kippur because it’s the Super Big Deal of Jewish holidays.
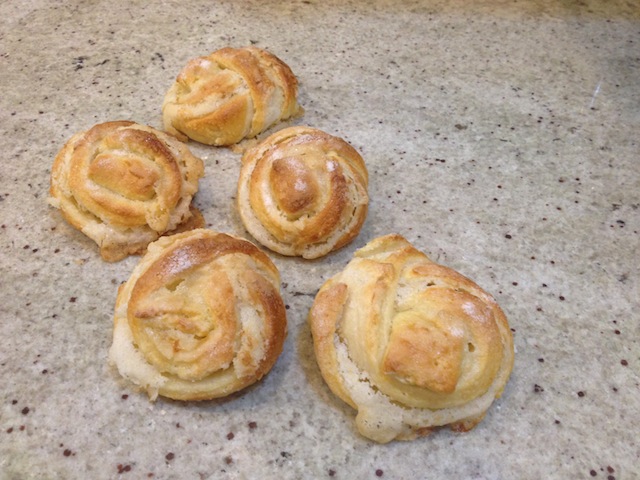
I do fast though, mostly just because it’s tradition and also it makes my parents happy, which means that from Friday evening through Saturday evening this week I will be not eating or drinking or brushing my teeth, yum! But then on Saturday evening at the end of the fast there is this thing called “Break Fast” where you break your fast (super complex terminology, I know) and while a lot of American Jews have a low-key bagels-and-lox situation, my crazy South African Jewish parents host a 40 person feast for Break Fast every year. We open the feast with my mother’s famous bulkas, which are basically yeast buns and also somehow became a traditional Break Fast food for South African Jews. They are also the best damn thing in the whole world, especially when you haven’t eaten for 25 hours but also all the time.
WHICH BRINGS US TO our recipe of the day. Are you excited to make these things? You should be so fucking excited. Seriously, the thought of bulkas is what gets me through the Yom Kippur fast every year. They are kind of labor intensive to make but I swear it’s worth it. Make these before you begin your fast on Friday night and I promise you will be the happiest little hungry hungry hippo come Saturday evening.
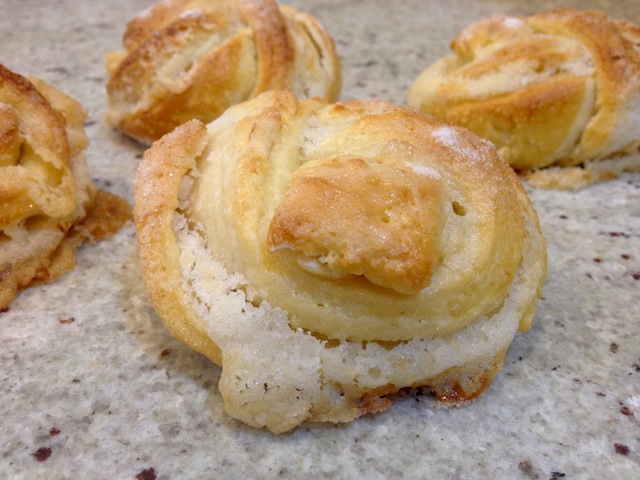
Vanessa’s Mom’s Famous Bulkas
Ingredients
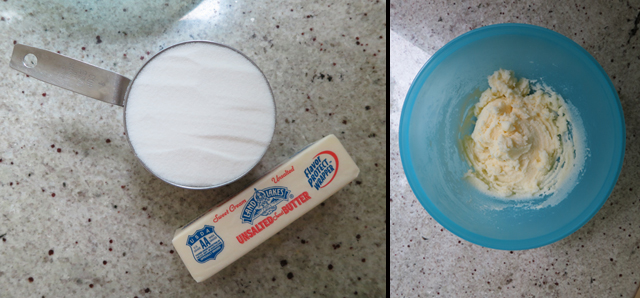
Filling
1 stick of butter (½ cup)
1 cup of superfine sugar
Dough
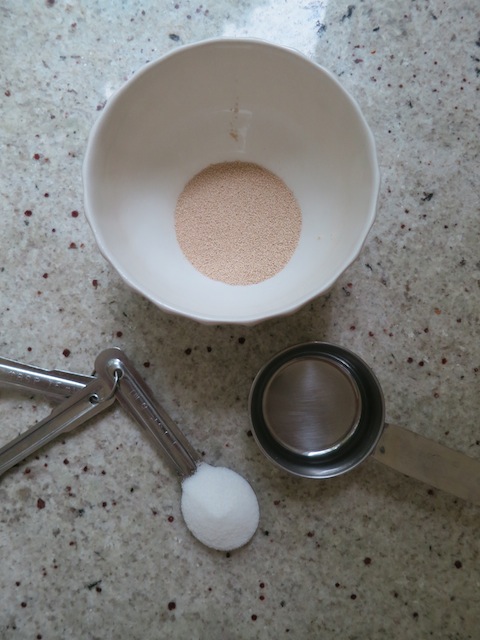
¼ cup lukewarm water
1 package dry yeast
1 tsp sugar
1 stick of butter (½ cup)
¾ cup of milk
2 eggs
½ cup superfine sugar
1 tsp salt
4 cups of flour
Glazing
1 egg
extra superfine sugar
1. I make the filling first, because it’s super easy and why not. Often when a recipe says to cream butter and sugar I just melt the butter into liquid because who cares, but in the case of this recipe the butter/sugar mixture should be pretty solid, so try not to liquify the butter in your microwave. Best case scenario, you’re super good at planning and you remember to leave a stick of butter out for a few hours before you make this, but if you forget that’s fine, just microwave the butter a teeny tiny bit. Just enough to soften it. Then take the stick of butter and a cup of superfine sugar and mix that shit up. Sidenote, when my brother was little he thought this was “custard” and my mom had to inform him that actually it is not at all custard, it’s literally just butter and sugar. I feel like I’ve told you this story before. It is sort of folklore in the Friedman family. Anyway, make the filling then set it aside. Boom, step one, done.
Now onto the dough!
2. Get your yeast ready. Take your package of dry yeast and dump it in a small container. Add the ¼ cup lukewarm water and 1 teaspoon of sugar. Cover it (I use a dishtowel) and let it do its thing. After 5-10 minutes you should hear it bubbling (quiet bubbling – don’t expect fireworks or anything, it is very very quiet, lowkey bubbling) and when you remove the covering the yeast should have expanded a lot. Does it look like the picture below in step 3? Excellent. If not, your yeast is fucked and you need to do this step again with new yeast. Do not take this step lightly. Seriously, if your yeast is bad this recipe is a huge waste of time.
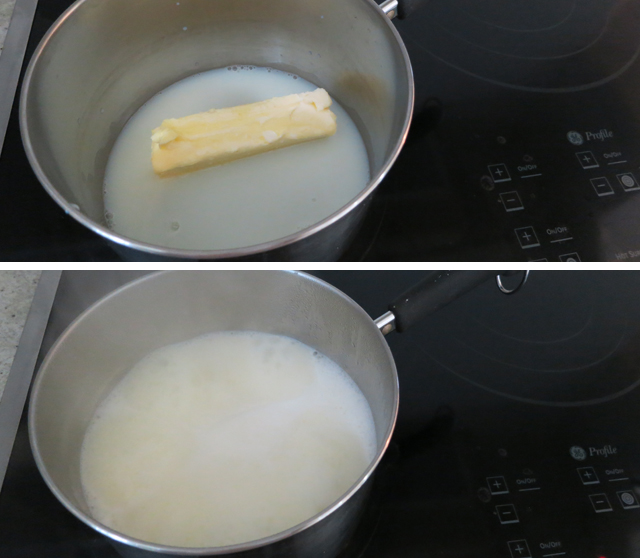
3. You can do this step while the yeast is getting yeasty. Put a stick of butter and ¾ cup of milk in a pot together and heat it up on the stovetop. Boil the butter and milk until the mixture comes to the top of the pot.
Warning: my mom made me super paranoid about this because she said once the mixture starts to boil it rises to the top super quickly and before you know it you’ve got scalding buttery milk all over your kitchen floor, so as a result I don’t really let the mixture come to the top of the pot. I sort of grab it off the stove as soon as it starts to rise. But maybe you’re wilder than I am. If you do let it rise to the top of the pot and manage to avoid disaster you should let me know so I can tell my mom she’s crazy. Moms love when you do that.
Anyway, once you take the pot off the stove you need to let it cool down until you can stick your finger in the mixture without burning yourself. This method is sort of iffy because how can you tell if you’re gonna burn yourself until you’re, you know, burning yourself, but listen, no one ever said this life was glamorous. We all make sacrifices for delicious baked goods, okay? (Seriously just let it cool for 10 minutes at the minimum and please don’t sue me if you do burn yourself, be careful kids.)
4. Once your milk/butter mixture is sufficiently cool put it in a large bowl and add the eggs, superfine sugar, salt, and yeast mixture. Then, add up to 4 cups of flour. You want the dough to be elastic and sort of sticky, so don’t add too much flour. I think I added too much flour this time around, which you’ll hear me complain about in the VIDEO below (yes there’s a video, yes I’m super proud, yes please say nice things about it in the comments). Anyway just add the flour cup by cup and gauge as you go. The dough should stick to your hands a little bit but not too much. As always, follow your heart.

5. Cover the dough and let it rise! This is why the yeast is important. It’s gonna expand! You made a small thing and it’s going to grow into a bigger thing! It’s like community! It’s like Autostraddle! It’s like love! It’s like science! Gosh darn isn’t the world cool? Anyway. Let the dough rise for 4-8 hours in a warm place. Wait for the magic to happen. Marathon the whole season of Orange Is The New Black which I embarrassingly still haven’t done are you judging me you can judge me I’m judging myself. Daydream about A-Camp. Maybe have some sex.

6. Hi, we’re back! Grab your dough and grab your filling that you made like a million years ago and get ready to have some fun! You’ll need a somewhat large work space for this part. Sprinkle flour onto the surface of wherever you’re gonna do this thing and remove the now-much-larger ball of dough from the bowl. Try not to play with it too much – unlike your lady lover, this dough does not like to be touched too much before the main event.

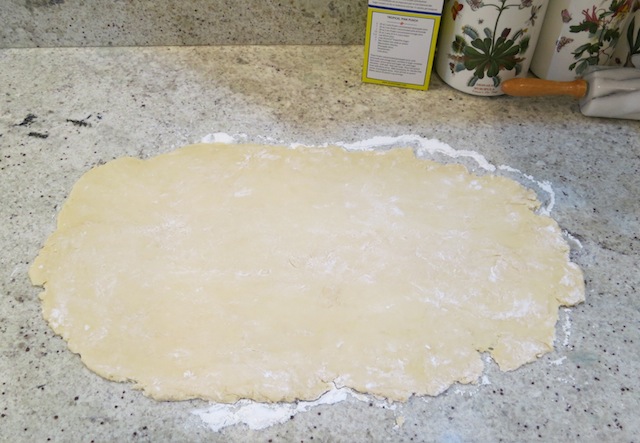
7. Grab a rolling pin and roll the dough out into a big rectangle, like so.
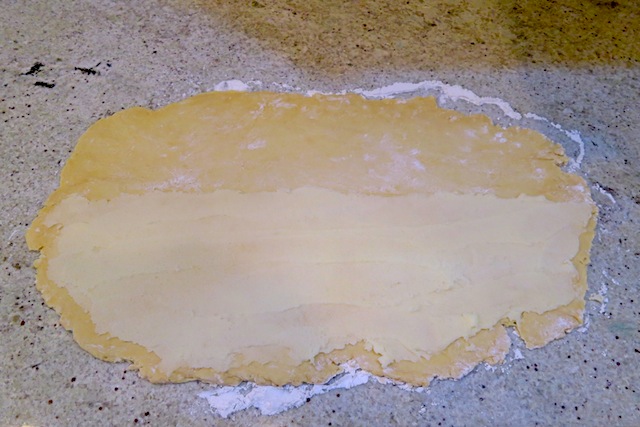
8. Take the filling and spread it on half the rectangle, horizontally (like in the picture). I like to draw a light line with a butter knife down the middle of the rectangle so I can visualize exactly where the filling needs to go.
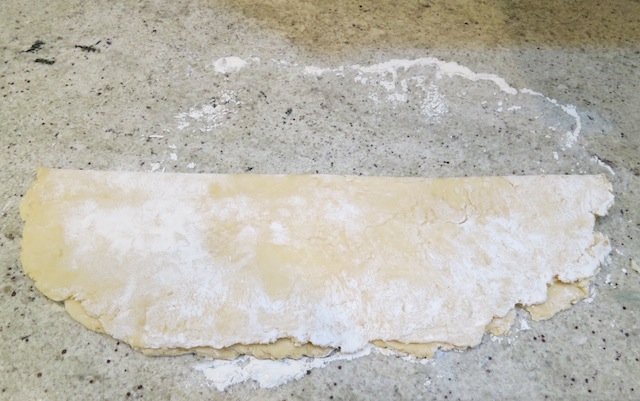
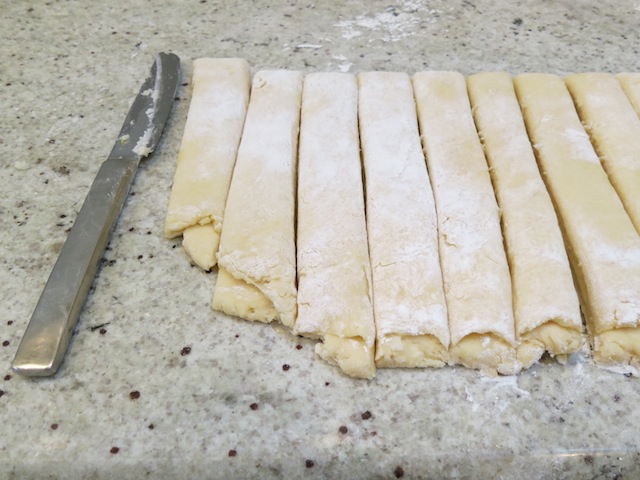
9. Fold the dough rectangle in half. You should have a large dough rectangle sandwich situation with dough, filling, dough.
10. Cut the rectangle into a bunch of long strips. All of these directions are best described by the visuals, not my words. That’s why I made you a video, actually. Did I mention I made a video? It’s my first YouTube upload ever, I’m really proud of it. The video that I made. Did you know I made a video?
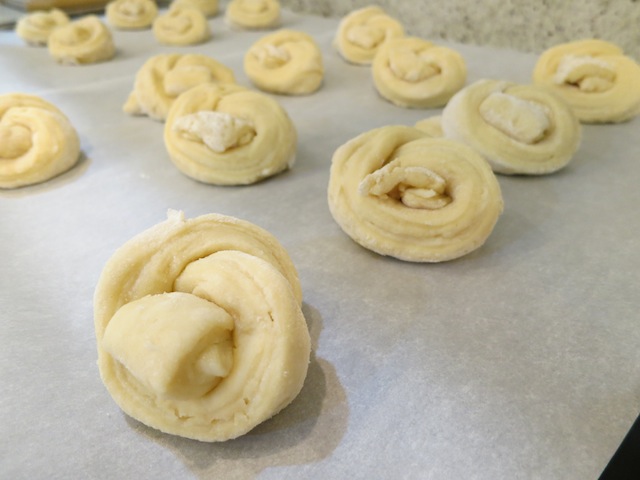
11. LOOK THIS IS WHAT YOU DO NEXT, I MADE YOU A VIDEO TO DEMONSTRATE! You tie the strips into knots! For some reason I called the strips “strands” in this video. I also said they’re kind of like pretzel knots which makes absolutely zero sense because guys, they’re not like pretzel knots at all. I dunno, my brother started filming and I panicked! Also ugh, my voice. BUT ANYWAY LOOK AT THIS RAD VIDEO, IT SHOWS YOU WHAT TO DO IN THIS STEP:
12. Once you’ve made all your little yeast bun bulka knots, put them on a baking tray and cover them with a dishcloth because we’ve gotta let them rise again! I told you this was a labor intensive recipe. It’s worth it, I promise. Go watch another episode of OITNB or have a quickie because this rising process is only 30 minutes long. Oh, and now is a good time to turn on your oven. Preheat to 350 degrees, baby. It’s about to get hot in here.
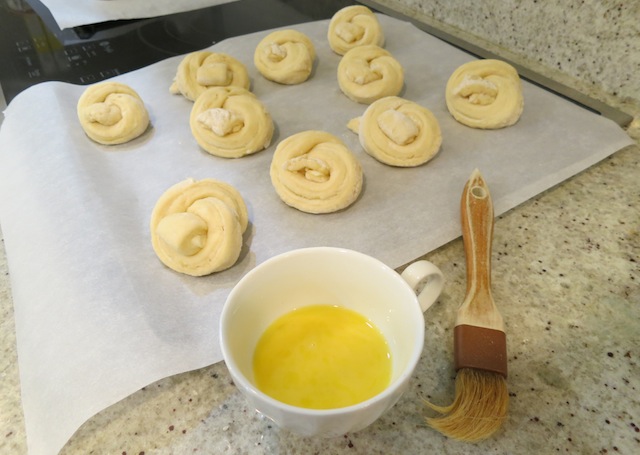
13. And we’re back! Again. It’s time to glaze! Take the egg I instructed you to get for this part of the adventure and crack it into a small container. Then whisk it all together with a fork. Then take a fancy baking brush and gently glaze the bulkas with the raw egg. I don’t know what you could use instead of a baking brush for this process. I understanding that you might not have one. I personally don’t own one, but obviously my parents own three because suburbia. And grown ups. I think you could maybe just drizzle egg on top if you didn’t own a baking brush? Or maybe you could use a regular paint brush if it was very very very clean. I’m not sure. Maybe this is a recipe that only grown ups who own baking brushes can make. Maybe I am not being inclusive. Fuck.
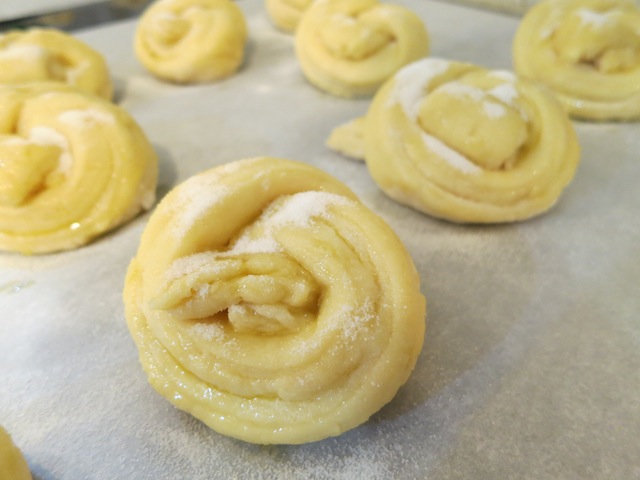
14. Once you’re done glazing the knots with the raw egg and once I’m not being neurotic that I’ve alienated everyone who doesn’t own a baking brush, take your extra superfine sugar and sprinkle it on top of each bulka. I think this is self explanatory but a cute girl recently told me that evenly distributing sesame seeds on top of challah can be challenging and I thought that was self explanatory also, so allow me to take this moment to inform all the cute girls in the world that there is no wrong way to distribute sugar on a bulka. Just go for it! I believe in you.
15. It’s finally time to get these guys in the oven! They should bake for 15-20 minutes. Let the sugar bubble a little bit and let the tops turn golden brown and then swoop in and get them the fuck outta there because these babies are DONE. Mazel tov. Let’s eat! Just kidding you have to fast for 25 hours before you eat these, duh.
Whew. Thank you for coming on this spiritual journey with me, Straddlers. I wish those of you who will be fasting on Yom Kippur an easy fast, and I hope all of you, Jewish or not, enjoy my mom’s top secret bulka recipe. I’ll think of you guys when I take my first bite to break the fast on Saturday night!


Comments
Vanessa, you’re so adorable, I want to smish you & your bulkas. Thank you for introducing me to a new South African Jewish thing!
And omg, when I was living with my parents, my dad totally got on my ass about ruining his granite countertops & sustainably grown bamboo hardwood floors. WHAT’S THE POINT OF SUBURBIA IF YOU CAN’T USE BAKING BRUSHES ON GRANITE COUNTERTOPS, I SAY.
I really feel like I’m benefiting a lot from your move to suburbia Vanessa!
and it’s only been 2 weeks! think of the possibilities.
If you want to make some of these for the Boston trip in a few weeks I’m totally OK with that.
I am also benefiting a lot from your move to suburbia. If you have leftover bulkas, I call dibs.
i think we have some! come over sometime this week?
Whoa, I thought I was the only one who sang Crazy Town when baking sugary treats.
You’re my butterfly. Sugar. Baby.
I have to take a moment and let the past wash over me.
aww you are 12 kinds of cute with your shut-in-made baked goods :)
This was super educational, especially since it gave me a reason to finally find out what “custard” really is. ;-)
Not being a native speaker, when I starded to learn English, a process in which reading Harry Potter played a major role, I often mixed the word up with “mustard”, which was really confusing. I vaguely remember wondering why Hogwards would serve mustard pie at the super fancy banquets that seem to be the whole point in learning to do magic in the first place… And I´m not even sure whether that confusion came from one of the first times I read Harry Potter in English or an actual mis-translation in one of the German versions. Maybe custard/mustard is something that just confuses Germans in general, even the ones who get to translate legendary book cycles?
Anyway, I figured out that the two are not the same thing a while ago, but somehow, I never bothered to find out what custard is. Now I did. Thanks for the reminder!
These. Look. Delicious.
making all kinds of incoherent baking noises over here, it’s not pretty. TO THE KITCHEN.
This is the cutest, most amazing post about a DELICIOUS LOOKING THING and I can’t wait to eat one of these.
Vanessa, every time I think I can’t love you any more, you go and do something like this.
Also, for everyone alienated by the pastry brush, I fold up a paper towel and use that. It gets the job done.
These look delicious and this was probably the funniest recipe I’ve read and your voice is adorable! (is that a creepy thing to say? I hope not)
I’m considering conversion and thought about starting to practice by doing the Yom Kippur fast (so it rhymes with “blur”? I thought the “u” was pronounced like in “push”), so I’m definitely making these tomorrow to motivate me – for cultural reasons and stuff but mostly because I really want to eat the pictures on my screen now.
BTW I do glazing with a paintbrush I never used and it works totally fine, I guess a soft toothbrush could do too if it’s cleaned thoroughly.
pronunciation kind of depends on the accent you use. the technically ‘correct’ hebrew way of pronouncing it is more like yom keep-oor. but yiddish pronunciation sort of varies, and sounds more like what would the u in blur.
you beat me to it!
I’m studying Judaism in my religion class right now and I am completely butchering the terminology. I think the holiday’s are about the only thing I have managed to say correctly with my thick accent.
not creepy at all! i am actually super self-conscious about my voice so thank you <3
also good luck with your first yom kippur fast if you decide to do it, and with your possible conversion, but most importantly with the bulkas ;)
I LOVE your voice. I have ASMR (http://en.wikipedia.org/wiki/Autonomous_sensory_meridian_response) and I found that video MAJORLY triggering. I was getting so many happy tingles in the back of my head, I could listen to you talk for hours.
Now THIS^ is a borderline creepy comment. But I won’t shy away from my love of pretty voices <3
Thank you for the awesome recipe!!! I wish I had an oven so I could bake this for Break-the-fast, but alas I am a college student that lives in a dorm that does not have any sort of kitchen.
But when I go home, I’ll bake these along with my grandmother’s recipes for mandelbrodt and rugelach. :)
Can this be a thing “Vanessa shares her mother’s secret Jewish recipes because of suburbia”?
To be honest I didn’t know South African Jews wee a thing but it makes sense because Jews are everywhere (like seriously there are probably hews on mars somehow)
Theses look complicated and delicious and I can’t wait to try to make it!
the south african jewish community is such a Thing you wouldn’t even believe it
yeah like my parents lived on a kibbutz when they were first dating/married (yes i am THAT jewish) and like half of the members were south african jews. it is such A Thing
do you know which kibbutz they lived on?
also! If you are short a baking brush, I just use my fingers to brush egg on challah, if you have fingers you should be good.
That video, tho. Oh man. All the cute.
Vanessa, you’re my favourite. These look amazing! Funny that the word for bun in Ukrainian is actually “bulka”, so yet another cross-over word that both cultures use. (I only learned recently that “tchatchkis” is actually Yiddish when I’ve used that word my entire life as a Gentile Ukie. WHO KNEW. I didn’t.)
Also, being shut in suburbia sounds like the perfect time and place to marathon Orange Is The New Black.
I care! I care about creaming butter! When you’re making a filling that you’re just going to shove in your face, it doesn’t matter. Butter. Sugar. Now it’s butter-sugar.
But if you’re making a cake or something that involves the creaming method (ie. creaming butter and sugar together followed by eggs and then flour/liquid/flour) the butter-sugar dance does matter. Whenever you mash the softened butter with sugar crystals, while it seems like you’re just making them make friends you’re actually creating a whole bunch of teensy tiny baby holes in the butter itself. Later on when you’re doing the molecular mambo in your oven, all of the leavening agents will do their magic and create a bunch of CO2 to make your baked good big and fluffy. If they’re allowed to go at it alone, you’ll have a bunch of irregular holes OR a bunch of CO2 that escapes. But if you give the CO2 a bunch of protobubbles to blow up like empty balloons, then you’ll end up with a cake or cookie with a finer crumb!
But also this looks really delicious and I think I have to make this. Now I’m super curious about Jewish Afrikaans cuisine because I think I always attributed my family’s cooking my grandma’s Cantonese background? But now I’m like heeeeeey I wonder kind of hybrid foods I’m eating and what kind are you eating. Because I’m a culinary peeping tom that way.
God I love coffee in the morning.
NOPE.
i can’t.
i simply can’t.
i swear to g-d, one more picture of baby vanessa and i will not be able to go on.
oy vey iz mir, indeed.
oh also this is an incredibly beautiful post/recipe/video situation and i will dream daily of making this but never actually get my shit together enough to get around to actually making it but i APPRECIATE THE IMPROVEMENT OF MY DREEMZ ty v
Thank you for sharing this, looks real tempting. In my family we don’t Break Fast with bagels and lox, we break it with a buffet of middle eastern food, and a stuffed chicken, and usually there is only 4 people at the table.
If I go to my parents’ house for Yom Kippur, we go to break-the-fast at a South American house!! They don’t make awesome South American Jew foods, though- it’s bagels… which, I mean, is still awesome, because, you know, bagels.
I read this at work yesterday and almost drooled on my keyboard!! A few weeks ago I decided that I can cook and bake and have made three things so far. I definitely will be making this, but will maybe wait until i’ve gotten a few more recipes under my belt. I think the whole adding of the flour part would be my downfall. Baby steps!
Also RT T-Pain re: you as a baby.
Mer, you remind me of one of my father´s favorite quotes… “If you can read, you can cook/bake”.
I think above all, this has allowed him to leave the cooking/baking mostly to my mother (because hey, he didn´t need to prove that he could to it!), but over the years, he HAS made a few things. And by sticking to good recipes, I can´t remember him ever making an absolutely inedible mess, so I have faith in you, too!
Those look really good…like the sort of thing you’d have as a snack (or a quick breakfast) with a nice cup of coffee or tea.
turns out these are even more delicious than this recipe makes them seem (how does that even happen?! science/magic)
(also that cute girl has such valid sesame seed opinions, as well as being clearly so cute)
With the understanding that these are “the best damn thing in the whole world [. . .] all the time,” I’m in the process of making them tonight for not-related-to-Yom-Kippur-in-any-way eating. I was trying to figure out what to bake for my students (uni first-years), because they are the best kids and the semester is almost over, and these seem like a fantastic choice for an 8am class on a Monday. Enough like bread to pass for legitimate breakfast food, and sweet enough to be indulgent. Thanks for the recipe! Now if only I can last the night without eating them all myself . . .