

Welcome to the new DIYke Club! Some friends and I started a DIY/crafting group that gets together a couple of times a month. We try a fun drink recipe and do a craft we haven’t made before. We’re having a blast and thought you might want to get in on the action. Maybe you’ll start your own local DIYke chapter? Let’s all get liquored up and make things!
Header by Rory Midhani
As a grad student, ‘free time’ and ‘spare cash’ are about as common as magical unicorns. This makes it difficult to find enough time/money for all of the hanging out, hobbies, and drinking I’d like to do. While agonizing over the injustice of it all, I decided the only thing to do was eat popsicles and surround myself with as many rainbow things as possible. In the unlikely event that your life is lacking in either of these departments, I’m here to help. Pride should be year long after all, no matter what your liver and amount of REM sleep say.
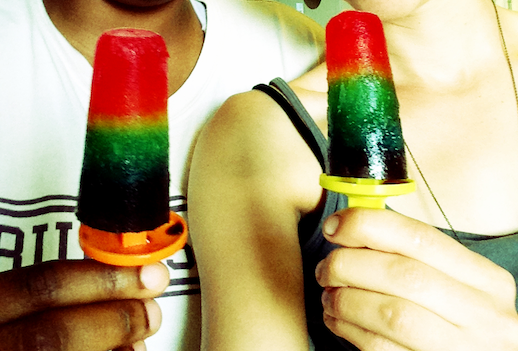
Boozesicles
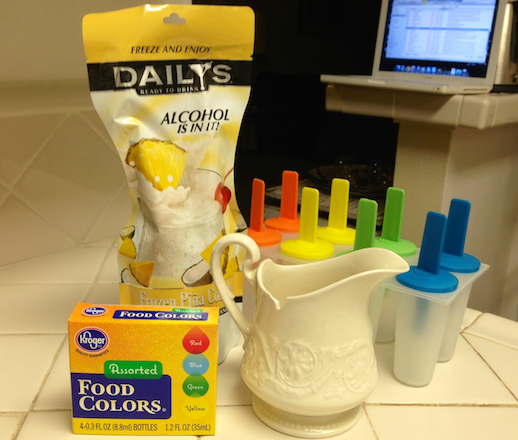
Supplies needed:
+Piña colada mix (or some other freezable, sweet alcohol mix)
+Food coloring
+Popsicle molds -or- Dixie cups, foil, and popsicle sticks
+Container with pour spout
Step 1:
Mix 1/6th of the drink mix with a couple drops red food dye in a container with a pour spout.
Step 2:
Pour this red mix evenly into your popsicle mold of choice.
Step 3:
Freeze this layer until solid. Repeat with orange, yellow, green, blue, and purple.

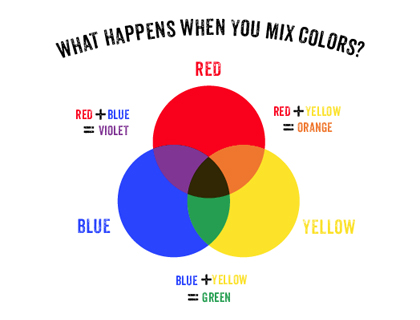
Notes:
Just in case you don’t have all the colors of the rainbow, here is a color-mixing chart.
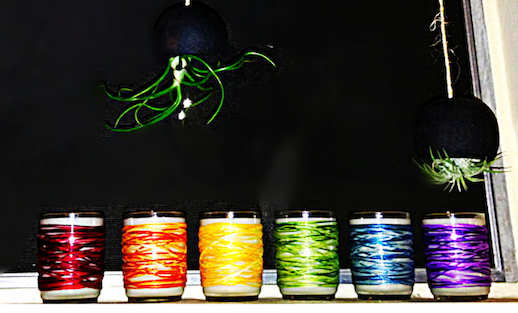
Candles
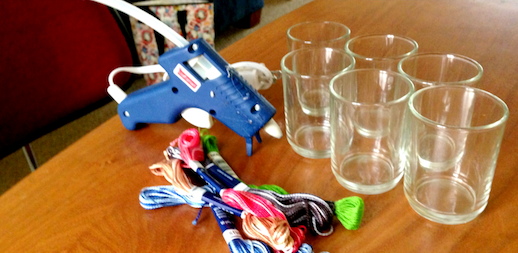
Supplies needed:
+ Glass votive holders (reuse old votive holders or purchase new ones)
+ Friendship bracelet string in red, orange, yellow, green, blue, and purple
+ Hot glue (or super glue)
Step 1:
Using a dot of hot glue, attach the string to the middle of the glass votive holder.
Step 2:
Wrap the string around the middle of the glass. The more haphazard your wrapping pattern is the more interesting the candle will looks when burning.
Step 3:
When you are satisfied with how it looks, glue the other end of the string to the glass with a dot of hot glue.

Supplies needed:
+1 lb soy wax flakes
+Pre-tabbed candlewicks
+Something to hold the wicks in place while the candles cool. (pins, bobby pins, tin foil, toothpicks, coffee straws and twisty ties, etc.)
+Two pots to make a double boiler -or- a pot and a candle making pitcher
+Essential fragrance oils (1 oz per pound of soy wax should do the trick unless you’re using a stronger scent, I used lavender)
Step 1:
Glue the wick tab (metal base of the wick) to the center of the votive so the wick stands straight up.
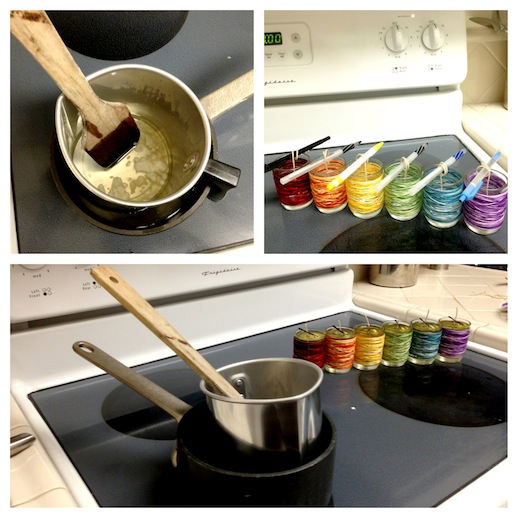
Step 2:
Start melting your wax in the double boiler. When it is melted, stir in fragrance.

Step 3:
Stabilize the wick so it stays upright in the center of the candle as the wax cools.
Step 4:
Pour the wax into each of the glass votives.
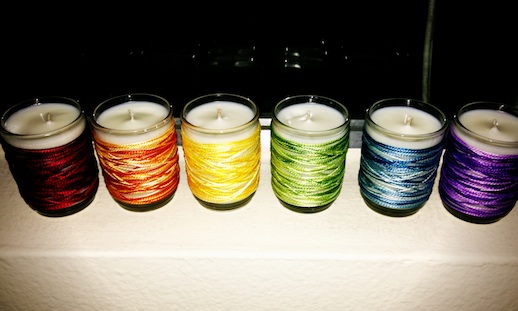
Step 5:
Wait for the wax to cool. Once the candle has hardened, trim the wick to its desired length.
Notes:
–Choose a soy wax to best suit your needs. I used Ecosoya Advanced Soy Wax.
–Candle Science is a great resource for more technical candle making questions. You should also take the time to choose your wick. I used 6″ pre-tabbed HTP 52 wicks. Try to avoid zinc-cored wicks if possible as they can irritate the lungs while burning.
Now kick up your feet, enjoy your boozesicle, and watch the candles flicker in your amazing smelling room.
Got a drink or crafting idea you think we should try?


Comments
Oh. My. God. I can’t wait to make both of these things. Amazing.
Those popsicles look pretty and delicious!
cute. I need to get some Popsicle molds stat.
ok the thing about liz is that she can make even the most complicated-looking thing, seem super doable. like i feel 100% confident i could make those candles. i really do.
is there a place to find scent suggestions? or like, knockoff scent formulas? there’s a candle at target — this pink magnolia situation to be exact http://www.target.com/p/jar-candle-3-wick-magnolia/-/A-14244621#prodSlot=medium_2_6 — but it’s so expensive and i can’t bring myself to pay that much. is there a way i could replicate that smell? how do people do this.
There are a million places to buy fragrance oils on the interwebs (and of course a million price points) which is fantastic, except you can’t smell them in advance so each purchase is a bit of a gamble. Because I’m a neurotic human, I obsessively read the descriptions for about 50 fragrance oils before I finally settle on one and I have definitely ordered oils that were different than what I was expecting but I haven’t been disappointed yet. I like candle science oils because they rate them specifically for how well they ‘stick’ in different kinds of wax, and scenting soy wax can be tricky (read about their testing/rating process here: http://www.candlescience.com/fragrance/). BUT their shipping costs are prohibitive so I buy there much more affordable sampler packs on amazon with free shipping (here is one with a pink magnolia scent: http://www.amazon.com/CandleScience-Collection-Fragrance-Sampler-bottles/dp/B0092RNCLQ/ref=sr_1_sc_1?s=arts-crafts&ie=UTF8&qid=1382302062&sr=1-1-spell&keywords=candle+science+magnolia&tag=autowin-20).
As for matching name-brand scents, I don’t have any experience with this, and just poking around candle-supply sites I’m familiar with I didn’t see any the Target candle scent you were talking about (a lot of bath and body works though). As with most things, the larger quantity you buy the less expensive it is, which is why crafting in a group is awesome – you can experiment with a bunch of different scents at a fraction of the cost of store bought scented candles!
I felt very invested in this after reading the first two sentences, because this is my life. I felt even more invested when I realized I have the exact same food coloring in my cabinet. Basically now I feel the need to make all the things.
Definitely going to have to try the boozesicles!
So I totally read the whole articles thinking that, instead of Boozesicles, they were actually BOOBsicles… Which left me feeling nippleless and entirely disappointed.
On the up side though- booze.
hmmm…frozen boob-shaped treats?? Sounds amazing – challenge accepted!!
you are magic.
Yay Liz! Yay crafting! Yay drinking!
Oh my god I’m so excited about this new column!! I can’t wait to try this!
These candles actually look really cool in real life and I usually do not care about the attractiveness of candles/anything but myself.
Definitely using my friend’s birthday as an excuse to make these boozy popsicles and have them for breakfast next weekend.