

Welcome to your second class in worldmaking 001! Last time, you learned how to deep clean your bedroom, and today, we’re getting into the only other room in my house that I always have struggled with keeping clean: the kitchen.

The kitchen is such a vital place in the home. Notorious gentrifiers and purveyors of well-priced linen-cotton blend duvet covers Chip and Joanna Gaines have been known to say that the kitchen is the heart of the home and the thing is, they’re right! It’s where you often start and end your day, it’s the place where the things that materialy nourish you are housed.
In the play, black girl love by Ari L. Monts (lol), one character reflects on the importance of a clean kitchen as an “I’m-too-nervous-to-tell-you-I-want-to-make-out” tactic:
HONOR
You have good books too. Books are important. John Waters, you know that crazy ass white dude who made Hairspray? I remember reading like a GQ or a Vanity Fair interview with him where he said something like “don’t sleep with someone if you go over their house and they don’t have any books,” or something like that. My mom also thinks you shouldn’t sleep with someone if they have a dirty kitchen because you know…what if you’re cuddling in bed after and you go to get a drink and they got roaches? Like can you fucking imagine?! Oh my god I would die. And you’d probably be butt ass naked and just…(she shudders, and peters out.)
Silence.
Is the moment over?
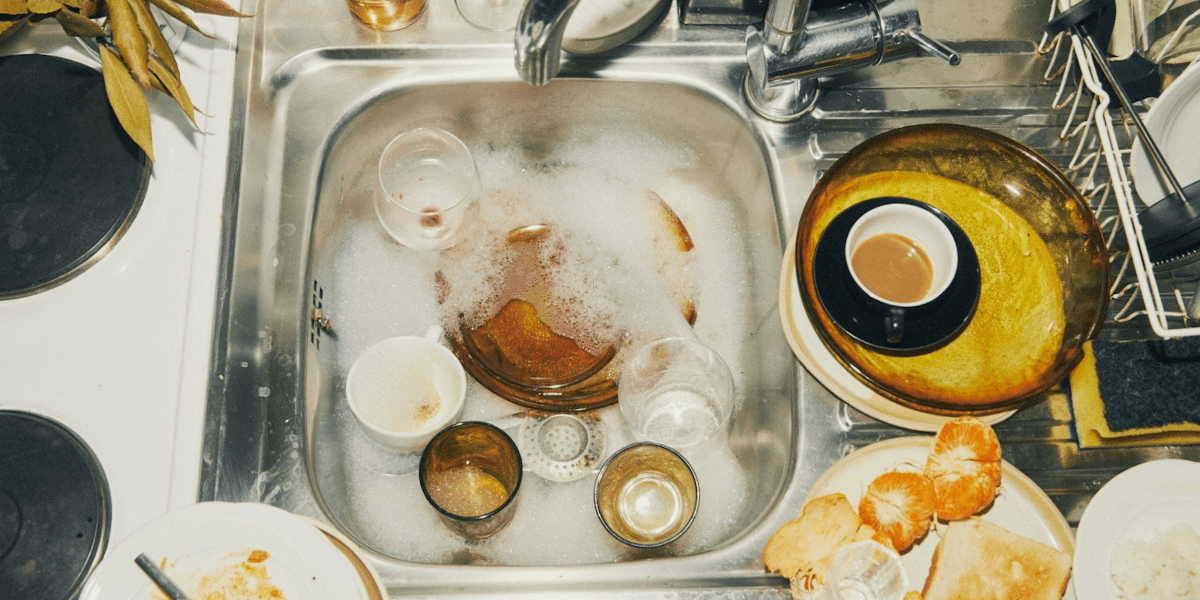
Because the kitchen is so used, it’s one of the quickest rooms to get messy. I’ve always said washing dishes is the most unsatisfying chore because as soon as you finish, you have more dishes to wash! It literally never ends!

My hope in crafting this guide for cleaning your kitchen is that it makes the task never feel daunting, even when your kitchen is absolutely a mess – and believe me, your kitchen will be a mess more than once if you use it as it’s intended to be used. Which is also a beautiful reminder about housekeeping in general: mess is a sign of a home being used. What’s more beautiful than that! So, take a deep breath, put your rubber gloves on, and without further ado:
The Kitchen
1. Make a List
You did not think I’d forget about lists, did you? Your list will keep you on track. You list will keep you happy. Your list is your friend!

2. Tools

Lots of these tools are repeats! Which means you can look back into the bedroom cleaning guide if you need specifics. I’ll let you know if you should use something other than what I suggested for bedrooms.
• Timer: for keeping you on track
• Microfiber towels: for stovetops, windows, your stove/oven, and any other shiny things
• A bunch of rags/paper towels/recycled newspaper/recycled paper bags
• Sponge(s), bottle cleaners, and anything else you’ll need for washing dishes: I believe you should have at least two sponges for dishes (one for scouring things, one for pots/pans with coatings that cannot be scratched), and one for counters. .
• Trash/recycling/compost bags/bins/whatever your home uses: Here’s the thing. Yes, you need bags with which to remove trash from your home. Also: I think the trash should be taken out every single day. Maybe many times a day. I think trash cans inside of a house are incredibly gross to me! I do not like having a trash can inside of my home, but I live with someone for whom it’s important. Which means that when I deep clean my kitchen, and when you deep clean your kitchen, you will need to not only take out the trash, but clean the trash can. WHICH IS WHY I am anti-trash can. I know. It is unpopular and inconvenient, but it is my inconvenient truth.
• Broom
• Vacuum (small handheld one if you have it, for getting into cabinet corners)
• Mop
• Appliance specific cleaner (if needed): If you’ve got an induction-top stove, you might want to bring along a box cutter, and the specific cleaning solution suggested by your stove manufacturer. If your oven doesn’t have a self-cleaning setting, you might want to bring some oven cleaner. I would suggest trying DIY oven cleaner before buying it; you’d be surprised how easy it can be to clean an oven with heat and time. This website offers you some great suggestions, and guess what, the winner is baking soda and water.
• Glass cleaner
• Pipe cleaner situation
• Scrub brush: If you’re going to use it on the floor and the counters, I’d suggest getting two!
• Dish soap or dishwasher liquid
• Favorite room scent if that’s your thing (incense/candle/etc)
• Baking soda
• Favorite AP cleaner
• If you don’t have a split sink, a wash bucket for dishes: I’ve recently learned people disagree with using a dish bucket, but I don’t understand how one can properly wash dishes without soaking them! So, unless you have a split sink, I really think you should try it! Look for a “dishpan” or a “dish basin” or a “bus box” that fits into about half of your sink. If you’re really feeling fancy, get two buckets, or a split bucket, so you can have a wash sink and a rinse sink.
• Vinegar
• Favorite sanitizer: to sanitize things. Lysol, bleach, or your favorite sanitizer from the store.
• Favorite tile cleaner (or a floor cleaner for whatever kind of floor you have): to mop your floors. The great thing about tile floors is any all purpose cleaner will do. Read the instructions (which usually specify dilution), or use the vinegar/water/dish soap mix I suggested in the bedroom guide.
3. How To

Okay, I’m thinking about the kitchen kind of like a hierarchy of needs situation; at the top: clean dishes. It’s impossible to always have clean dishes and therefore that need is never fully met, but it’s what we’re always working for! In the middle, we have the reminder to always check our dates and make sure we don’t have old food. Food goes bad! It is our job to slow that down, or dispose of the food in a way that keeps our kitchens clean once that’s happened. And at the bottom are floors so clean that one could eat off of them. Again, impossible! But clean floors make an entire kitchen feel clean, and I think keeping a clean floor is the thing to aim for if you can do nothing else.
Sanitizing and Prep Work
• Boil any old sponges: When I dropped the claim that you should maybe have at least three sponges, maybe you thought, why? The reason is because the counter sponge should not be used to wash dishes and the dish sponges shouldn’t be used to clean counters. Ideally! But we live in a society and maybe you don’t want 3 sponges. The solution (and honestly something you should be doing even if you have three sponges) is to boil your sponges as often as possible after use. Sponges are nasty. They hold on to disgusting things. Boiling water can and will safely clean them. Drop them in boiling water for about 3 minutes after using them (and at least once a week) and then dry them somewhere where they’ll be able to air-dry completely (so, not flat on the counter). If you’re doing this at the start of a big clean, you want to do this early so the sponges can cool off enough for you to use them if needed.
• Take out the trash/recycling/compost: Do this now, even though you’ll probably have to do it again at the end. It’s good to start with as blank a canvas as possible.
• Fill sink/dish tub with HOT water and soap (and soak the dishes): This is, for me, the first step to washing dishes. You especially want to soak anything with something hard/crusty/old stuck onto it. I use enough soap for the soaking dishes to look like they’re in their own little bubble bath
• Fill rinse sink with cold water and vinegar: Cold water and a cap-full of white vinegar will rinse your dishes until they squeak and will help them to dry quickly.
• Sanitize any windows, doorways, etc: Similarly to in the bedroom, this is a quick step to remember to clean the high touch areas which are easily forgotten. Cabinet door handles, fridge handle, doorways, key hooks, window-sills, etc.
• Start cleaning the oven: Put down whatever oven cleaning method you’ve decided upon, and let it sit for at least an hour. Alternatively, start the oven self-cleaning function! I LOVE a self-cleaning oven! But beware that most (safe) ovens with a self-cleaning function will lock the oven for up to five hours because the entire range gets way too hot to safely use. If it’s summer, crank the AC or turn on lots of fans.
Quick Tidy
Pull out your timer for this quick cleaning portion.
• 15 min gather dishes from around the home: If you are like me, there are always mugs where they don’t belong and random spoons on dressers. Go grab them, and put them in the sink to soak with any other dishes getting washed!
• 15 min removing non-kitchen items from the kitchen: Same thing as above, just opposite! Has a magazine been living on the counter for a few weeks? Move it. Mail piling up? Sort through it and give it to the appropriate housemates, or recycle it! Dirty kitchen linen pile taking over a cabinet? Bring the linen to the laundry basket.
Spot Cleaning
• Clean stove exhaust fan: I’m gonna hand this one over to Melissa Maker.
• Wipe down/check smoke detector: Please do not be like me and keep your smoke detector stuffed into a drawer. If you’re using it well, it makes sense that you’d need to take it down, wipe it down and test it every few months. Make sure the batteries work and make sure there aren’t any stains from that soup you overboiled last week.
• Clean window screens + windows: The bedroom guide has all the nitty gritty if you need it.
• Spot clean spills on walls/ceiling: Pull out your favorite cleaning rag, your favorite all purpose cleaner, and get to work on those walls. Kitchen walls, especially near the stove, are honestly dirtier than you think, and it’s good to give them a little wipedown. If you have painted walls, you’ll need to be mindful of accidentally wiping off the paint, and you should start with something more mild, like soap and water before moving to a more intense cleaner.
Cabinets/Fridge
• Take everything out: Yes, everything! And if we’re really deep cleaning, you should take any refrigerated food out and put it into a cooler on ice, because you then want to unplug the fridge. The first step to actually cleaning a container that holds something is to remove the things it holds. For me, this is a big difference between cleaning and tidying.
Cleaning is a little bit disruptive! You’ve got to remove everything from where it goes, and then really look at the space and determine whether or not you’re using it well before putting it back together. The second step of this cleaning process is therefore the re-evaluation step.
• Re-evaluate: Do you really need three boxes of Cheerios? Is there a way to consolidate them, or can you give some away? After you’ve removed everything, really get in there and ask yourself why you have what you have, is it still good, is the way they’re being stored helpful or harmful, and what to do going forward. If you don’t already, I’d suggest keeping a roll of painter’s tape in the kitchen to keep the dates on things you cook so you’ll know that you aren’t storing food longer than the FDA says is safe. The re-evaluation step is really just a reminder to make sure you actually want what’s in your shelves and refrigerator.
• Wipe down: Food can make things sticky! Get out a rag and some AP cleaner and go at it.
• Re-organize: This can be as intense as deciding you need to buy acrylic bins for everything, or it could mean that you use the old jam jars you’ve refused to throw away to store all your snacks so you actually know what you have. We’ll talk more about organizational systems when we talk about the home office but just know, it doesn’t need to look like anyone else’s organization system. If you feel organized, that’s good enough.
Dishes

We’ve made it almost to the end! I wash dishes very close to last because like I said, dishes are never-ending and if you wash them at the beginning, even if you don’t stop, somehow, there will still be dishes at the end. So just let them soak throughout, keep adding any stray dishes into the pile, and wait. When it’s time to begin, dump out the water, rinse the vessels the dishes have been sitting in if there’s debris, and pile the dishes up next to the sink by type (plates, cups, bowls, silverware, etc).
• Cleanest to dirtiest: Wash your dishes cleanest to dirtiest. This not only keeps whatever sponge/dishrag situation you’re using the most sanitary, it also makes your life easier. Think about it, the soapy water will still be usable after washing a few spoons, but after washing the pot you made shakshuka in, it probably might not be! In order to lessen the need to replace the water you’re using to wash dishes (the warm, soapy water, I suggest washing cleanest to dirtiest. This usually means in my home we wash cups first, then silverware, then bowls, then plates, then pots/pans/cooking utensils, then baking dishes.
Don’t forget to wash things like your water bottle and spoon rest, they are filthy.
time for my quarterly reminder to bleach your water bottle it’s filthy
— bat v’lo ben. bat v’lo isha. (@alaraemnts) September 20, 2020
To actually wash your dishes, start with adding a dime sized amount of dish soap onto your sponge/dishrag and circularly clean your dish. Dunk it into the soapy water a few times throughout the process to help begin to rinse (this is not the final rinse, as soapy water would leave residue). Use your fingers to feel the item you’re washing–does something feel oily, or crusty? Then it’s not clean! get to scrubbing! Use the scouring side of your sponge to really get in there if you need.
• Rinse in vinegar/water solution: When you’re sure the dish is clean, then rinse it in the cold water/vinegar solution. It should take 2-3 dunks. Set the dish on a drying rack or towel until you’re ready to buff the dishes dry.
• Buff dry: If you can, I think it’s always better to immediately dry off and put away your dishes. If they need to sit out, the world will not end! But when I want a clean kitchen, drying dishes doesn’t fit the vibe. Use a fluffy towel and dry until you don’t see any more streaks! If you use the vinegar trick, this will be quicker than you think!
• If you have a dishwasher, loading it well is the key to getting your dishes clean. Here’s one way of going about it:
Closing
You’re basically done! Just like we cleaned our bedroom from top to bottom, you want to do the same in the kitchen which means we end with sweeping and mopping our floors. You should also wipe down your oven if you haven’t already! You learned how to do that in the bedroom guide, but there’s one more step that without it, I think you can’t have a truly clean kitchen.
• Clean Your Sink: I shit you not, there is nothing I love more than cleaning my sink after washing dishes. I have a long, trauma-related history with dishes (I know it sounds weird to say!) where a deep source of pain has become a healing/resetting ritual that I have written about before. And cleaning the sink is the final part of that ritual. I use bleach, because I love bleach. I spray down the entire sink and even the space around it, I make myself a cup of tea that I will take with me when I’m done cleaning the kitchen, and I light a candle. Then, after the tea is made and the candle is lit, I take my sponge and using the scouring side first, scrub down the sink (if you have a porcelain sink, don’t use the scouring side! it will scratch the coating). Then I rinse it down and wipe down any remaining suds towards the drain. I put away the sponge, I take my tea, and I turn on the little light above the stove. The kitchen is clean.
And now we’ve reset. The future is new and exciting.


Comments
I think reading about cleaning does for me what ASMR does for some people. This is so soothing and beautiful!
oh i LOVE THIS COMMENT! and also suggest you read “Home Comforts” if you like this kind of shit; Cheryl Mendelson is the Q U E E N of writing about housekeeping in a way that makes you want to read an 800 page book about it
I’m wondering who this guide is really for. There’s people who clean their kitchen regularly and those who don’t. Do the latter really get motivated by this insane list? Who actually cleans their oven regularly or empties their fridge?
Hey babe! The guide is for anyone who hates to clean but is interested in learning to clean, who finds cleaning scary/daunting and doesn’t know how to go about cleaning or anyone who loves cleaning and wants more tips!!
P.S. The DSM-V is the only “person” allowed to call me or anything I write insane! Let’s watch the ableism, Autostraddle is better than that!!!
and maybe for anyone who needs the vicarious sense of cleansing… stuff
thank you Ari.
Loved this article and this response, thanks Ari!
It’s not an “insane” list. It’s clearly meant to be educational, motivational, and soothing. No worries if it’s not for you but the writer didn’t do anything wrong here.
Hi! Ari and the other commenters have done a great job responding to this above, but as the editor of this series I wanted to chime in, too.
I specifically sought out Ari to write a cleaning column for Autostraddle, because their advice about cleaning and world building has always been very inspiring to me (they have been writing about this subject online for years at this point, and their expertise and generosity is one of the things that drew me to their work). As you can imagine, it’s not easy to write content about how to keep a home — a very personal endeavor — in a way that appeals to everyone. But what I love about Ari is they approach all levels of queer homemaker with the same level of care and respect. Perhaps you missed their column a few months back that spoke to the lack of moral judgment we should make on ourselves and others when we/they are unable to clean?
In any case, to answer your question, “who this guide is really for” — it’s for our readers. It’s for people who want to see what a deep clean of a kitchen can look like. It’s for people who want to pick and choose 1-2 steps from this guide. It’s for people who already have a routine set up who want to compare what they do vs. what someone else does. It’s for people who didn’t learn how to clean growing up who want some guidance. It’s for people who live with housemates who are looking for a chore chart to split up between a bunch of people. It’s for people who honestly just like reading about this stuff online and then go ahead and hire a cleaner to actually clean their place. It’s for anyone and everyone who enjoys it on any level. And if it’s not for you… that’s fine! But commenting and calling the writer’s list “insane” is both unkind and ableist, and it’s not something I as an editor will tolerate in the future.
So if you asked this question in good faith, now you have an answer. And if you asked it just to be rude, now you know what will and won’t be accepted in the comment section of this column (and everything I edit on the site) moving forward.
Thanks again to Ari for writing this column for us every month!
LOVE this, very much need to clean my kitchen, and yesterday they had kitchen washbasins at the Dollar (.25) Tree!
I love using a washbasin so much, not only for soaking but also, somehow dumping all your dishes in one bin makes the sink feel less full??
I was JUST thinking “the reason I haven’t cleaned my oven since I moved here is because I don’t know where to start.” So, THANK YOU
I got a Martha Stewart guide for Xmas and tbh this is blowing it out of the water
This article soothed my soul. I LOVE to take care of my home because it feels like taking care of myself, but when depression visits I have a tough time connecting to that joy and we start the cycle of things piling up, feeling bad about it and myself, avoiding, doing a massive clean and feeling better for a bit, then the cycle beginning again. Reading this piece filled me with peace, because it reminded me that a messy kitchen “is also a beautiful reminder about housekeeping in general: mess is a sign of a home being used. What’s more beautiful than that!” Cheers to a home that’s used and loved!
Okay this was extremely soothing and TBH, very helpful! As someone whose mental health can impact cleaning having a set list to follow like this feels comforting lol
Thank you for this! I’ve never thought about keeping the floor clean in the way you describe, but I kinda love it and I might try incorporating that into my low-intensity/more frequent cleaning habits
This was fun to read, and I can’t wait to dig into some of your previous Queer Homemaker posts! I hope y’all don’t mind if I take a moment to represent for Team Dish Cloth? I was not socialized with sponges growing up, and while I used them intermittently in college and in my early twenties, I always went back to dish cloths/dish rags, and that’s where I’ll stay. I would like to 1. explain why I like them and 2. share my method for keeping them clean.
1. I love how dish cloths are pliable and adaptable. You can spread a dish cloth out fully to clean a large surface, then fold the crumbs into it to remove them more easily. You can bunch it up to get the bulk you need to clean the bottom of a glass. You can use just the tiniest tip of the hem to clean the gunk out of any number of crevices. Depending on the type you use, I find that dish cloths have more texture to them, which gives them an extremely gentle scrubbing quality that I think cleans better than a sponge.
2. At the end of the night I slosh out the soapy water from my dishpan bit by bit and use my dishrag to give the sink a nice scrub. No candle, but still very therapeutic! I also wipe behind and around the faucet. Then, I rinse it out and hang it up to dry. Every morning, I put the previous day’s dish cloth into the hamper, to be washed on hot with all my other towels when I do laundry. Then, I take a fresh, clean dish cloth from the drawer and start all over again.
(Note: I mostly play for Team Hot Soapy Water rather than Team Disinfectant when it comes to everyday cleaning. If you’re curious to try it, just know that dishrags may not work well if you’re using bleach to clean the sink because the residue might start to eat through the cloth by the time you get to laundry day.)
You can get dishcloths in the home/kitchen section of most stores. I’ve gotten many good ones from the thrift store (run them through a nice hot wash before using for the first time!). You can use cloths that are specifically billed as dish cloths, or you can find wash cloths that you like the weight/size/texture of. (I prefer ones that have some texture like bumps or ribs, and are not too thick and not too thin. I’m a real Dish Rag Princess.) As my bathroom wash cloths start to thin a little and get frayed, I will often move them into the kitchen to serve as dish cloths before they ultimately become true rags.
In addition to dish cloths I also use a “green scrubby,” which is just the green part of a scrubber sponge with no sponge attached, sold alongside the sponges. And also a stainless steel scrubbing pad (like steel wool, but not as fine and not coated in soap). None of my cookware is non-stick! lol
If you were socialized with dish cloths like I was but need a little guidance, hopefully this helps you to up your game a little. And if you weren’t, hopefully this helps you see dish cloths in a new light. Go Team Dish Rag!
This article hit close to home (or should I say work!!):
Before I retired, I worked for a consumer products company formulating cleaners and other consumer products.
Chances are you may be using some of the products I have formulated.
In retirement, I still formulate all my own cleaning products and many personal care products……once a formulator, always a formulator…..
ALSO: if you want to print out your own version of my little checklist at the start (i keep it near my sink and use it as a daily reminder of little things i can do around the kitchen) you can download it using this link i think
I love this series so much, thanks Ari!
I’m currently not physically able to clean but still enjoying reading these articles and imaging a future where my space is clean and dust free.
I wonder whether you would be able to do a car/vehicle cleaning article in future? In the past I have kept a reasonably clean home but somehow I’ve never really known how to clean my car.
Thanks
I love these articles and every time a new one pops up, I keep it open in my tabs for when I need a cozy pick-me-up.
Housekeeping makes me feel calm and centered, it makes me feel like I’m creating a soft landing place for myself and the people who come into my life, and it makes me feel connected to my mother and my grandmothers who each–in very different fashions–built homes through their housework.
Sometimes it’s easier to call in the cleaning professionals if you don’t know how to do it well. Today there are quite a few such companies that are ready to help you with this. The main thing is quality. I was told about maid services in Bothell wa. They said that they were satisfied with the quality of work and attitude to the client.