

Welcome to the new DIYke Club! Some friends and I started a DIY/crafting group that gets together a couple of times a month. We try a fun drink recipe and do a craft we haven’t made before. We’re having a blast and thought you might want to get in on the action. Maybe you’ll start your own local DIYke chapter? Let’s all get liquored up and make things!
Header by Rory Midhani

For those not in the know, we made hardware jewelry at A-Camp 4.0! Who knew all you weirdo humans are so talented and creative? Spoiler Alert: I did. Anyway, I’ve seen tutorials for these washer necklaces on the interwebs but pictures are confusing so I made a video to help demystify the process. Don’t panic, there are still pictures.
Seriously though, what says, “I love Home Depot, but still care about my hair” better than a necklace made out of washers? And if you’re not convinced that’s what you want your jewelry to say about you, have a blackberry margarita and then we’ll talk.
Washer Necklaces

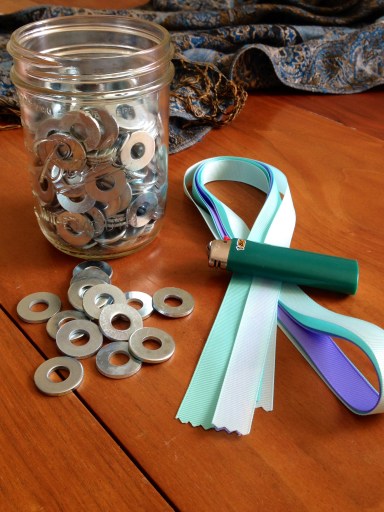
Supplies needed:
+10-25 of the 5/16th inch cut washers from your local hardware store
+1-2 yards 5/8th inch width grosgrain ribbon in the color of your choice (Again, quantity depends on desired length. I used 1 yard.) This can be found at craft stores and Etsy
+lighter
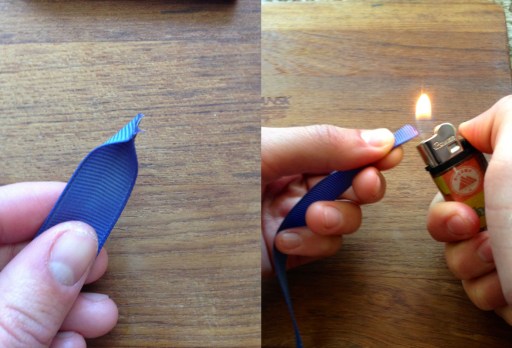
Step 1:
Pinch edges of ribbon together and gently burn with a lighter. This will make the edges hard and thus easier to thread your ribbon into tight spaces.
Step 2:
Slide one washer face first (if you can’t tell the difference between face up and down ignore this–it is only relevant to certain types of washers) onto the ribbon. Leave enough space at the end to tie the necklace in a bow around your neck. I left a little more than a foot.

Step 3:
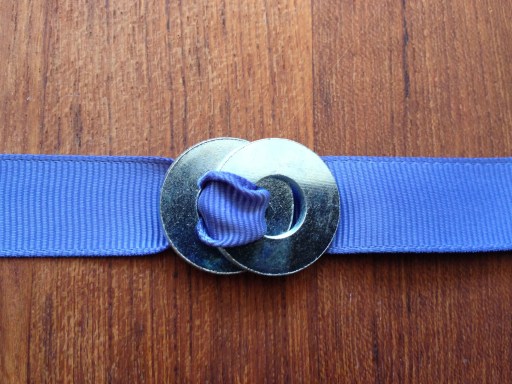
Slide another washer onto the ribbon, this time backside first. The new washer should neatly stack on top of the first washer.
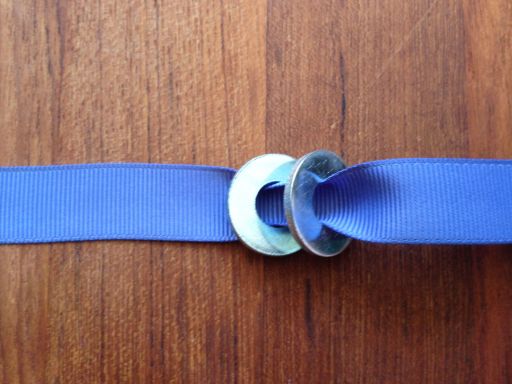
Step 4:
Thread the ribbon over the top washer into the bottom washer. As you pull tight, the top washer will flip over so it is also face up. Take your time to make sure your ribbon doesn’t get tangled or to straighten any twists that may have occurred in the ribbon.
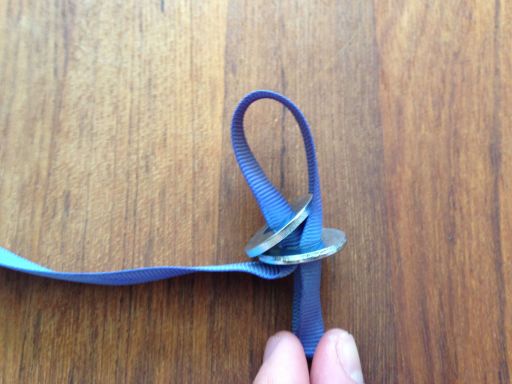
Step 5:
Thread the ribbon up through the space between the outside of the bottom washer and the inside of the top washer. As you pull tight take your time to make sure the ribbon doesn’t get tangled.
Step 6:
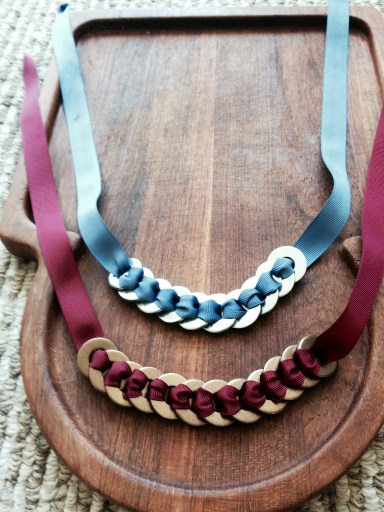
Repeat steps 2-5 until your necklace is the perfect length. I used 12 for the maroon necklace and 10 for the periwinkle necklace. Some people use upwards of 20 so it’s really up to you.
Step 7:
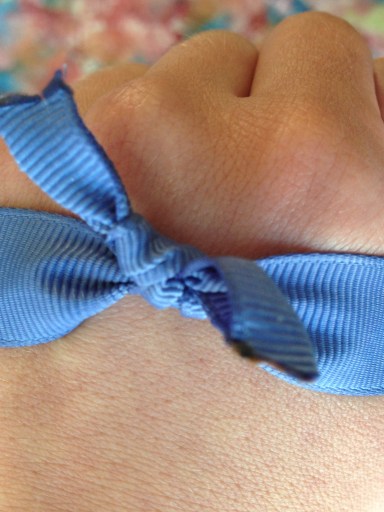
When finished, put the necklace on and tie in a bow or a gentle knot behind your neck.
Here’s the video I mentioned earlier in case this is confusing!
https://www.youtube.com/watch?v=x-H8KvWH0C0
Blackberry Margaritas
Prep time: 10 minutes
Serves: 6
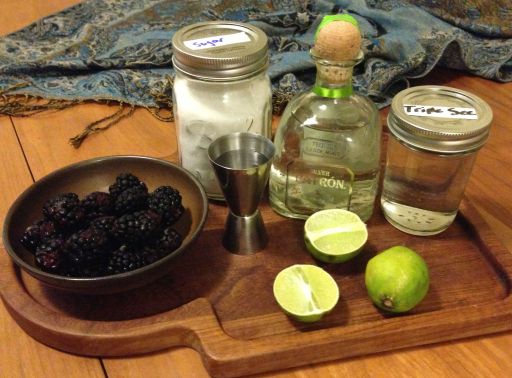
Supplies needed:
+ 6 shots Silver Tequila
+ 3 shots Triple Sec
+ 9 shots lime juice
+ 1 small package of blackberries
+ ½ cup sugar + 1 Tbsp
+ 1 cup water + 1 Tbsp
Step 1:
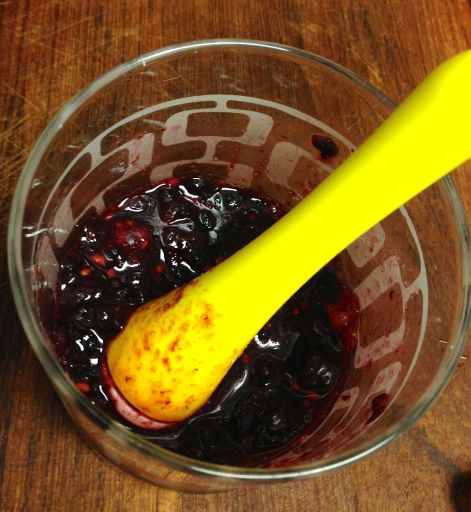
Muddle berries (with several reserved for garnish) with 1 Tbsp sugar and 1 Tbsp room temperature water. Set aside.
Step 2:
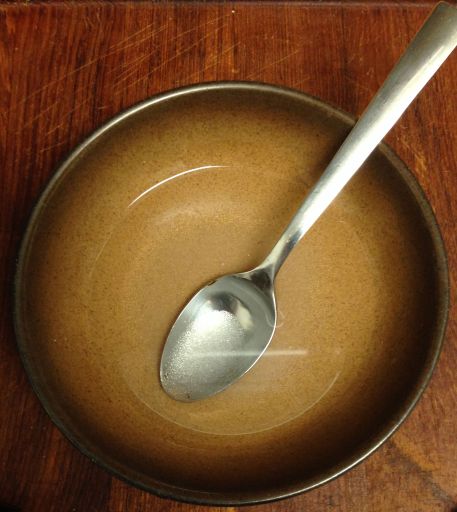
Make simple syrup by mixing ½ cup sugar with 1 cup boiling water and stirring until sugar dissolves completely. Set aside.
Step 3:
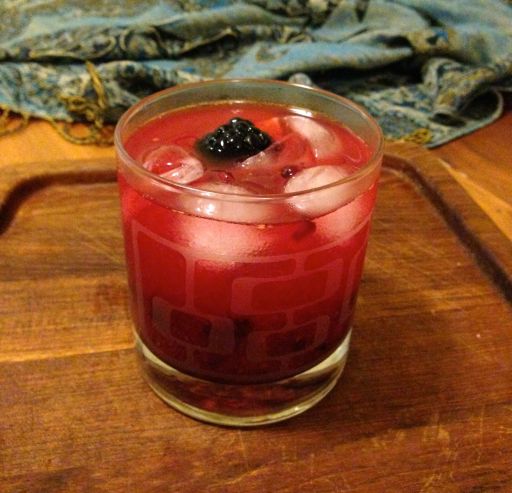
Stir together tequila, triple sec, lime juice, blackberry puree, and simple syrup. Pour over ice and garnish with blackberries.


Comments
Yes! I wear the washer necklace I made at A-Camp all the time and get lots of compliments (and I feel pretty fancy, I must say, being able to respond with, “Thanks! I made it!”)
When I make more in other colors, I’ll definitely have to do so with some blackberry margaritas involved.
Those necklaces are so cute! I can’t wait to make one.
yes hello, i would like all the blackberry margaritas please.
I LOVE my washer necklace that I made at camp. Though I actually forgot about it until this post. So, thank you. I can’t wait to wear it out :)
ps. Those margaritas. I need them like now.
i was so sad to miss the hardware jewelry workshop at camp, so i’m really amped about this post! everyone’s bracelets and necklaces were THE CUTEST. super excited to make my ownnnnn.
thanks liz!!
Im so glad you posted this! I couldn’t attend the workshop at camp and really wanted to.
and omg those blackberry margaritas look like heaven.
Very creative.The washer necklace is actually wearable and my favourite colour too…
Okay, okay, okay. Best idea ever. Making washer necklaces after drinking all the blackberry margaritas which are by the way extremely yummy.
This post seems life everything I need in my life right now. It is screwing with my bookmarking system though- crafty folder or cocktails folder?
Oooooh, I want this washer necklace so bad. No – I want several. Copper, brass, stainless steel, in different colours and sizes to match different clothes. What a wonderful idea!
Am I the only one who always see DIYke Club posts as the perfect date nights? “Hey, wanna make blackberry margaritas and make cute-ass necklace together?” I love it!
Was wandering where you purchased the bronze colored washers and what they are made of? Can’t seem to find any at my local hardware stores.