

Welcome to the million billionth installment of Make A Thing, where people stop being polite and start getting real. I’m just kidding, this is the most polite column and we make handmade gifts for people! Or ourselves. Or our cats. Mostly our cats.
Header by Rory Midhani
I haven’t written to my Autostraddle penpal in awhile (Hi, Katy! I’ve moved twice, I’m so sorry) but I still long for handwritten letters showing up in my mailbox. Sometimes those letters involve dinosaur stickers. Sometimes they involve lovely stationary. Everyone loves getting personal mail, it is a fact of life, along with the realization that everyone loves kittens and Orange is the New Black. It’s just something we accept.
Additionally, giving someone a card or letter is an extremely personal gesture, as it’s basically telling someone their words are worthy of leaving their brain and coming to you in tangible form. Or, perhaps, you just think your girlfriend needs to write you more love notes. Ain’t no shame.
Handmade Envelopes and Cards
I wanted to make handmade envelopes because 1) all of my envelopes are boring white or ivory, 2) most of the people I care about in the world don’t live in my town and deserve to be caught up with not over text or email but by handwritten love notes, and 3) I think they make a lovely gift. They’re extremely easy to make, but they’re impactful in their simplicity – easy but thoughtful. What more could you want in a gift?
Supplies Needed:
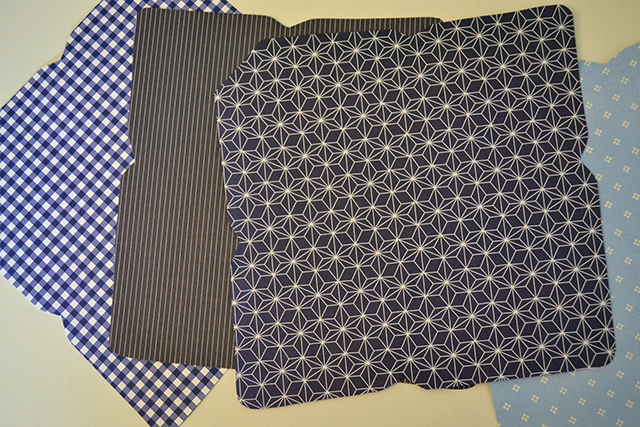
+ Pretty paper (I used standard scrapbook paper)
+ Envelope of the size you like
+ Pencil
+ Scissors
+ Glue
+ Cardstock
Level of Difficulty: My three-year-old niece is learning French in school and her new thing is to ask, “What is that word in French?” And usually I have no freaking idea, but I know it doesn’t matter because she won’t remember it but lying to her about French instills a lot of guilt in me. So this craft is easier than coming up for a French word for “Totally!” at 3am when she wakes up crying in the middle of the night because she wants her water bottle refilled.
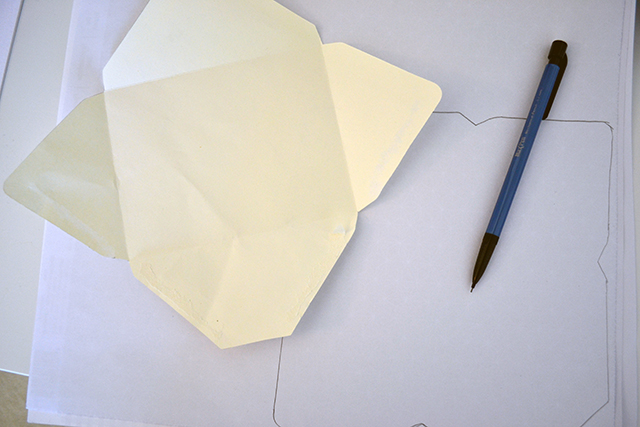
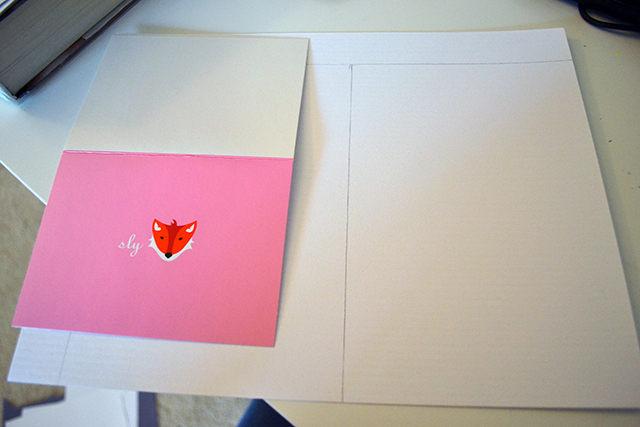
1. Find an envelope of a comparable size to what you’d like your new envelope to be. Take it apart and trace it on the back of your pretty paper.
2. Taking the envelope, outline the top section. It occurred to me after doing this that I could have just used the regular outline from the piece and moved it down slightly rather than tracing a whole new outline an eighth of an inch away from the actual borders. So, you could just do that, I suppose.
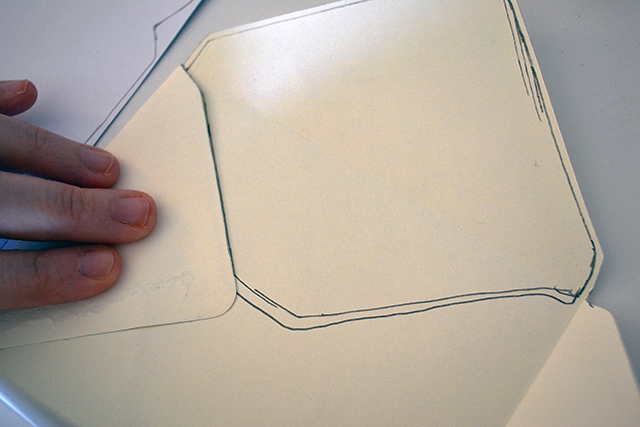
3. Trace your top section onto the piece of paper.
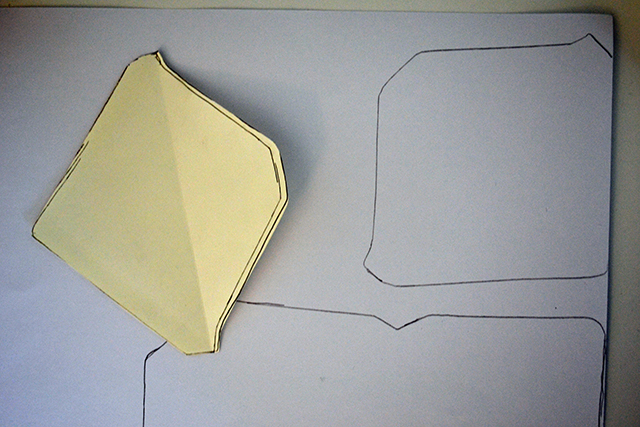
4. Cut it all out!
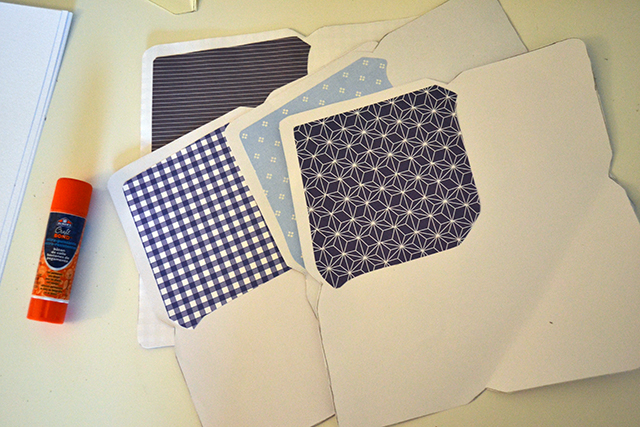
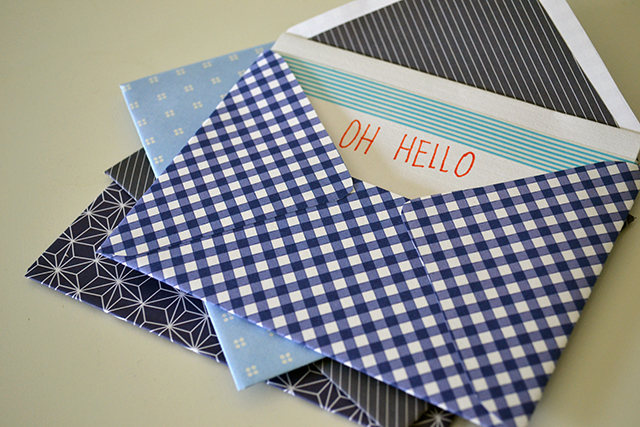
5. Glue the top sections onto the inside top flaps of each envelope. I chose to do this in complementary patterns, but you can match your patterns up if you’re really feeling partial to that way of life.

5. Fold your envelopes in along the inside lines, creating a rectangle in the middle. You know, like a regular envelope.
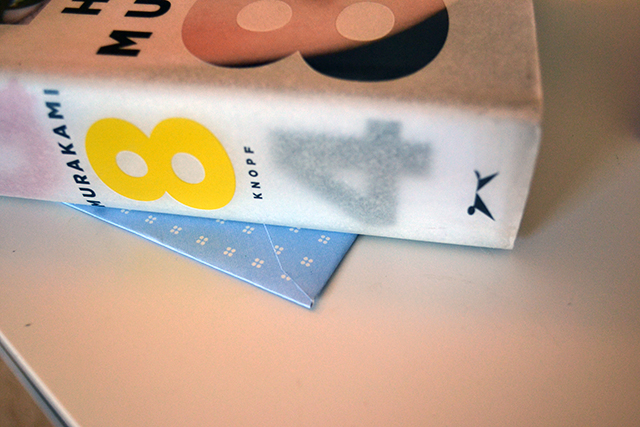
6. I kept my envelopes pressed under a heavy book (jsyk, 1Q84 is perfect for this mission, thanks Murakami!) for an hour or two to make them super flat and nice.
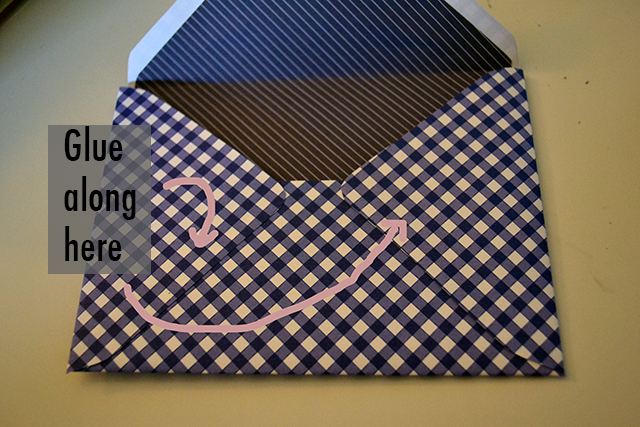
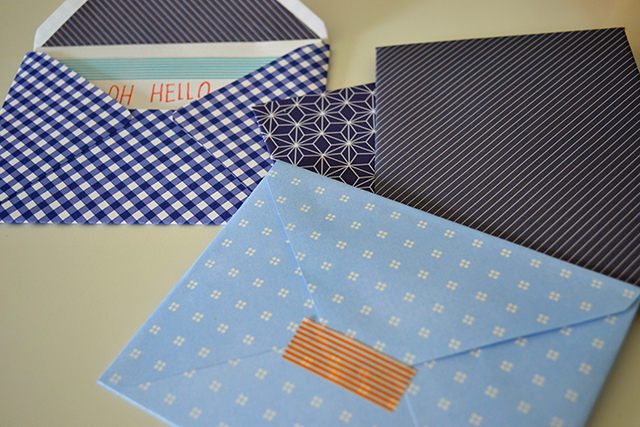
7. Glue along the inside edges of the bottom flaps.
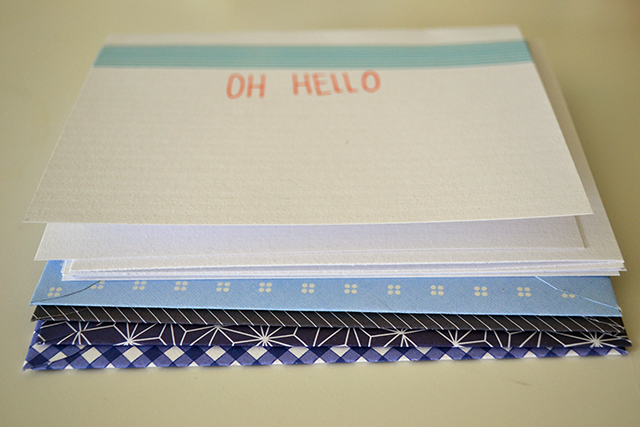
8. I traced the matching card to my envelope onto cardstock to make matching cards for my envelopes. Cut those out, fold them in half, and decorate them.
You’re done! Close your envelopes with glue, tape or a sticker and voila! They’re ready to send on out.


Comments
Amazing :) Love it!
Hansen,
Let me tell you a story of why you are perfect. Just now I was making my list of things to do for the day and one of the items was “Mail my girlfriend the card I made her”, but alas I did not have an envelope and so I was going to have to wait until I could buy one. Then this was published. Your timing is impeccable and you are wonderful, as are these envelopes.
<3
Those envelopes though, so cute!
Though I’m no dedicated crafter, I’ll defs try making these sometime.
These are so ADORABLE, I want to hug these envelopes!
I literally just dropped everything I was doing to go make one of these envelopes for my lady penpal friend. They’re so cute!
Now I can make envelopes for all the zines/comics/love letters/lust letters I send out! Everyone who receives mail from me is now thanking you Hansen!
Heads up: Looking for more pen pals. Will send comics and zines.
This is wonderful! Thank you so much for teaching me this :)
Handmade envelopes are one of my all-time favorite handmade things! And I am loving the use of washi tape in the penultimate photo.
cute! I am always making cards and have no envelopes that fit them. Yay!
It can also be really fun to use magazines/thrifted books for these. Big pictures especially. And then agonize over the exact placement of your folds to frame it perfectly, address placement, etc. Collage it and suddenly celebrities are blowing bubbles across famous landscape paintings, etc.
Alas these envelopes are way beyond my crafting skill level, the number zero.
They ARE adorable though, and i love them much more than any envelope ive ever seen for sale. ever. PROPS!
I was in a pinch once and ended up with notebook paper and band-aids.
These look like a much better/put-together/adult plan.
Those are gorgeous. I love the fancy paper that was used.
I’m always doing homemade cards and envelopes for my niece for birthdays and holidays, but I never thought of putting the extra bit of paper on the inside. I’ll have to remember that for next time I make an envelope.
I wasn’t even sure I what I was looking for, but this is exactly what I needed.