

Welcome to the millionth billionth installment of Make A Thing, where we make handmade gifts for people. Or ourselves. Or our cats. Or our nieces.
Header by Rory Midhani
Hello thing-makers! We’re going to do something a little different today and turn Make A Thing into Made A Thing. Just for today. It’s okay. Let us go on a journey together, into the wild, wild world of making other people’s things and then giving sage advice on how to make those things. Usually when I make other people’s things, I change a few things and then I feel good about how fabulous I am as a thing-maker and can give you guys my own tutorial. However, with these dolls I pretty much just followed the directions exactly and loved how they turned out.
I decided to make a pair of Black Apple dolls for my niece’s third birthday. This was mostly a selfish endeavour, in that everyone else was going to buy my niece Minnie Mouse and My Little Pony things and I wanted to set myself apart as the Aunt Who Makes Cute Shit. Plus, I’m a huge Black Apple fan. To be fair, up until a week before her birthday, I was her most-of-the-time nanny, so I figured I needed to really be on my A-Game for her present. These dolls are really popular, really cute and seemed easy enough to make.
I followed a tutorial Black Apple creator Emily had made for Martha Stewart and I went to town. By went to town, I mean this tutorial has cute little drawings for what you should do and mostly they make sense but mostly I cut things out wrong, ripped holes in my doll legs and procrastinated for like four days before drawing faces on them because it’s easy to accidentally make your dolls super creepy and the thought of this stressed me out.
Here’s what I learned in this journey into Black Apple doll-making:
Double stitch everything.
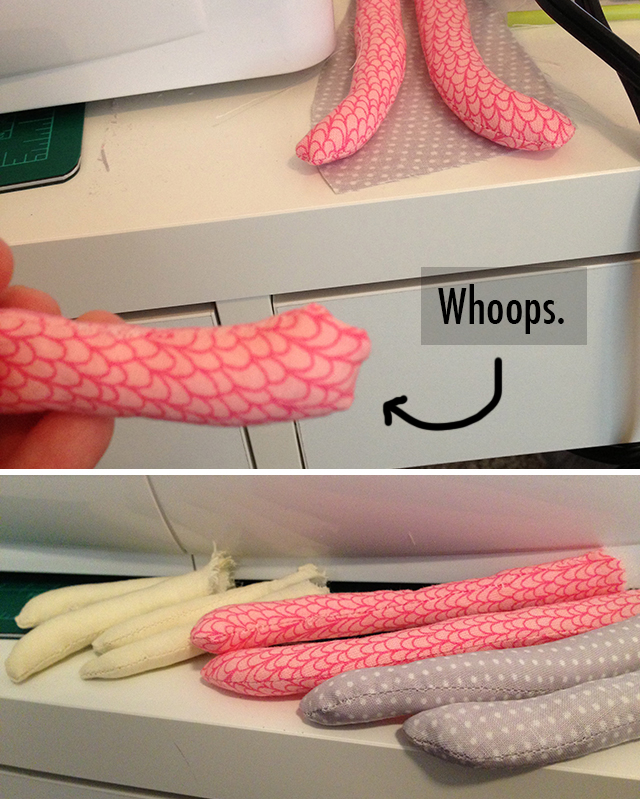
The feet and hands are difficult to sew if you’re an impatient person. Some of mine turned out really wonky and I had to cut and sew extras.
Use chopsticks for turning the legs inside out and putting stuffing into tiny arms and corners.
Think you’ve sewn well enough? Think again. There’s nothing worse than stuffing one of these things and having a hole and having to flip it back inside out (those fucking legs, you guys). Check weak points by poking a chopstick or pen around inside before you turn it right-side-out.
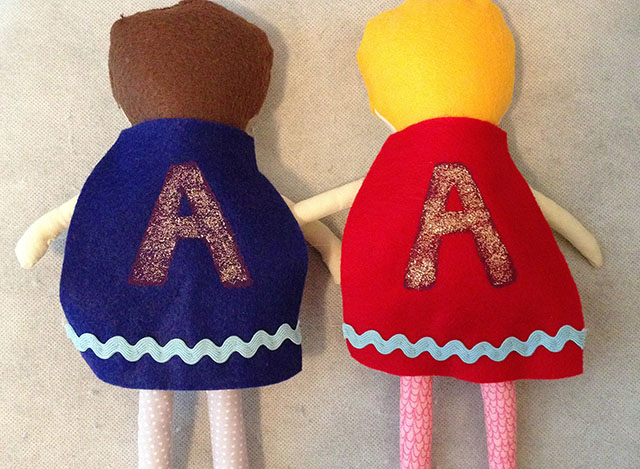
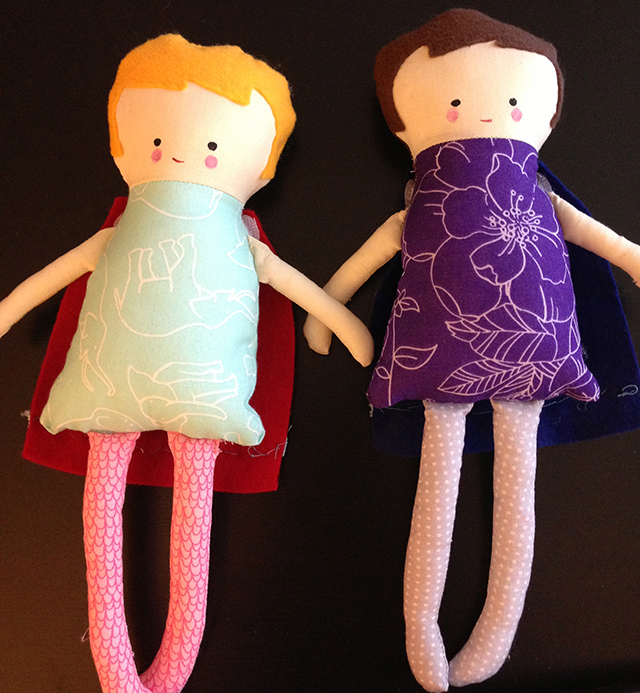
Accessories make these dolls not boring/creepy. I decided to give my niece’s dolls superhero capes to instill a love for badass things while she’s still young. I cut the superhero capes out of felt and decorated them with ric-rac and glitter paint I had leftover from the garlands. I attached them with velcro. Put the soft velcro side on the doll, so when the capes inevitably get lost, the dolls are still cuddle-able. Personalization is key; even if the person you’re making this for won’t notice, their parents/grandparents/everyone around will think you’re really clever for these additions.
Buy fat quarters for your fabric to save effort/money.
Use a large pattern on the fabric for the body and a small pattern for the stockings for optimum cuteness.
Please, do yourself a favor and resew that part. Every part. Maybe one million times.
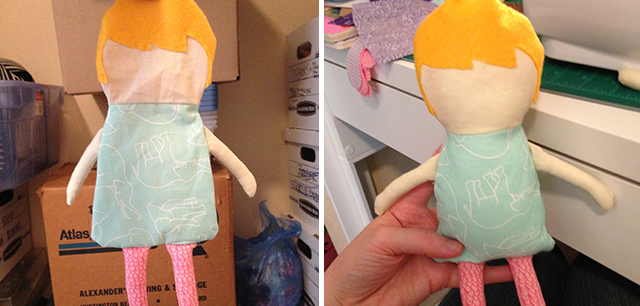
Don’t judge the way they look until you stuff them. I recommend stuffing way more than you think they need.
If you’re giving these to a small child, give the doll the toddler-test. Pull really hard on every arm/leg/head situation and see if anything comes undone. If so, blind stitch it over again. This ensures you won’t have a doll with missing limbs within three hours.
Ultimately, don’t stress about imperfections. These are dolls and they are meant to be loved and cuddled and pulled on and strapped onto bikes and dropped in the dirt, even if you’re giving it to an adult. And they’re washable!
For faces, I used acrylic paint on a q-tip for the eyes, a lip stain pen for the mouth, and acrylic paint for the cheeks. You can just save yourself the trouble and use paint for all of it like Emily recommends, but drawing with a pen/q-tip seemed so much easier.
Here’s how mine turned out in the end. My niece has already lost one of the capes, but for the most part they’re still going strong almost a month later! Their official names are Blue Dolly and Purple Dolly, so says their owner.
Go ahead and make a Black Apple doll with the Martha Stewart tutorial, which includes templates and adorable hand drawn directions for the ultimate adorable crafting experience. Then go check out everything else Emily does because she’s fantastic. Maybe you’re already a doll-maker or plush-mountain-maker extraordinaire? Share your tips!


Comments
These might be the cutest thing ever!!! Also I feel your pain when it comes to those ski by arms and legs!!! Whew, I have been there!!! You are amazing!
Ohautocorrect thanks for always making me look like such a doof! *skinny arms and legs*
I want one. Or two. Or seven.
ugh, super cute!!!!!! also ps used my sugar scrub that you made for me the other day. i smelled like the best cookies ever!!
Yay! I’m glad you liked it! I’m really surprised you used it and didn’t put it in a cookie recipe but now you smell like cookies which is almost as good, in my opinion.
These are the cutest. Will you be doing a Make a Thing article for Father’s Day like you did for Mother’s Day? That was probably my favorite article last month, and it inspired me to make an awesome gift!
Oh shit, when is Father’s Day?
I mean, yes. Yes, I will be doing that for Father’s Day which Google just told me is June 16.
This is so cute stop it.
I make angel dolls based on a pattern by Yvonne Porcella. Yes, yes, yes, double or triple stitch the seams, especially around the hands & feet. Enlarge the pattern if it’s all too too teensy for you to work with. A “bow turner” makes turning the arms & legs infinitely easier and is less likely to poke holes. I use commercial batik fabric to make them look otherworldly. And I print rainbow hearts on inkjet prepped silk (find it in the increasingly-large crafty section of the fabric store), which I then iron on to their chests. Yes to over-stuffing them – I start with polyfil, and then pour in the pellets for beanbags. And then I take wild & crazy novelty yarn and make a full head of wonderful hair. No faces.
I mean this is a pretty good article and all, but I guess I’m disappointed in the lack of hot-glue googly eyes. JK add this to the list of cool things that one day I might make.