
Hello beautiful, and welcome to How To Own It, where store-bought fashion meets DIY crafts. Each week I’ll be exploring an aesthetic theme, showing you some of the best ways to wear it and how to make it for yourself.
Header by Rory Midhani
Confession: I’m in a life-long love affair with stripes. Stripes are fun yet reliable and are therefore my go-to when plaid is out of season and polka dots feel like too much. Recently, though, I’ve been getting sick of stripes, yearning for something a little more exciting, a little more dangerous — but not so dangerous that it doesn’t feel like me. Luckily the fashion goddess was listening, and began mass producing chevron.
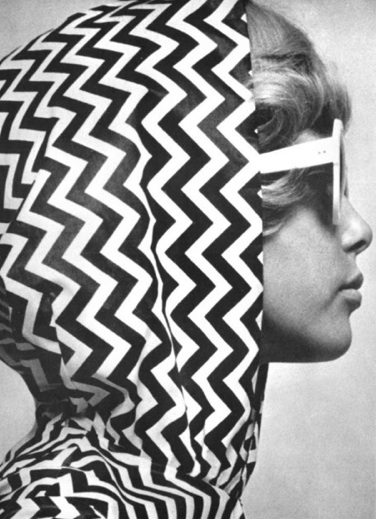
Chevron is basically stripes’ queer sister: they’re from the same family, but chevron changes things up a little. It zigs and zags while stripes stay, well, straight. You can wear it in pretty much any form. These are some of my favorites:


DIY Chevron Statement Necklace
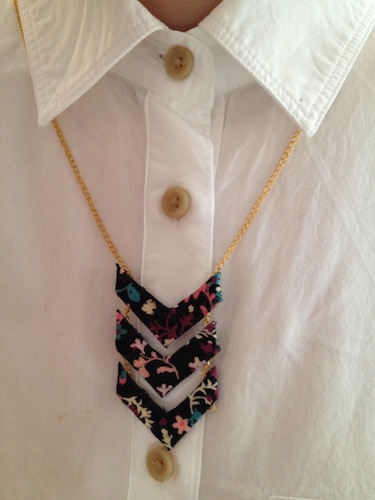
I’ve been noticing a lot of cute necklaces on Etsy that feature a single V from chevron repeating vertically, and it inspired me to try to make one. Several of you expressed concern a couple of weeks ago when I painted over floral print for a collar, so this week I’m going to make it up to you by using the rest of that floral pattern. You don’t have to use a patterned fabric if you want a more simplified look.
You will need:
Cardboard
Fabric
Fabric glue
a long chain
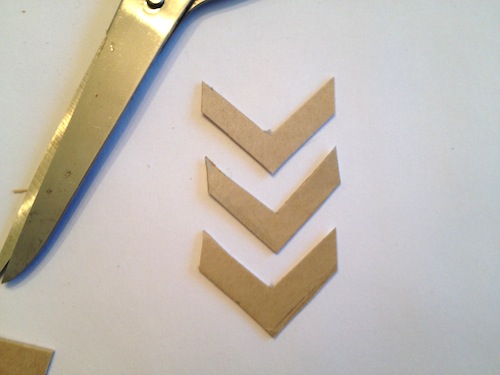
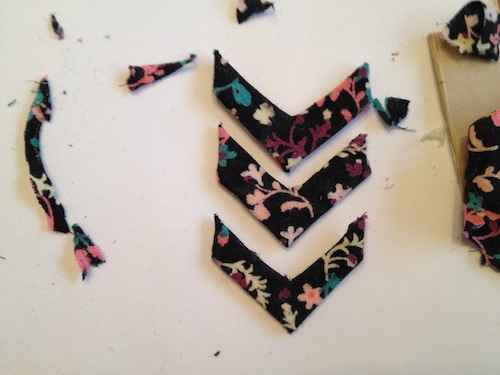
1. Cut the cardboard into three same-sized right angle Vs. The ends of each V should be vertical lines.
2. Cut a piece of fabric into a rectangle that the V fits on. Cut a slit halfway down the middle of the fabric rectangle so that you can fold it over the cardboard. Then, wrap the cardboard in the fabric like a present, glueing it down to the back.
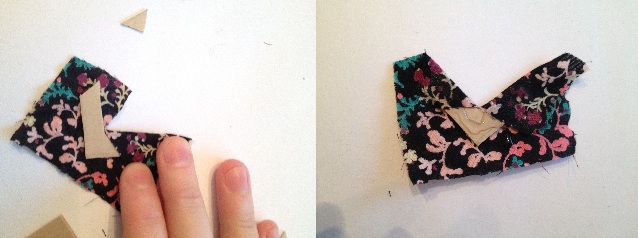
Cut away any pieces of fabric that show in the front so that all the folds are on one side. Repeat for all the cardboard shapes.
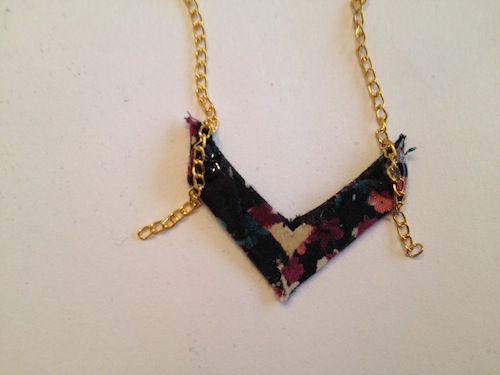
3. Take a chain long enough to fit over your head and glue the ends of it down to the corners of the back of one of the Vs. It’s okay if the chain shows a little bit at the bottom, you can always cut it later.
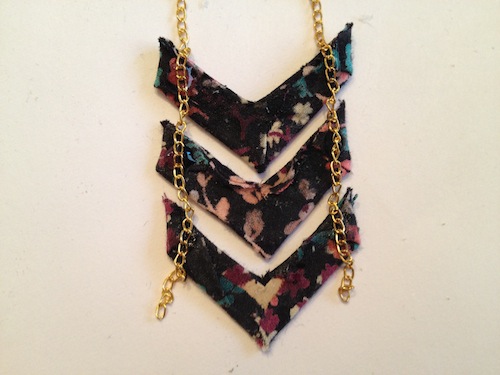
4. Stack the rest of the Vs vertically with an equal amount of space in between them. Glue the chain up the sides of the stack.
5. Let it dry!
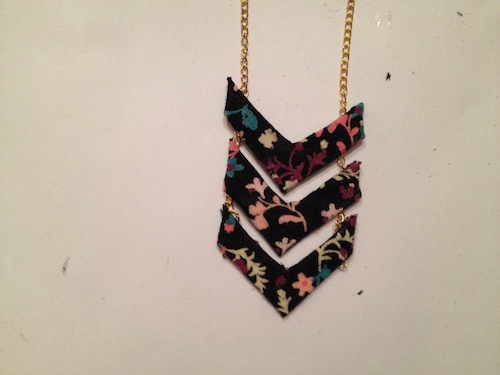
6. As per usual, I’m going to wear this with a soft button down, buttoned to the top. Happy zig zagging!


Comments
I gotta pin it.
It’s like the queer heavenly spirits KNEW I’d been talking myself out of buying myself a chevron necklace.
Gonna do this, but maybe with gold lame fabric instead?
gold lame chevron sounds super fierce, i would like to see this happen
Ooohh good call. I’d love to see that!
Plaid can be out of season?!?
I asked myself the exact same question. I think the consensus is no, flannel is never out of style.
Well I’m glad we cleared that up!
I stand corrected!
That would mean Ellen Page would be “out of season”…NEVER!
I didn’t even know what chevron was, but now I’m so into I’m going to go a coffee shop and use the word at least three times
I’ve been thinking about making a chevron necklace for awhile and this one looks perfect! So cute!
I was slightly disappointed to see that this was not, in fact, related to Stargate…but I do dig that first sweater!
Now I understand the logo for the fuel company…..huh.
My mind is blown.
I’ve been into chevron for a while! I painted an egret with a gold on white large chevron background once, to donate to an auction for a children’s organization. On the description, I wrote “Egret painting with gold chevron background.” The lady looked at me like I’m a nutter, and then told me I better clarify. I thought chevron was a well known pattern!
chevron i know, but i had to google egret. for the folks at home, it’s a bird.
YESSS this is gorgeous i’m so glad you found something so cool to do with more of that cute floral print!!
this necklace is one of those things that sounds really weird to me described but looks SO COOL. it looks perfect against that white button-up!
CUTE!
I, too, am enamored with chevron. I know it’s probably a fashion phase but I don’t care!! It’s wonderful!
I have a proposal for another how to own it – tie dye! I want to start making tie dye stuff because it looks like fun but it’s definitely not in fashion.
Can autostraddle implement a rule that Gabrielle must include a photo of her cute self sporting her creation in each of the “How to Own Its:”..?
please?