

Welcome to We’re All About It, where we talk about investment-worthy things that are going to make your adult lives 100% more amazing.
You know those documentaries about people who fall in love with inanimate objects, like the woman who married the Eiffel Tower? Well, this is a love story too. Not quite to that degree, but I’m not going to lie… I’ve thought about inviting my KitchenAid stand mixer into my marriage.
Almost. I mean, it was my marriage that led to my ownership of the mixer, after all.
My wife Kristie and I gleefully registered for all kinds of wedding gifts prior to our ceremony two years ago, from a vacuum cleaner to a camping tent. I was looking forward to unwrapping the mixer most of all, however. There was something that felt so pleasantly domestic about it. I could picture myself in a half-apron, a charming dash of flour absentmindedly wiped across my forehead, making from scratch some kind of nourishing, perfect dinner — my trusty mixer standing by. For better or worse, I felt like I would be accessing some kind of time-tested tradition of providing for one’s family via the kitchen. Frankly, it reminded me of my grandmother. She’d passed away only a few years before my wedding, and the idea of holding court in the kitchen with a standing mixer, as she had, made me feel closer to my memories of her.
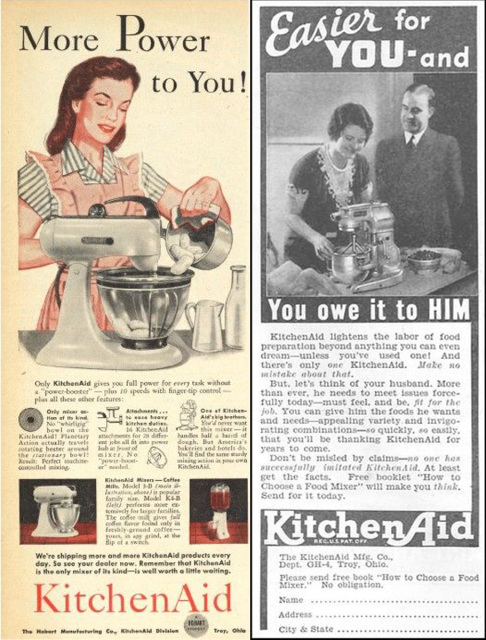
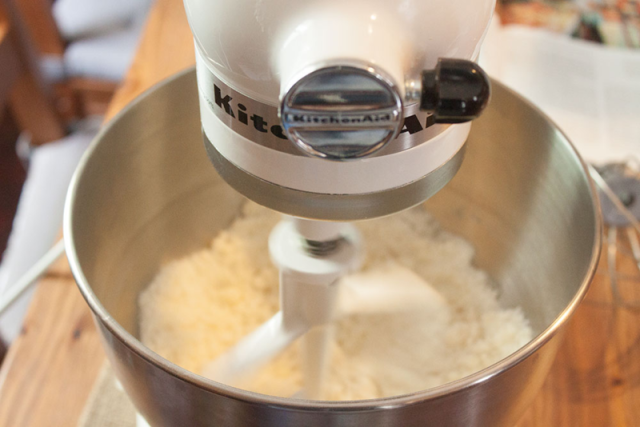
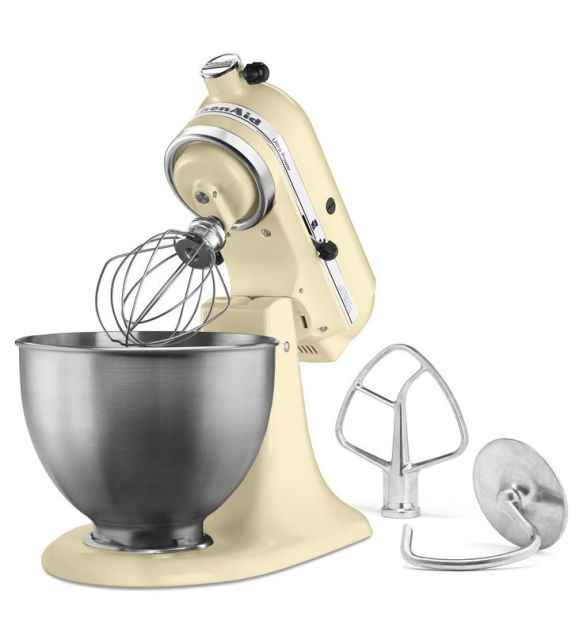
The appliance’s iconic design hasn’t changed much since its debut in 1919, and the colors available today evoke retro, pin-up style (look to Green Apple, Majestic Yellow, and Pink). My heart ached for a machine in Pistachio or Almond Cream, but I opted for the classic white, knowing that while we wouldn’t be cooking in our hideously red rental kitchen forever, I should probably match it for now. (And Pinterest abounds with tutorials on how to spray-paint your mixer in case you ever want to switch it up.)
Engaged friends of mine recently asked if it’s worth it to register for a mixer. Aside from baking French macarons, what do I really use it for? Sentimentality and love of timeless design aside, this machine is a beast. We have the KitchenAid Ultra Power 4.5-Qt Stand Mixer that comes with three attachments — a whisk, a dough hook, and a flat beater. Lots of other attachments are available online, but honestly, we’ve never needed more than these three.
I use the mixer for French macarons, yes, but also for things like mashing potatoes, blending brownie/cookie/cake mix, creaming butter, shredding chicken, kneading bread for dough, making frosting, beating eggs, and more. It’s satisfying to flip a switch and watch ingredients transform before your eyes—but even more satisfying to spend that time preparing other ingredients for your recipe, or getting a head start on dishes. That extra time (and energy) saved means more of my attention can be given to other aspects of cooking and baking, making me a better cook—and, like, probably a better person to be around since I’m not exhausted and cranky by the time the oven timer finally dings. As the KitchenAid motor whirs in the background while I’m cracking eggs or chopping vegetables, I know my ingredients are in good hands (or robot claws, whatever), and I can happily focus on other tasks.
So I practically shook my friend by the shoulders when he asked if it was worth registering for. While I think a good standing mixer really is crucial for finicky pastries like French macarons or meringues (and you should totally try making them), I’m surprised again and again at the ways the mixer comes in handy. The good warranty even scored us a new whisk attachment after I (genius, hello) stuck a spatula into the original one while it was still rotating.
Nowadays I usually forget to put on an apron before I cook or bake, and the amount of flour on my face is far from charming. But we’re going on two and a half years of marriage, and the mixer is more than keeping up.
Price: $299.99 – $359.99
Good for: People who like to cook or bake at home
Want a recipe to try with your new mixer?
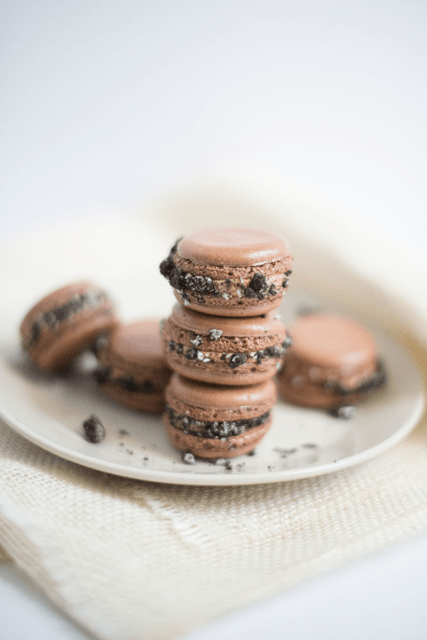
Make Your Own Chocolate Peanut Butter French Macarons
Originally published on The Homesteady
You will need:
- 115g aged egg whites at room temp
- Pinch of cream of tartar
- 150g superfine sugar
- 165g almond flour
- 165g powdered sugar
- 25g cocoa powder
- Peanut butter
- Oreos (or their gluten-free equivalent, which I used here)
1. Weigh all of your ingredients ahead of time and have them set out and ready to go. Line your baking sheets with parchment paper or silicone baking mats. Prepare a piping bag or Ziploc bag open in a tall drinking glass with scissors nearby. Preheat your oven to 350 degrees F.
2. Sift the almond flour, cocoa powder, and powdered sugar together. Do this twice. Reserve the larger almond pieces that won’t pass through the sifter. If you have more than a tablespoon left over, try sifting them through one more time.
3. Using the whisk attachment of your stand mixer, whisk the egg whites until they become foamy. Add the cream of tartar and continue to whisk on medium-low until stiff, shiny peaks form. Slowly add the sugar.
4. Switch to medium-high on your mixer and continue whipping until stiff, dull peaks form. Check your egg whites periodically until you have a stiff meringue.
5. Turn off your mixer and remove the whisk. Add 1/3 of your dry ingredients and fold in with a spatula. Combine the rest of the dry mixture this way, folding until incorporated. Continue folding until the batter falls off the spatula in a ribbon-like drizzle, disappearing back into the rest of the batter within 30 seconds.
6. Transfer the batter into the prepared piping bag. Snip off the end and pipe 1″ rounds onto your prepared sheets. Once all of the piping is complete, bang the trays on a table or counter a few times to release any trapped air bubbles. Let the trays sit out until the tops of the cookies feel dry to the gentlest of touches (about 30 minutes for me).
7. Bake the trays one at a time for 10 minutes, rotating once halfway through. Transfer the parchment paper or baking mat to a wire rack and allow them to cool completely.
8. Pipe peanut butter into the center of half of the cookies, and sandwich them together.
9. Crush a few Oreos and roll the edge of each macaron in the crumbs.
10. Store the macarons in an airtight container in the fridge. They are best after sitting at room temperature for about 10 minutes!


Comments
SO INTO THIS.
Someday I’ll have counter space again. Someday.
I present to you, the love of my life : the Magimix 4200. http://www.amazon.co.uk/Magimix-4200-Food-Processor-White/dp/B000BWH8P2
it’s super expensive but I got mine second hand for 50 bucks, ha!. It lasts forever. My mom bought hers like, 20 years ago and it still works as new.
I love you Magimix <3
This is just upsetting because I don’t own a kitchenaid mixer and I lust after them so much.
I want one so badly! Thanks for making it feel worth it to want it!
Honestly this is the most compelling reason to get married in my mind right now. And I’m not anti-marriage–I’ll also be into it for a variety of legit reasons when I’m in the right relationship. But mostly I’m looking forward to registering for a KitchenAid stand mixer in a cute color like lavender or mint green.
My GF got me a Green Apple one this last Christmas–I was not expecting it.
I love it.
I have the three attachments, too. Do you use the whisk to shred chicken?
I’m forever irritated that KitchenAid stand mixers are nearly three times the price in Europe that they are in the states. If they weren’t so exorbitantly expensive, I would definitely buy one, but I can’t really afford to spend €500 on a mixer, at least not if I want to be able to go on holidays ever.
So when I was a kid my dad basically forced one of these on my mom because she doesn’t like gadgets but she made all of our bread and it was exhausting. She soon realized that it was a life-saver. We’ve gone through several different ones since then, usually replaced by the warranty, and we use it for everything. You can even get extra attachments that will slice vegetables for you! When I’m all grown up and have my own kitchen I definitely want one of these.
We have been drooling over kitchenaids for the last 20 years. Finally, we were in the store buying a new vaccuum last weekend, and there was a stand mixer for $199! We have never seen one under 300, ever. So, we hemmed and hawed around for about an hour, and finally put it on my charge card.
It is so great! Everyone gets fresh whipped cream on their desserts! Today, I am doing home-made mayo.
Thanks for writing about this!
As a food blogger, I have hemmed and hawed over getting one of these as the years go by. I’ve worked in bakeries and can attest to the ease of having big mixers whizzing away while getting other tasks done, and it definitely makes recipes easier. But the only reasons why I’ve held back are counter space and the fact that I’m not sure which mixer I’d pick. I have a Kitchen Aid hand mixer and the motor is not quite strong enough (to my liking, at least) and I know other brands have stepped up their game in recent years in terms of durability and motor strength. I’d be curious to hear other’s thoughts on other brands of mixers as the only reason I bought Kitchen Aid was brand loyalty.
I’ve said for years I will officially become An Adult when I finally get my hands on a baby blue Kitchenaid mixer.
Also, I’m all about that macaron recipe. Autostraddle just always knows what’s up.
I bought an orange KitchenAid from eBay for my 16th birthday, and have found that I don’t use it as much as I thought I would. But maybe now that I’m out of school, I’ll find more time to use it.
My life will be complete when I own a stand mixer, a food processor, and a really nice vacuum.
#oldpersongoals
SAME.
I also specifically want a wicker picnic basket with china crockery. Why?! Who even knows.
#frivolousoldpersongoals
I lived on crappy second hand vacuum cleaners all through uni and start of my working life, then I got my own Dyson and it was a whole new world. It was almost as if cleaning wasn’t *that* bad.
Yeah, my mom had a dyson when I was growing up, and I totally seen why people will drop half a grand on one. I just don’t ever have an extra half a grand.
Tbh I’d probably bake a lot more often if I had one of these. Like you said, all that effort mixing by hand makes me kinda grumpy after I’m finished.
I’d love the Green Apple color…but knowing me, my whole (future) house is probably going to be green haha.
My mother got one of these when she married my dad 30 years ago. about two years ago, she gave it to me to use because it was making funny noises and I was told I could use it until it died. I tightened up joints and…it is still living. My girlfriend and I use it least once a week making challah, cookies, or brownies.
Best wedding present my mother ever received, and coolest hand-me-down I’ve ever gotten.
I love kitchenaid mixers! my mom has one and I used it constantly but now that I live on my own I miss it so much. Right now all I can afford is a hand mixer and it is so much better than nothing but I can’t wait till I have my own kitchenaid
One day. ~*one beautiful day*~
I have my Mom’s old one because she thinks she blew the motor so it doesn’t work right. It’s fine, except if you have a thick dough. (read: I can’t make gingerbread men and that is the only downside) AND I LOVE MY MIXER SO MUCH. I use it to make many things, including PEANUT BUTTER FROSTING.
I make so many baked goods with my mixer I LOVE IT SO MUCH. The only downside is I have a drop bowl instead of the ones with the lifting heads so it’s harder to get in there and scrape everything down, but I just got a paddle with little squeegees on the sides that I’ve been dying to try out! No more spatulas!
My family was always had a Sunbeam Mixmaster. Loved the old style ones that looked like space ships and and detailed information on what each mixing speed was for… like this wonderful specimen https://www.youtube.com/watch?v=miZS1dl_R7E
You want to make a good sponge cake you’ve got to have a standing mixer. Also make meringues and pavlovas much easier.
I’ve looked (read: drooled) at these before, but, like the toothpaste aisle, there are so many damn choices and models and colors and stuff that I get overwhelmed even at the research stage. Anyone have suggestions on what the differences are with the various KitchenAid stand mixers? Way too complicated for me right now.
A thought about where to buy one: it may not be the cheapest, but check to see if your area has any local kitchen/cooking-type stores. I’ll admit, I stood out like a sore thumb in that shop, and was beyond out of my element of comfort, but… the folks in there were super friendly, it’s owned by a local couple, and so on and so forth.
Guess I’d better put one of these on my wish-list for future savings goals!
I don’t know what I would do without my stand mixer! I got it as a graduation gift and I use it all the time!
Icarus entered my life 4 years ago. It was an arranged marriage, overseen by my mother. I’d dated others before, but found previous partners slow, single minded and clunky. When it came to the breakup, I found it easier to just box everything up and move on.
But Icarus? It was love at first sight. My heart leapt. She was classy, but understated. You knew she was the type of gal that ‘had it together’. Family and friends adored her -she was a gal that prided herself on attachments. And work? I’ve never seen anyone work harder.
She moved in immediately. It wasn’t long before we were entertaining celebrities such as Nigella Lawson, Jamie Oliver and the delightful Delia Smith. On quiet evenings we’d settle in to watch the Great British Bake Off, where Icarus would delight in seeing her extended family.
It’s true love alright. Gal Pals forever.
I didn’t know I needed a kitchen aid mixer in my life. My girlfriend who doesn’t do any cooking kept mentioning it to me, and then finally one day when I had a little extra cash I bought it, and also the cheese grater attachment.
I love it so much.
Sure, I use it to make fancy things at times… but the amount of cheese and chicken I shred for lots of our meals has made this worth it 10 times over.
The flat beater works perfectly to shred my chicken which I use for several different meals. No more sitting there hating my life with two forks. The Cheese Shredder attachment is something I will willingly marry in a heart beat.
Ooh this looks amazing. I think I ll stick to my cheapish one at the moment but one day! Mixers are amazing.
I convinced my siblings and dad to buy my mom a new apple green KitchenAid as a shared Christmas gift a few years ago, largely so I could inherit our white one, which is older than I am. I lurve it – I bake when I’m stressed, and there’s nothing more soothing than hearing the motor grind away and watching ingredients swirl together. It weighs a ton and takes up a lot of very limited storage space, but I wouldn’t trade it for the world.
I got mine when Target was liquidating in Canada. I was so excited to mostly make bread, because I’ve been having hand/wrist problems, but found out these aren’t the greatest for kneading, despite the dough hook. That was disappointing. It took some finessing to find a recipe that was soft enough, and I still have to knead it in batches or it makes alarming noises. I used to use my grandma’s ’70s kitchen aid and it seemed so much more powerful. Don’t overlook them if you can find them! Plus you can paint it without feeling bad.