

Welcome to This Is How We Do It, a new series wherein we’ll be discussing projects both inside the home and out and explaining, you know, how we do it.
I bought my first house three years ago, and went from renting a small apartment to owning and then furnishing a whole house. One of my favorite things about finally owning a home is that I feel I can buy “adult furniture” and not have to worry about ruining it by moving over and over again. I slowly started picking up vintage pieces from craigslist and refinishing them, including my dining table.
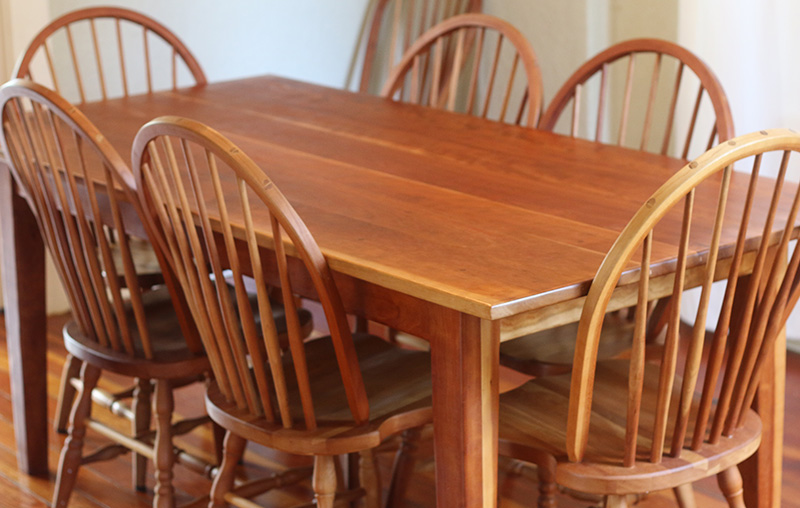
I set up a craigslist search and waded through hundreds of listings until I found this amazing solid cherry table and chair set for a couple hundred dollars — less than an IKEA set. I went to the seller’s house and was super excited about the quality of the wood and craftsmanship. It was solid wood, all joined, no nails and complete with 8 solid chairs. The only problem was the table’s surface. It was covered in rings from glasses and the finish had worn off in spots and the wood underneath had then become badly stained with dirt. No problem; it was solid wood, I could sand it out. So I brought it home.
How to refinish a table
Time: However long your patience lasts for craigslist plus a few hours for sanding and finishing spread over a couple days.
Materials:
fine steel wool (from a hardware store, not the grocery store)
Murphy’s Oil Soap
an electric orbital sander and sandpaper (80, 150 and 220 grit)
Watco Danish Oil, Natural
Howard Feed-N-Wax
some old t-shirts or lint-free rags to use for the finish which you’re ok tossing into the garbage after
Step 1: Acquire a solid wood table
(Already have a solid wood table? Great, skip this step!)
Craigslist has an “email alert” function which you may want to set up for your search if you don’t find anything right away. You’re going to be looking for a table which is solid wood, not veneer. Veneer is a very thin strip of a nice quality wood glued over the top of a cheaper or harder and more stable wood or wood composite. People have been using veneer for centuries, so buying vintage doesn’t necessarily mean you’re buying solid wood. The veneer layer on top is paper thin, so even if you sand very very very lightly by hand you still might sand through or rip & tear the veneer. It’s really not worth the effort, and solid wood is less fragile anyway.
If you can’t tell if a table is veneer or solid wood, look at the edge of the table. Is there an “end grain” at the end of the table, indicating it’s solid wood? Or is there another type of wood edging the table, or a seam at the very edge? That probably means veneer.
If you do have a veneer table, you can usually get away with chemically stripping the finish and refinishing, without sanding. Or even easier, something like Restor-A-Finish will likely be enough to fix most issues (the stuff is magic).
Step 2: Clean it
The next step is to clean the years of dirt and grime and furniture polish off the table. Use your fine steel wool and a bowl of hot water and Murphy’s Oil Soap to get all the crud off. Keep dumping and refilling your bowl of soapy water and wash the table until the water stays clear. Make sure to run it over with a rag with plain water to rinse it too.
Step 3: Sand it
You really should try to get an electric orbital sander if you can, as it’ll save you lots of time. (Do you have a friend you can borrow one from? is there a tool library in your city? do you have a crafty friendly neighbor?). If you can’t at least get a nice sanding block and decent quality sandpaper — it makes the task a lot faster.
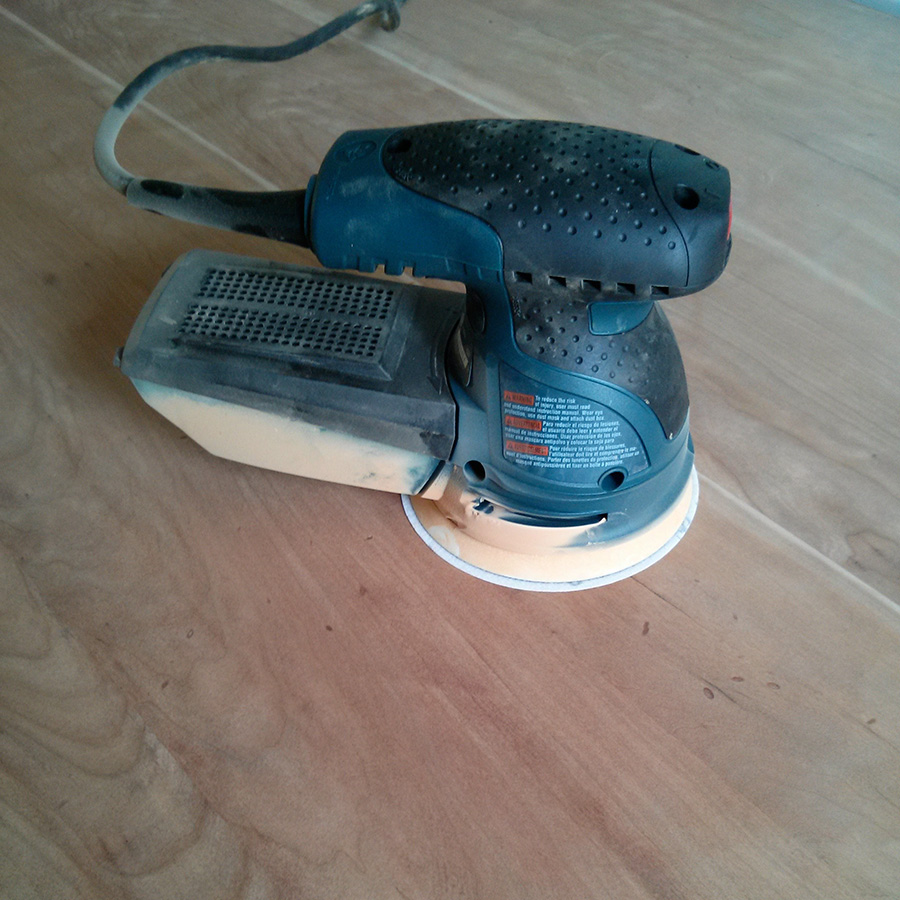
Start with a 80ish grit and sand until all the old stain and finish, marks, rings, scratches and whatever else is off the table top. Once you’re happy you can do another pass with a 150 or so, then finally a 220 or higher grit to make it real smooth. Don’t press too hard with the electric sander or you’ll get little circle marks which are hard to get out. Make sure you sand in the direction of the grain, not across the grain. Be careful about the edges of the table; I recommend doing these by hand.
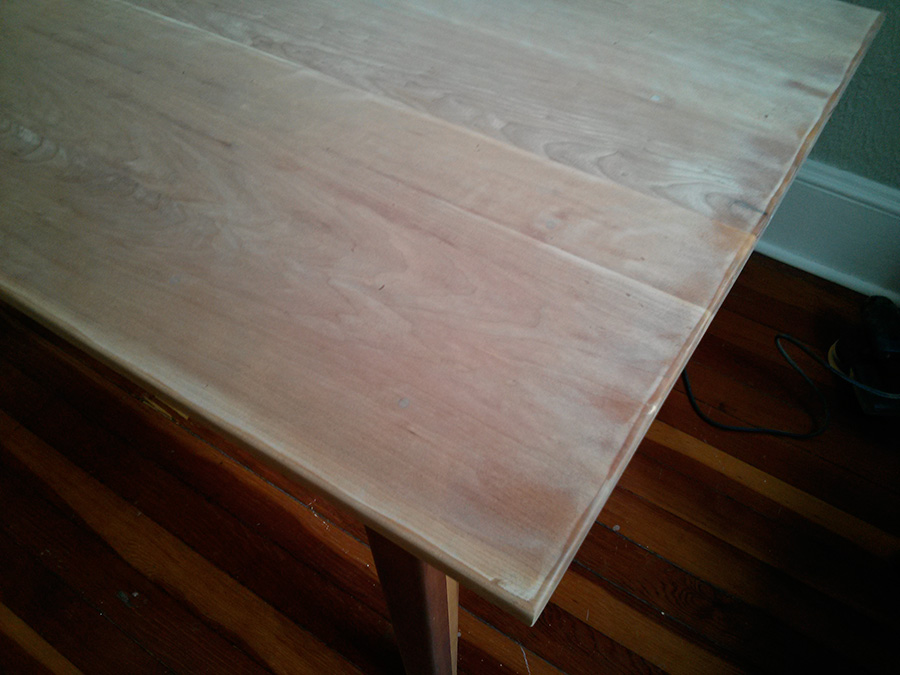
Step 4: Wipe it down
Clean off all the wood dust real well. You can use a wet cloth if you want but you have to wait until the table is totally dry before going on to the next step.
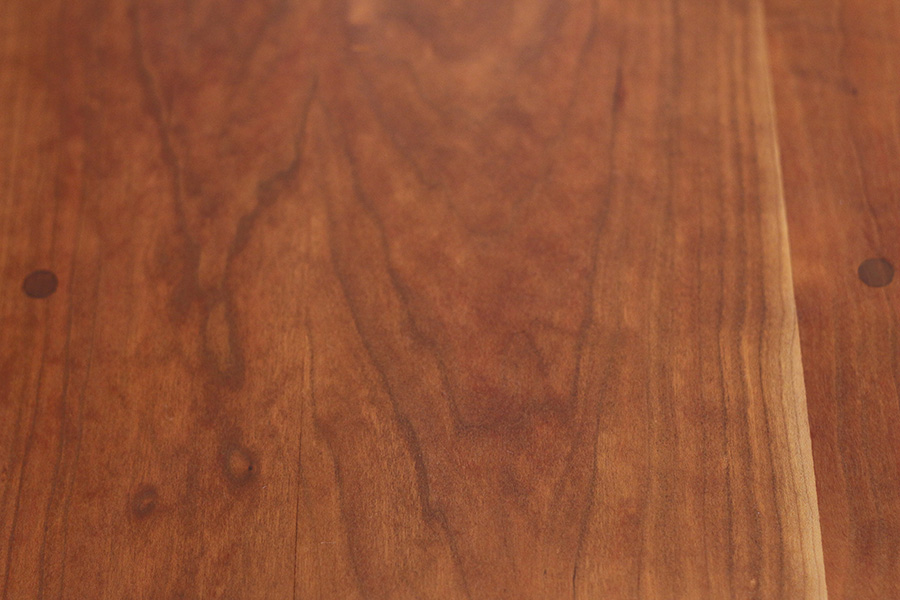
Step 5: Oil it!
I really prefer oiled wood to a varnish or polyurethane — the finished table still feels like wood and not plastic. This is my favorite step because I get so much satisfaction out it. I love to watch the colors of the wood come out when it’s wet with the oil.
Use the lint-free rags or old t-shirts and rub the Danish oil into the wood, and be liberal with it. Allow it to soak into the wood for about 5 or 10 minutes and then wipe off the excess. Allow to completely dry before repeating this process. I did 5 coats on my table.
For one or more of these oil applications you can use fine 400 grit sandpaper or your fine steel wool to wet sand the table. It makes a bit of a slurry of wood dust mixed with oil which fills the tiny pores of the wood, sealing it better from moisture. It’s not a necessary step, but feel free to do it if you want. Wipe off the excess as normal when you’re done sanding.
These oiled rags heat up as they dry, and can be spontaneously combustible. When you are finished, spread them out somewhere to dry that they won’t be in contact with anything flammable and allow them to fully dry before throwing them in the garbage. I lay them in the bathtub or sink and then put them in a sealed container in the garbage when they are dry.
Wait a good 24+ hours before going on to the next step. Make sure the table is totally dry.
Step 6: Wax it
The oil does a really good job at making the wood look beautiful and hardening the surface, but to make it extra waterproof you’ll need to add wax. I really like a product called Feed-N-Wax which is some percentage orange oil and some other percentage beeswax which makes me feel that it’s somewhat safer for me, though that’s probably untrue. At least it smells nice. Apply the Feed-N-Wax liberally and let it soak in, and after 20 mins or so wipe off the excess and you’re good! I take a dry towel and buff the surface to shine it up too, but you can skip that. You should keep doing this every few months or so to refresh the coat. I also did it to my chairs after I cleaned them. It will darken the color of the wood just a bit, so keep that in mind.
Note that you can skip this step and add a layer of water based polyurethane over the top of it all if you don’t want to wax. I don’t find the waxing tedious though, it takes just a few minutes.
Maintenance
I clean my table with plain water or Murphy’s Oil Soap, and don’t use any strong cleaning products on it. I reapply the Feed-N-Wax every few months. I do use trivets on my table for very hot things like soup, and use coasters for drinks, but the finish should hold up if you forget.
Feel free to post questions and photos about your table projects in the comments. I can even help tell you if your table is solid or veneer if you are unsure.


Comments
I love this post, it speaks to my crafty side, and I really wish I had a genuine excuse to look for a solid wooden table on craigslist. This post might just have to be that excuse.
Thanks for this!
Hello other Cee! You’re welcome!
This is amazing!!!!
Would this work for other wood surfaces that aren’t tables? I inherited this awesome wooden dresser from an old rental house (previous tenant left it and the landlord said take it) but it’s in super bad shape and I’ve been wanting to refinish it because it’s so pretty, but I had no clue where to start until today!
This would work for any solid wood item in your home that’s not painted. Sometimes it’s easier to use restor-a-finish on furniture which has a lot of details or edges that are hard to stand. I used restor-a-finish on my nightstand because the top was veneer and the finish cleaned up beautifully. If you are unsure, feel free to post a photo or two of your dresser here in the comments and I can take a look!
I’m going camping this weekend and will probably be without service, so I might not be able to reply until Sunday evening. ⛺
I wish we were at this point in the future were you get scratch & smell on the web pages, also scratch&feel because there’s NOTHING as satisfying as the feeling of finely sanded smooth wood, and then the smell of oil / wax on that wood.
Great post! I used to work on wood a lot at my sailing school (we would build a lot of cool stuff). I’m too far away and sure miss working with my hands though
I DID buy an ikea table recently off craigslist and it looks a bit used. It does say “solid birch” on the description so I’m planning on refinishing it
OR OR go ahead with colors and do THIS : http://shoestringchick.com/apartment-dining-table-space-saving-gateleg/
I think it looks really chic!
Also I CAN’T WAIT till I have a place to call my own and a permanent JOB and everything so I can acquire nice pieces and do what you’re doing. I’ve found some good things over time but you’re right, moving al lthe time is NOT GOOD for the furniture you really care about…
I completely agree about the smell and feel of finely sanded nice wood.
My table before this one was a birch ikea table I also bought used off craigslist. I sanded down the legs and left them raw and painted the table top a dark grey slate color – very similar to the idea in that link. I also put a few layers of clear poly on top of the paint which I recommend if you plan to use the table every day. I’d never paint a cherry or walnut table but wouldn’t think twice about used ikea stuff.
Let me know what you decide to do with your table!
yeah I feel the same. I’ve got an amazing wooden table that I would NEVER EVER paint over but birch+ikea ? paint away !!!
I’m in a small space so I plan on using it as a desk most of a time + dinner table only when I have guests. Do you think poly would then be necessary ?
As for the legs, how did they change once you sanded them ? did they look lighter / had a more matte finish ?
thanks for the input :)
Growing up, anytime anything was refinished, it was always stain+polyurethane. I like the sound of the oil and wax though; I have to try it!
Also, I have an orbital sander if anyone needs to borrow it!
I wish I had listened to people when they told me to cover my legs/arms/all exposed skin while stripping old stain. That shit (the stain stripper) BURNS. It feels exactly like a hornet sting, and it leaves giant welts…super fun stuff. It’s also worth it to use higher quality (read: more expensive) products/tools when refinishing wood furniture. It saves you time and frustration.
AND be careful with your Pinterest-inspired ideas. I refinished a coffee table right before I broke up with my now-ex, and her Pinterest inspiration led to the worst color combination ever. Dark stained top, Vol Orange bottom (she was going for “rust colored” but then she decided she liked the orange…NOBODY THINKS VOLUNTEER ORANGE LOOKS GOOD. WE’RE NOT EVEN VOLS FANS BECAUSE PAT SUMMITT IS GONE.)
Cant wait to get my own house so i can get a table and do this! Lol. I might prefer a bench though…
I love refinishing furniture, and I don’t let the fact that I live in tiny apartment stop me. I’ve done two night tables, a dresser and a coffee table right in the parking lot of my building. You don’t need to own your own home to customize your furniture!
GOOD POINT.
awesome! Looks great :)
I spent all day today doing yard work on dilapidated lawns for volunteer stuff (and discovered my penchant for hedging, apparently) and now I’m feeling all handy even though I’m normally useless. Maybe I’ll try finishing a table one day. Even though I’ll probably never be able to do those sorts of things I’m super excited about this column.
This is perfect! I just got a coffee table from someone on Facebook and it clashed with my side table and entertainment center.
Will so do this
Thanks cabin daddy !
Yes! You can get the oil in tinted colors too if you want to try to match your other furniture better. Or stain to match and use a clear poly on top! Let me know how it turns out! :)
I have been waiting to see this step by step for so long and it’s so good, Cee. Your table is as awesome as you are.
Thanks @alioh :)
The table looks great, very nice job.
I’m looking forward to this column, even though I’m still an apartment-dweller.
This is so cool! I am always down to read about some DIY and this makes me want to look up where I can get a orbital sander.
Autostraddle is the ultimate resource for queers who wanna do ultimate things.
This is great! I’d love to see more woodwork and house projects on Autostraddle!
Such a nice table! You’re so clever. Really this post was everything I’d hoped and dreamed. I can’t wait to attempt a project like this when I have a home again.
Portland family table! I have had some of my best meals huddled around this table with all my favorite company.
this table & chairs = great memories
So keen for this!
My wife never has a lot of enthusiasm for my DIY ideas while we live in a small apartment with no garden or garage and poor ventilation. … hopefully one day we will live driving distance from my parents again with access to Dad’s big garage and tools!
My wife and I live about a mile from my parents, and I love having access to my mom’s woodworking and power tools!
I have this crappy old coffee table that I really want to refinish – I fear it might be veneer though. Maybe I’ll try that Restor-a-Finish stuff, assuming I can get it in Australia!
It looks like you might be in luck
Ooooooh.
I’m really happy this article exists. I’m mentally bookmarking it for future use.
Cee is there anything you can’t do? Are you bad at anything? Just wondering.
Sweet! Great article and awesome idea for a new series. Thanks!
SO GOOD.
This is awesome! I have this gorgeous old coffee table which came with a few dings and water rings, and I’ve been meaning to figure out how to pretty it up for years.
This is amazing and I look forward to this being a serie
this is awesome!! would you recommend the same approach to fixing wooden chairs that need to be refinished or would you stick with varnish? thanks!!
Hello! It depends on the condition of the chair and what the current finish is. I just cleaned my chairs and use feed-n-wax on them every few months. Something like restor-a-finish might work for you too. Feel free to upload a photo if you have a specific chair in mind!
thanks! i don’t have any chairs in particular. i’ve just been browsing craigslist and thinking about options. all the chairs that look like they’d be comfortable have super ugly paint jobs or look like they’d need a fair amount of refinishing due to wear and tear so i’ve been contemplating stripping and refinishing or alternatively looking into how expensive chairs from an unfinished furniture store would be.
Thanks so much for this post. I recently found a cherry coffeetable at a thrift shop for $30. It’s covered in a dark stain, along with water marks and what looks like spray over-spray from some past spray-paint project.
Even though I’ve refinished several pieces before, I always look for new advice and virtual support from bloggers like yourself.
After struggling tonight to strip the old stain and varnish off by hand, I’m hoping to check my neighbors’ garages for the suggested orbital sander tomorrow.
The piece will take some time and lots of love but I’m excited about it. I tested out some Teak Oil on a sanded swatch tonight and it’s absolutely beautiful.
A word about the beeswax you’re using on your dining table: Perfect. It’s what’s used to season wooden cutting boards so you’re in no danger in any way.
I don’t know how to post a photo but wish I could share my new project with you. Let me know if you can help out with that.
Thanks again. Love your articles.