Feature image via Shutterstock
When I moved to New York a few years ago, I didn’t know feral cats were a thing. I knew stray cats were a thing, and I knew just how to handle those little guys. You lure them to you with a piece of hot dog at the little league ballpark or some peanut butter in the church parking lot, and then you scoop them up and take them home and de-flea them and love them forever. Easy peasy. Feral cats, though, are a whole other thing. They live their entire lives outside and can almost never be socialized to behave like house cats. But they’re still cats! I’d only been in New York for about ten minutes when I spotted my first feral cat, and that led me down the path of getting Trap, Neuter, Return certified by the ASPCA; socializing and adopting a litter of feral kittens; and setting up my own community cat colony (Hogwarts School of Witchkittens and Wizardcats is our official registered name with the NYC Feral Cat Initiative).
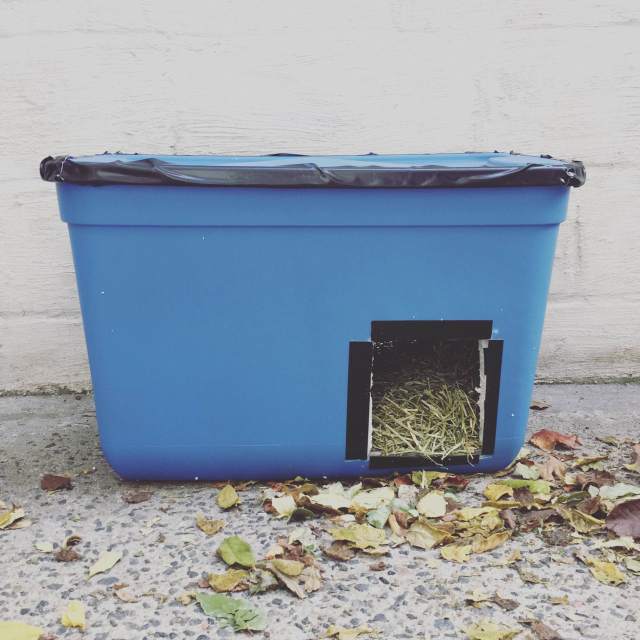
Being a Dumbledore to a colony of feral cats isn’t for everyone, I get it — but winter is coming, and you can save a feral cat’s life by providing shelter for it. It’s cheap and it’s easy! Below are instructions for making a DIY winter shelter for one cat. They don’t look like much, but they are really effective. Last winter, the shelters I made saw my colony through one of the biggest blizzards in NYC’s history. The snow was hip-deep, but my cats stayed snug and warm and dry in their little Rubbermaid houses.
Step One: Gather Your Supplies
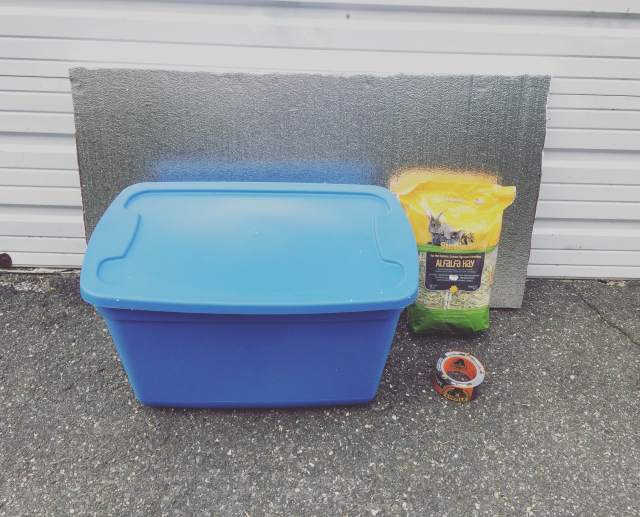
You can get everything you need for a feral cat shelter at Home Depot. In fact, you need so few supplies you can carry them home all by yourself on the subway.
+ A plastic or rubber storage container. I use the HDX 20-gallon tote because it’s the perfect size for one cat after you add the insulation and bedding. Make sure your container has a solid lid on top; flip-top containers that open in the middle will let in snow and rain and cold air.
+ Insulation. You can use just regular styrofoam. That’s what I started with last year, but it got so cold that I ended up taking the houses apart and wrapping the styrofoam in those emergency reflective blankets marathoners use on TV and then putting the houses back together. So this year, I went ahead and paid a little extra for thicker styrofoam with built-in reflection. (This is R-Tech 1″ thick insulating sheathing.)
+ Gorilla tape.
+ Pine straw. The ASPCA recommends that you use pine straw instead of hay as the bedding/extra insulation for feral cat beds because it dries faster and is less allergy-inducing. I couldn’t find pine straw in NYC last year, so I used the kind of hay people put in rabbit beds and it worked just fine. However, my feral cat shelters sit up off the ground and have a roof-type situation over them, so they’re not as likely to get wet inside like one that’s sitting on the ground.
Step Two: Make The Cat Entrance and Water Exit
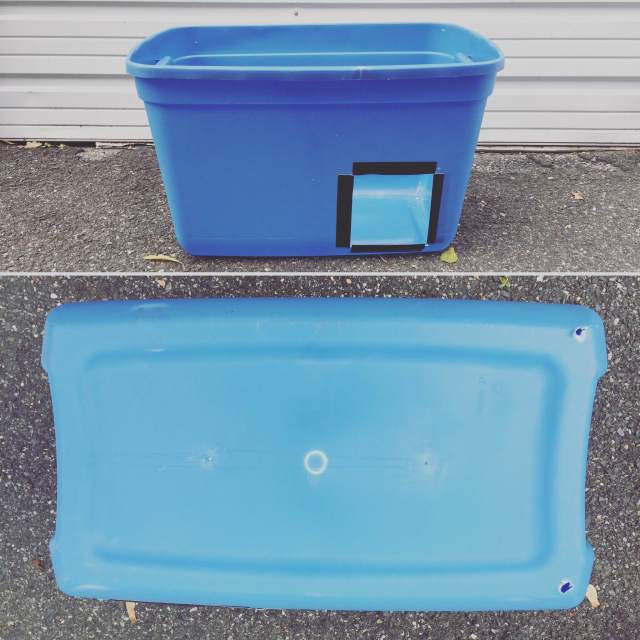
Cut a cat-sized door into your container. Make it big enough for a cat to fit inside, but not so big that it lets in excess cold air/snow. I like to cover the edges of the door with Gorilla tape because the plastic edges seem poky after I cut them.
Cut two holes in the bottom of one side of your container. You’ll sit the container at a little bit of an incline so any excess water can drain out if it makes its way inside the house.
The plastic of the HDX container is thin enough that just my pocket knife works for all the cutting.
Step Three: Insulate The House
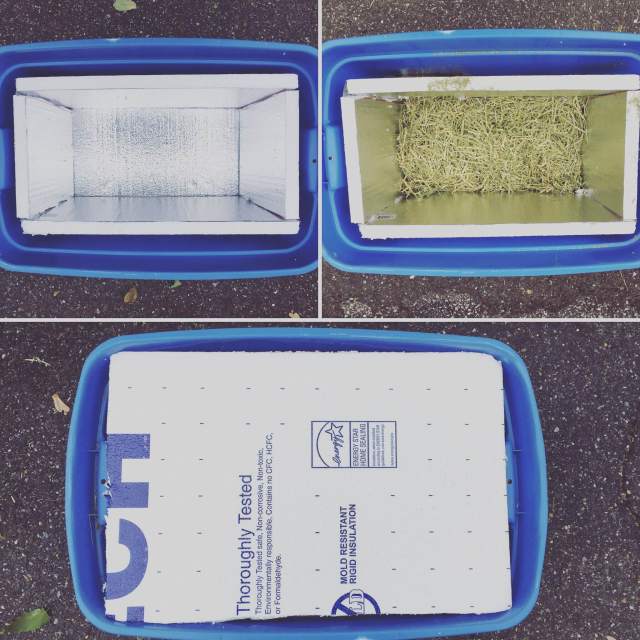
Measure the inside of your container and cut out insulation to make four walls, a floor, and a ceiling. Use Gorilla tape on the outside corners of your walls to make sure they don’t fall in. If you’re using reflective styrofoam, make sure the reflective side is facing into the house on the floor and ceiling, too! You want all sides to be insulated, not just the walls.
Once your floor and walls are in place, cut the door out of the styrofoam.
Add your pine straw.
Step Four: Hi, Bobbi Jean!
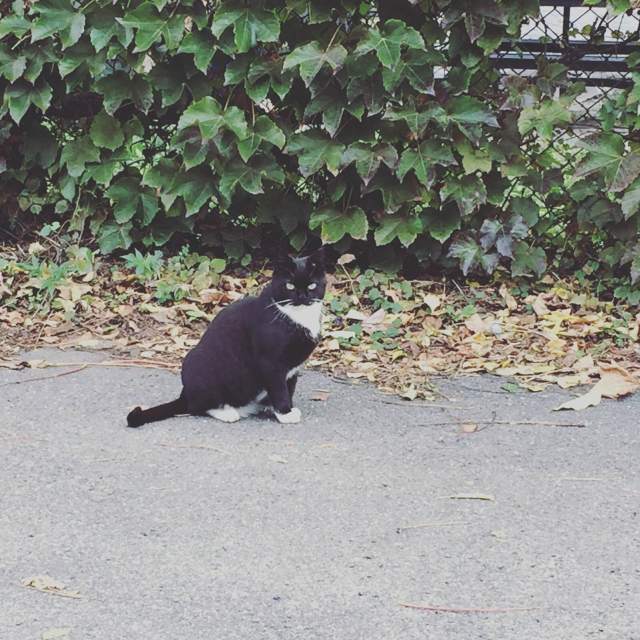
If your feral cat is watching you build her house, talk sweetly to her the whole time so she associates the house with you and knows it’s a safe place just for her.
Step Five: Seal It Up
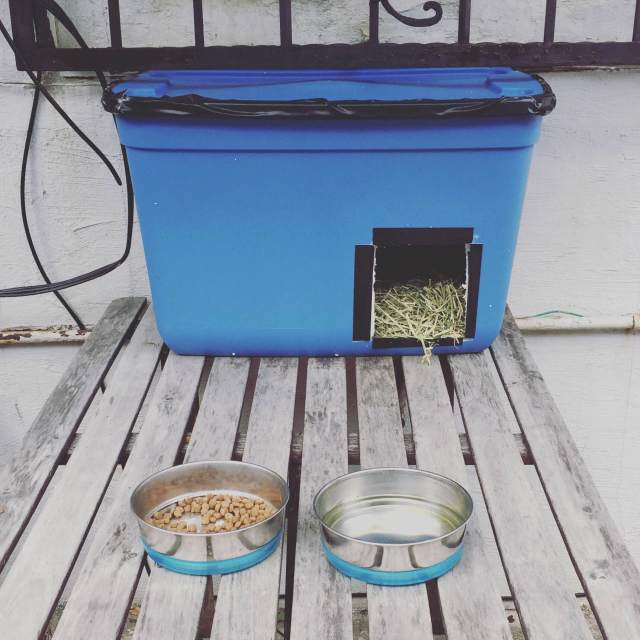
You don’t have to seal the top of the house with tape, but it’ll make it extra dry and also ensures that the lid doesn’t come flying off in a windstorm. Gorilla tape holds through all kinds of bonkers weather conditions, so don’t worry about rain or sleet or snow wearing it down.
You’ll want to find a way to anchor your house. These things are really light. You can use stones inside the house (between the outside insulation and the plastic), or a brick on top of the house. Bobbi Jean’s house wedges under the window just perfectly in my back”yard.”
These cheap and easy shelters really can be the difference between life and death for a cat this winter.
For more information about TNR (the very very very best thing you can do to help feral cats, especially in big cities) (and they help you back by controlling the pest population!), check out the ASPCA. All the training is free and happens on the weekends!