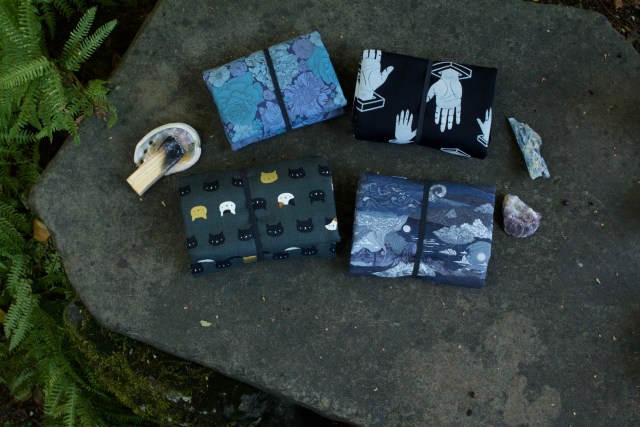
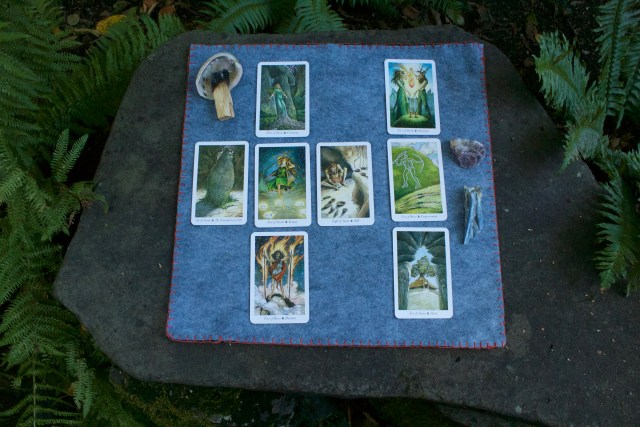
Let’s get in the spooky spirit and make a magic folding Tarot pouch. This no-sewing-machine-necessary pouch can be unfolded to reveal a soft and supple reading mat — perfect for the cardslinger on the go. It’ll take less than an hour to sew up and will be the envy of everyone in your coven.

Supplies:
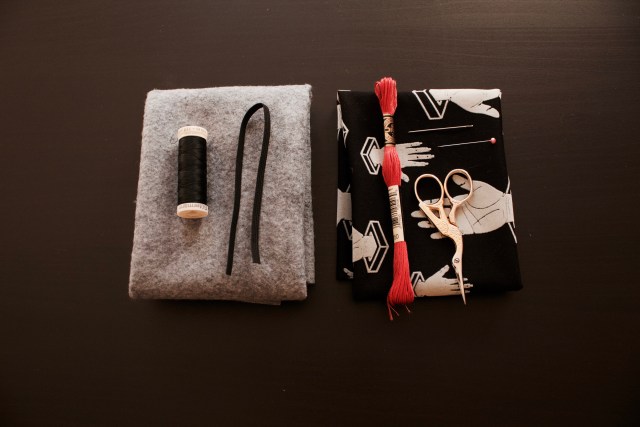
Outer Fabric: Cut to 17”x17”. Avoid stretchy or super thick fabrics. Both will result in uncool, unfoldable little cases.
Felt: Cut to 17”x17”. Don’t go cheap on this one. Most felt is made of acrylic, gross. Instead opt for some 100% wool felt that will keep your cards nice and happy.
¼” elastic: Cut to a 10″ length
Embroidery Needle
Embroidery Floss
One Sewing Pin
Thread
Scissors
Let’s Get Started!
In order for your pouch to fold up nicely, the elastic must be attached at a specific area on the 17″ square of outer fabric.
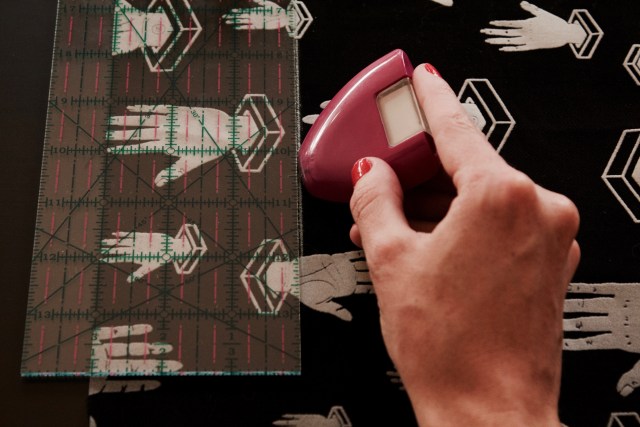
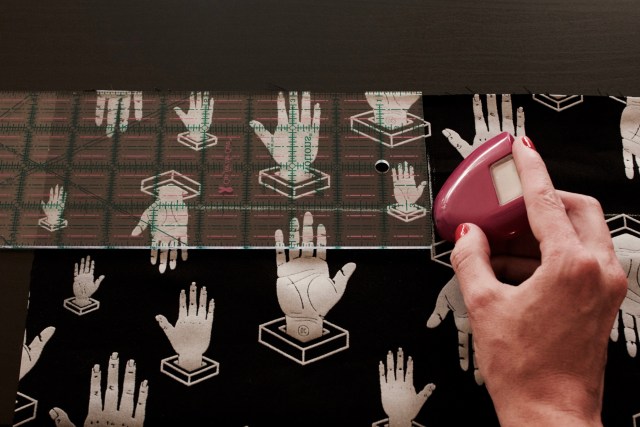
Draw the elastic placement mark 3″ down from the top edge and 9 ½” in from the outer edge.

Fold the elastic in half and pin the edges to the placement mark on your fabric, with the length of the elastic toward the center of the fabric.
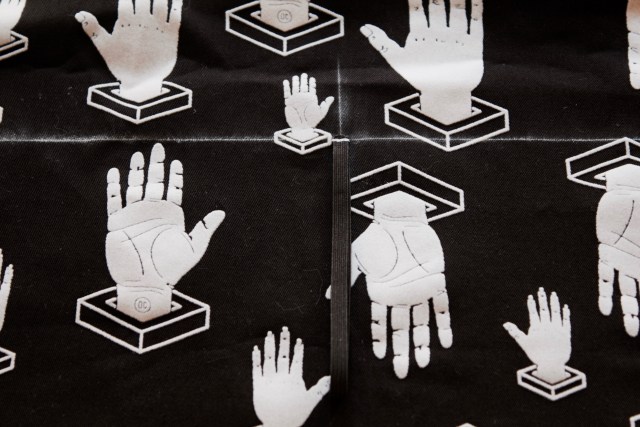
Sew this elastic loop in place by either machine sewing or by hand.
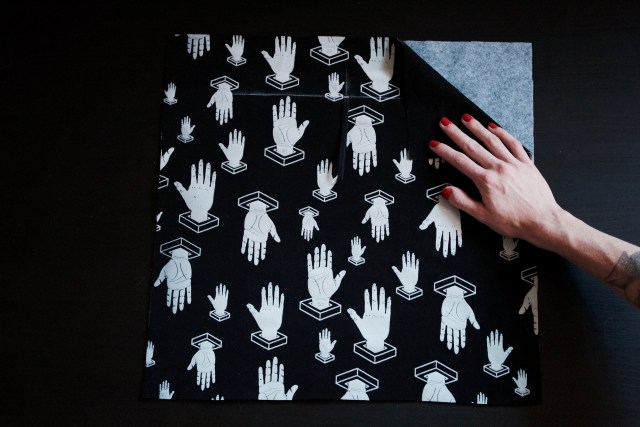
With wrong sides together, make a felt and fabric sandwich, matching up each edge to one another. The texture of the felt will most likely keep your fabric from shifting while you do your stitching.
The Blanket Stitch

This stitch will join the outer fabric and felt together while also creating a decorative edging for your tarot card pouch.
Start by threading an embroidery needle with floss. Bring the thread through the eye of the needle and let a few inches hang loose. Tie a knot at the end of the longer thread strand and let the other strand of thread flow freely.
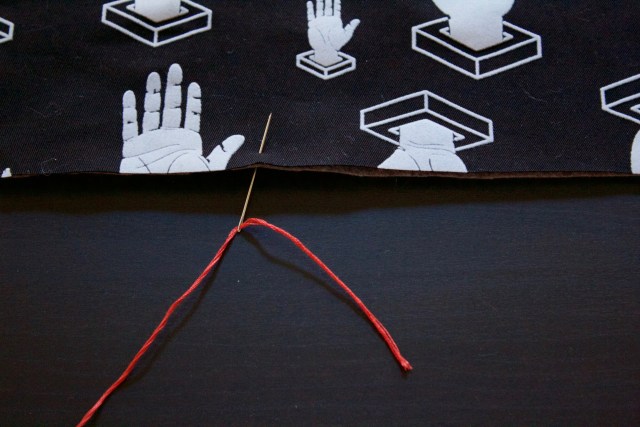
Bring the needle up through the felt side to the fabric side about ¼” away from the raw edge.
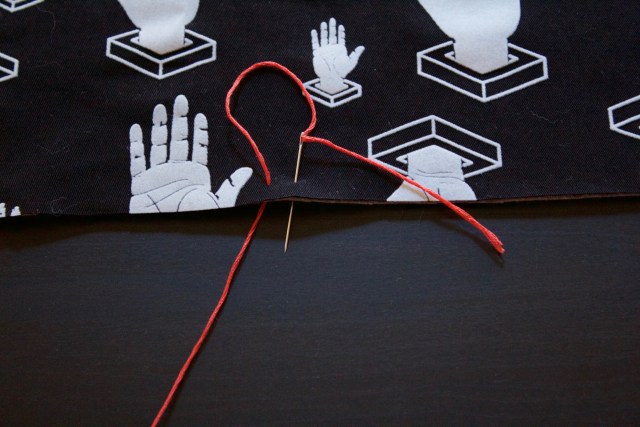
Bring the needle down into the fabric approx ¼” away from the other stitch and ¼” from the edge, creating a loop between the two stitches.
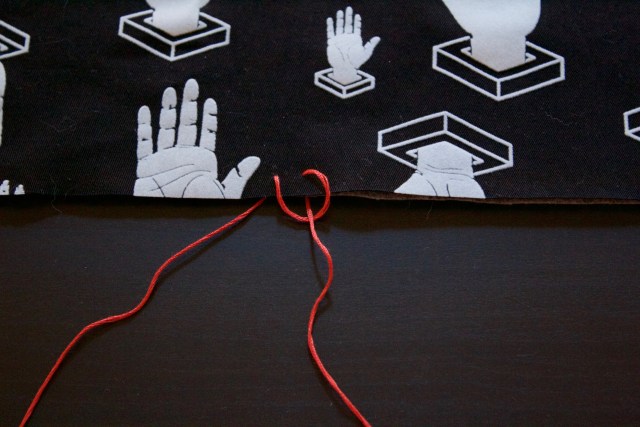
Before pulling the loop tight, thread your needle through the loop.
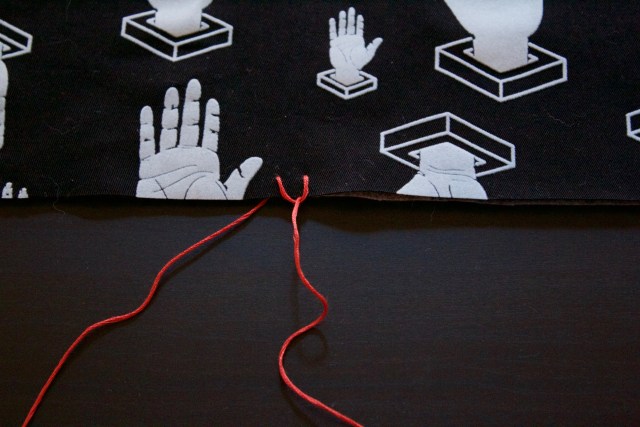
Pull the needle tightly and you will have created your first blanket stitch.
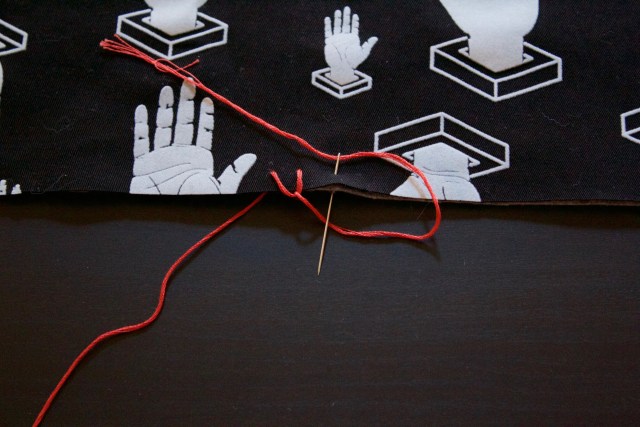
Continue traveling approximately ¼” along the edge, catching the loop and pulling through.

Continue stitching all four sides of your fabric and felt sandwich.
The Magic Folding

Place the mat fabric side down with the elastic on the top edge, away from you.
The key to the magic folding is to mentally divide the square into thirds widthwise and fours heightwise. Place the deck one row up and in the middle. After your fold your fabric a couple of times, the folds will begin to keep their shape, making it easier to place your deck correctly.

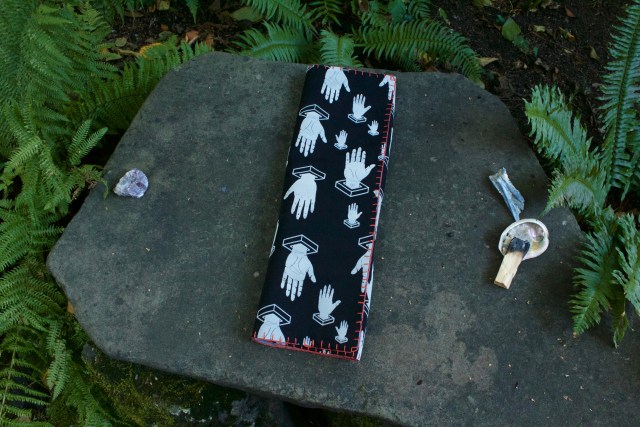
Fold both side edges towards the center of the mat to the opposite edge of the tarot deck.
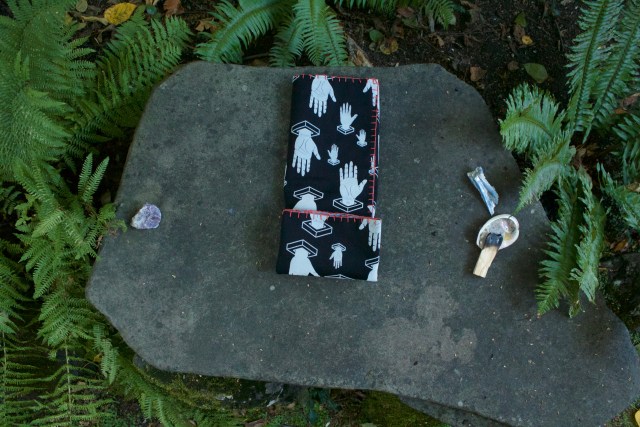
Fold the bottom portion to the top edge of the tarot deck.
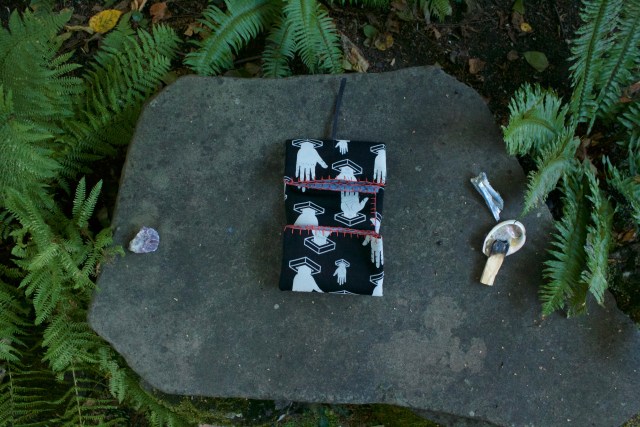
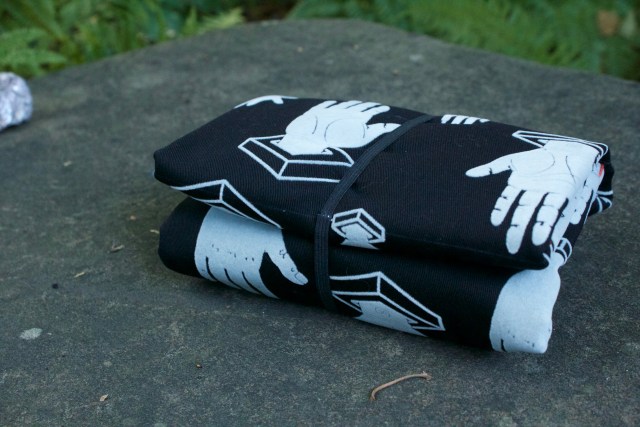
Lastly, double fold the top portion into itself, bring the edge to the top edge of the deck and then over the deck. Wrap the elastic loop around your neatly folded pouch and you’re all done!
The night is dark and full of terrors but your deck will be safe and sound from all the bad vibes from here on out.




Comments
I actually have ‘tarot blanket’ written on my Christmas list for my gf this year. This article is perfect!!
Do you have any suggestions on how to adhere a specific spread of cards like outlines of where to put the cards?
Hey K, I’m not sure I understand your question. Do you mean making a sort of template for your spreads on the felt side? If so, I would use some chalk to temporarily make the lines and do a little running/sashiko stitch along the lines. It’d look real cute.
Where did you get each and every one of those fabrics posted in the first pic?
Hey Madeline! The Floral and “Dark and Stormy fabrics are both Liberty of London, you can find some of their fabrics online here, http://www.jonesandvandermeer.com/products/liberty-weather-wonderland-c.html. The other two are unfortunately from my stash, I should have bought 10 yards of that hand fabric.
The hand fabric is amazing and perfect for a Tarot pouch!
This is so relevant to my interests it’s almost ridiculous. Tarot, cute fabric, no-sew projects because I’m awful at a machine…
Get out of my head!
PLEASE let us know where you got all the fabrics in the example picture! I need all of them for gifts immediately!
Hey Frankie! See my comment above to Madeline ;)
Perfection! I have been searching high and low for my ideal tarot cloth and you just, like, made one :D
what an amazing craft!! I love this.
Eeeee! I love it. Totally going to try this.
Gonna do this! Thank you!!!
I love this! It looks super easy and thoughtful!
I bought this lovely fabric today with peacocks on it and I thought it would be a shame to have to cut the peacocks up so I was looking for something big to make so the peacocks would still be seen in full size. This is an ideal tarot deck holder/spread cloth idea!!!!!! Definitely going to make it!! Tonight!!!
How much floss did you use? Like, the length… I’m not sure how much I should buy :S
Hey Mica! I suggest purchasing about 2 skeins of embroidery floss.
Hi! I was just wondering how you finish a blanket stitch so it doesn’t come undone?
Just a simple knot at the end works just fine! You can get fancy and sandwich the knot between the two layers of fabric if you’d like.
Hey, I was wondering what kind of embroidery floss you used? Is it satin? Thanks!
I used the instructions to make one of these for myself and I’m very happy with how it turned out. Interestingly, I have the exact same tarot deck so I knew it would work for me. Thanks Katie!
This is literally exactly what I was looking for and I’d love to make one exactly like it, but my carpal tunnel syndrome might make the blanket stitching a bit difficult. Do you have any recommendations for adapting the pattern for machine sewing, which is a little easier on my hands? Thank you so much!
I imagine you would just add a half inch to both the length and width of the fabrics, sew it at a 1/4” seam where the pattern is turned to the inside (leaving an inch unseen) then, once you’re done, turn it inside out and finish the stitch.
Hi Kiki I just finished mine! I loooove the design and feel of it. I went for reel wool like you suggested. My cards and I feel more happy already!
Thanks for sharing this tutorial!