

Welcome to the gazillionth installment of Make A Thing, where we make handmade gifts for people. Or ourselves. Or our cats. Mostly our cats.
Header by Rory Midhani
My neighbors have this really pretty hot air balloon porch decoration and I am a little obsessed with it. I’m also a huge fan of actual hot air balloons because they are stunning, but recently I looked up how much it would cost to ride in one and it’s like $200. Is this actually a good deal? Any hot air balloon aficionados out there?
When I mentioned to my sister that I really want to make a hot air balloon porch decoration, she immediately suggested I make a fleet of them for my niece’s room. I was skeptical at first, but then paper mache came to mind and now here we are, with paper mache hot air balloon decorations.
Yes, I’m aware it’s technically papier-mâché, but I cheated and used Mod Podge so I can spell it however I want. Now let’s get over ourselves and do this.
Paper Mache Hot Air Balloons
Supplies Needed:
+ Paper
+ Mod Podge
+ Balloons (I used smallish water balloons I had left over from camp that I forgot to give to my campers [sorry SS Sparkle Motion!])
+ Optional for hanging them to dry: string, safety pins
+ Paint
+ String/Embroidery floss
Level of Difficulty: Easier than keeping a straight face while watching Deanne Smith’s kitten during the video for Nerdy Love Song.
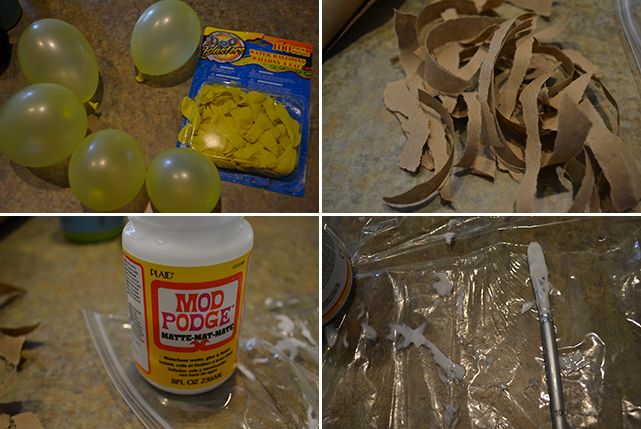
Make sure to use really thin strips of paper or they’ll bubble on the edges and not create a smooth surface for your paper mache.
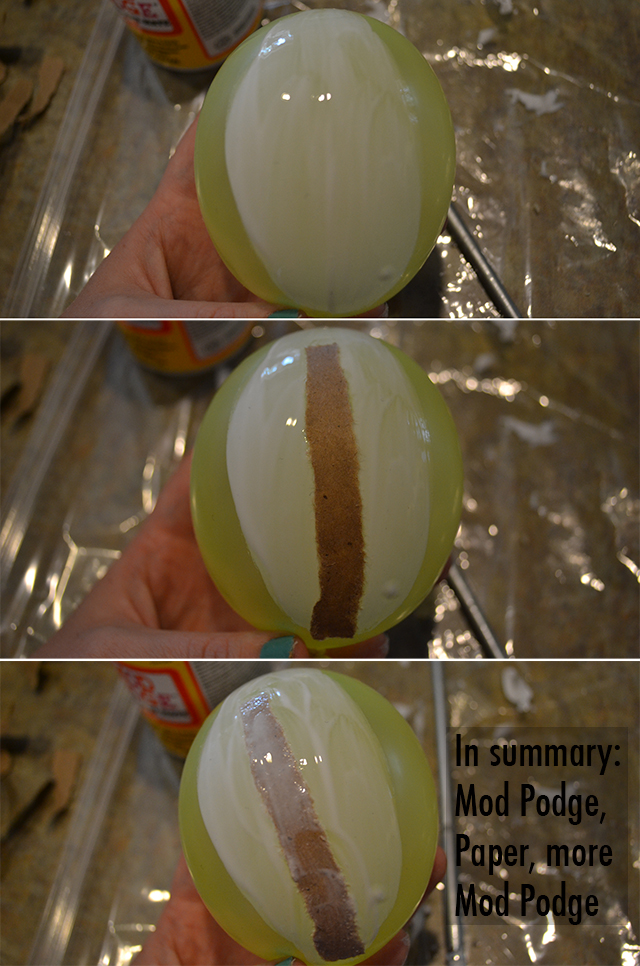
Seriously, aaaaalllllllll the Mod Podge. Just keep it going. I liked to Mod Podge the balloon, stick the paper on there, then apply MORE Mod Podge. Overlap and do as many layers as you want, but I did just one layer out of laziness.
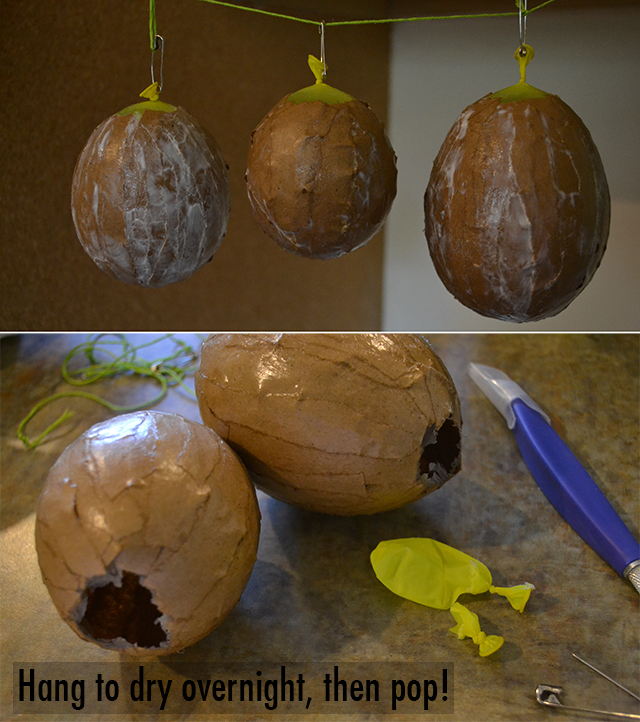
I think they look like weird coconuts.
Note: in the drying picture, I used thick strips of paper and it went wonky. Don’t make my mistakes, kids! I thought popping the balloon would be seriously satisfying but it just kind of quietly deflated. This is the way the world ends, not with a bang, but with a really slowly and silently deflating balloon.
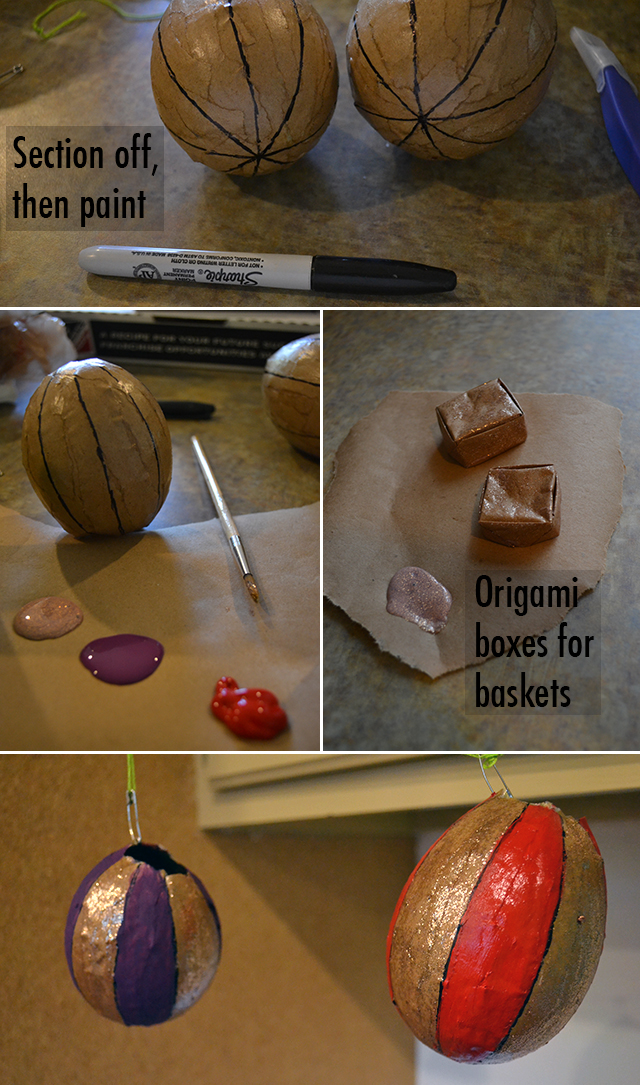
Don’t worry about painting over your section lines. I just waited for it to dry and then redid them. I feel like Make A Thing could be called “Hansen Crafts: nbd.”
The origami boxes were made using this super easy tutorial.
And yes, I totally used glitter paint what are you going to do about it.

Check out my really well drawn instructions on those. Start on the inside, then go through the side of the basket, then from the outside into the balloon part. This is so much easier than it looks. It’s okay if your balloon gets a little smooshed in this process. They’re really forgiving if you push out the dents from the inside.

If your hands are nimble enough to get up inside the balloon to poke a hole, four for you, Glen Coco. I took the path of least resistance and left the knot on top because I got really frustrated and was crushing my balloon. Not worth it.
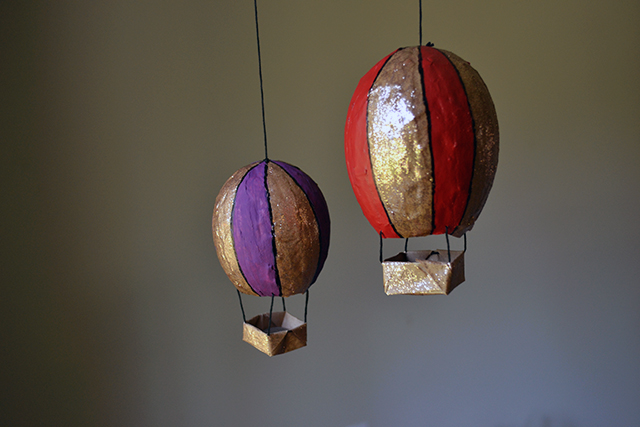
All done! I weighted down the baskets with pennies, but you can use anything handy within arm’s reach. I hung Audrey’s balloons in front of her window so they’d twirl in the breeze and sparkle in the light. I think she’s going to love them.


Comments
so cute!! I made something similar when I was a kid and loved it so much. Paper mache rules!
These are so adorable! I know what my kids and I are doing next weekend<33
Wah those are adorable! As I have a degree in papier mache-ing (sort of, Im a primary school teacher) I would suggest using quite small pieces of paper for a smoother effect, also if you tear them rather than cutting I find that the edges stick better. If you’re on a budget you can also mix the hobby glue with some warm water and it’ll still work just as well, though may need some more time to dry. The more layers you do the more durable your thing will be! :)
These are awesome! I love the sparkly paint.
Those look awesome!!
Also – as a person who has been in a real hot air balloon – it is fantastic! – it is expensive so maybe ask for donations towards it for a big birthday coming up. Also – when I did it, they have to have perfect weather, so expect it to be at least several months and a few false alarms before you get to actually go :D
This is the way the world ends, not with a bang, but with a really slowly and silently deflating balloon.
Best. Line. Ever.
what if you don’t like balloons for irrational reasons? could you use something else?
Oh man, I totally feel you on that one!
I don’t know of any alternatives to balloons, but maybe you could find a crafting buddy? Whenever I’ve made paper mache involving balloons, I’ve made sure that I was crafting with a friend because I absolutely hate hate hate both blowing up and popping balloons.
Google tells me:
http://www.ehow.com/how_8344083_make-paper-mache-ball-balloon.html
But can you make them go up in the air?
this! the next make a thing should be how to do that. i kinda maybe always daydreamed in college about having a mini hot air balloon on a string that i could use to carry my pencils and literature anthologies across campus. and the basket would detach. so i could carry it into class. i maybe thought this through a little. anyway, teach us how to make that please?
Feel free to figure that one out and guest blog for Make a Thing.
haha, but i was really just hoping to ride into victory on your genius…
I’m not very crafty, but this looks simple enough, aaaaaaand is going to make an epic house warming present :D Thanks!