

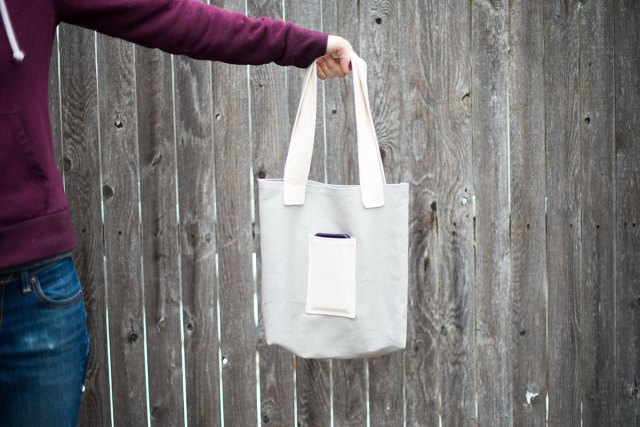
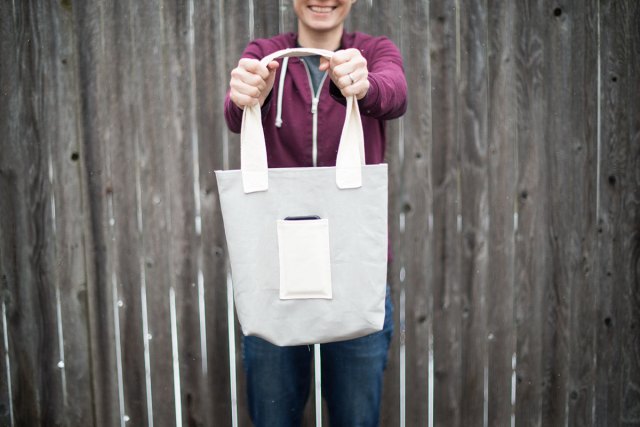
This is a great project for beginning sewists. I love the contrasting canvas, and the outside pocket is the perfect size for a smartphone. Give it a try!
And yes, it’s still snowing where I live. Because New England.
You will need:
- 1 yard main color (MC) canvas
- 1/2 yard contrast color (CC) canvas
- Pins or sewing clips (I preferred clips for this project since the canvas was so thick)
- Off-white thread
- Iron
- Sewing machine
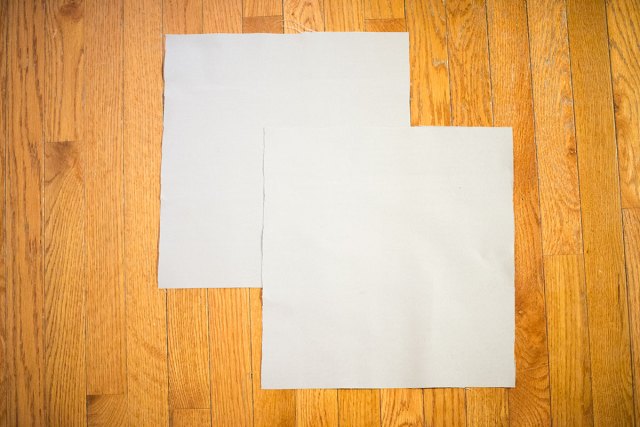
1. Cut two pieces of MC canvas in 13.5″ by 14″ rectangles.
2. Fold over one of the shorter edges of each rectangle by about 1/4″, press with the iron, fold another 1/4″, press again, and pin or clip in place.
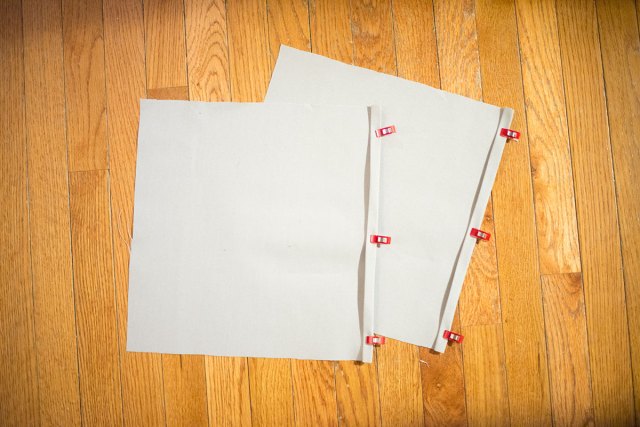
3. Stich along the folded edge. This is the “top” of these pieces.
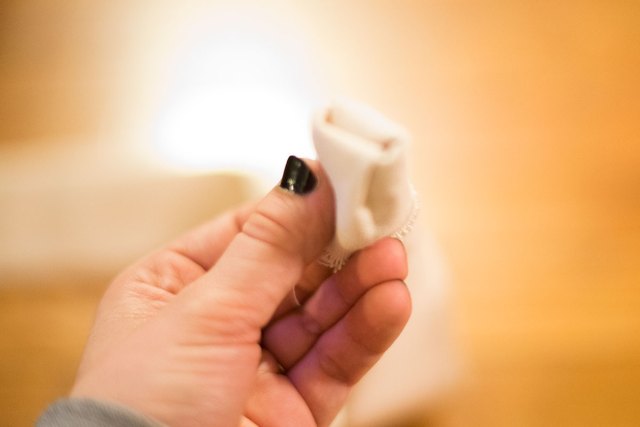
4. Cut a rectangle of the CC canvas to 4.5″ by 6.5″.
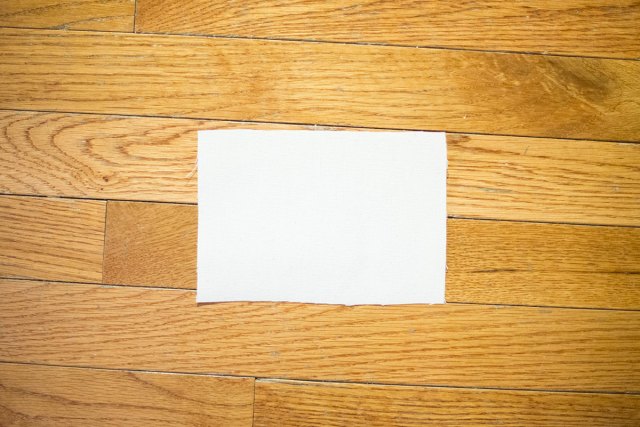
5. Fold over one of the shorter edges by about 1/4″, press with the iron, fold another 1/4″, press again, and pin or clip in place.
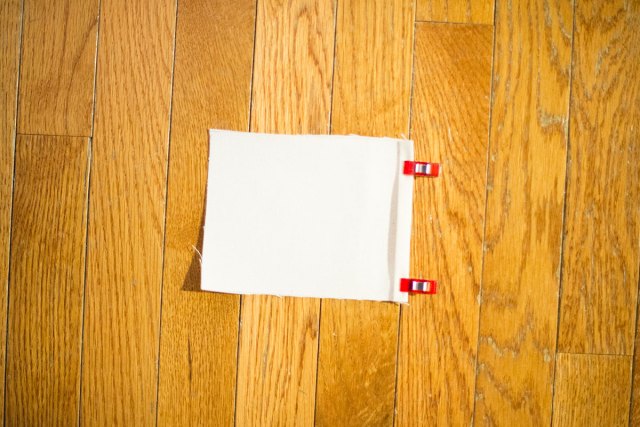
6. Stitch along the folded edge of the CC rectangle.
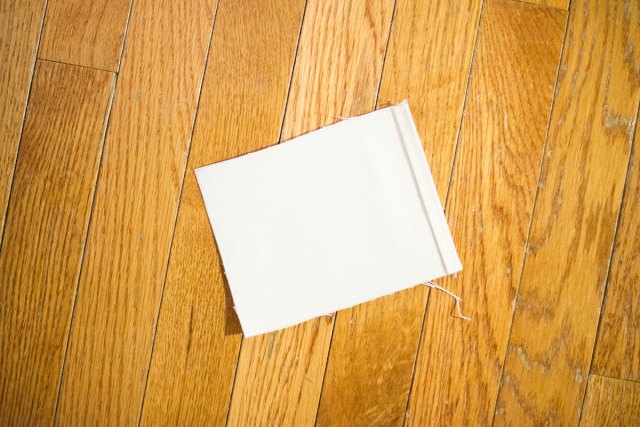
7. Fold 1/4″ along the three raw edges of the CC rectangle. Press with the iron.

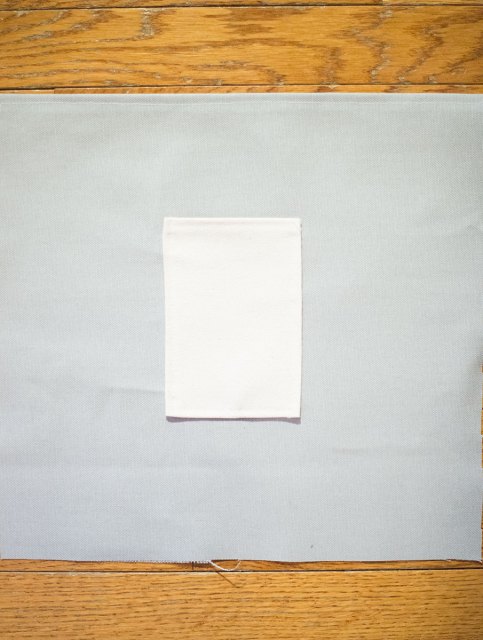
8. Pin the CC rectangle to the right side of one of the MC rectangles. Make sure both sewn edges are pointing “up.”
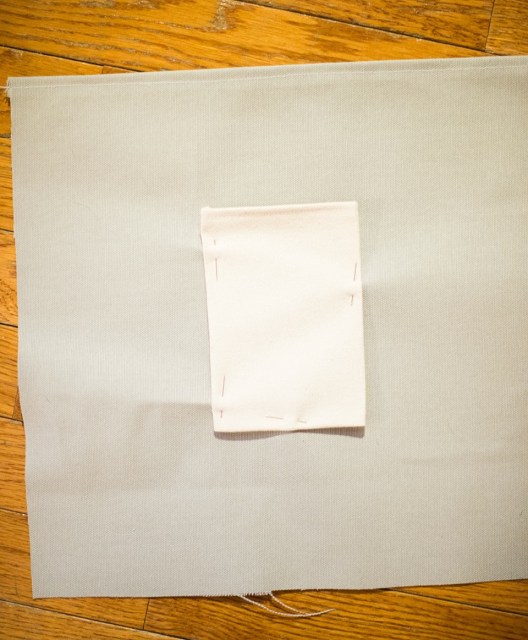
9. Sew the CC rectangle in place.
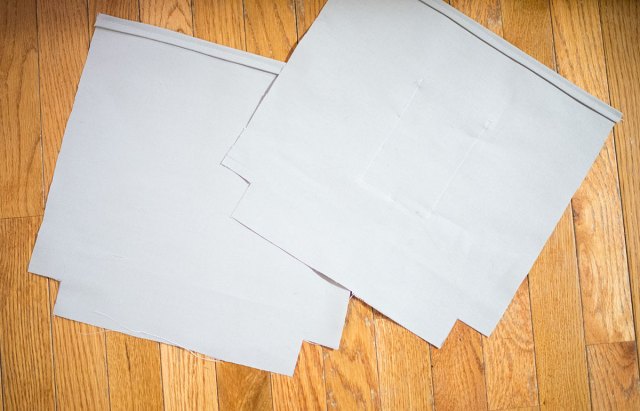
10. Cut 2″ by 2″ squares out of the “bottom” corners of each MC rectangle.
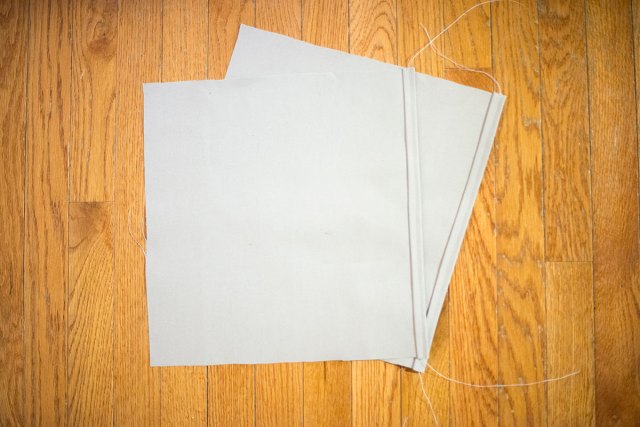
11. Clip the two MC rectangles together, right side facing.
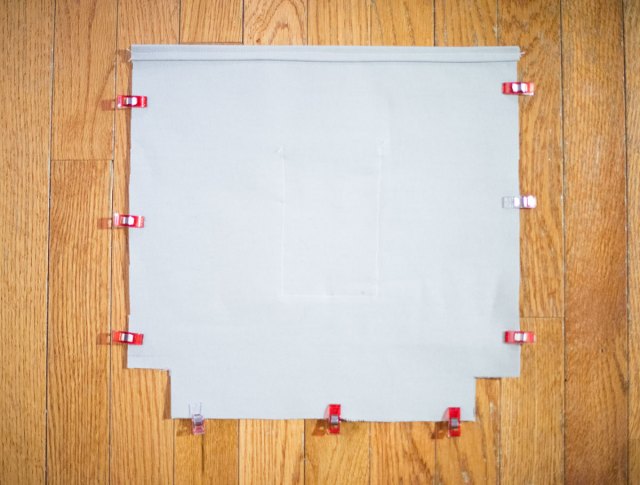
12. Stitch the sides and bottom together, without stitching the 2″ corners.

13. Box the corners. Clip, and then sew in place. Turn inside out. Stop now if you want a bucket! Just kidding, I know you don’t want a bucket.
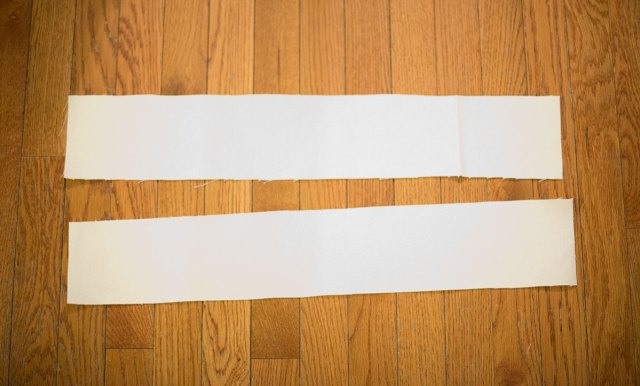
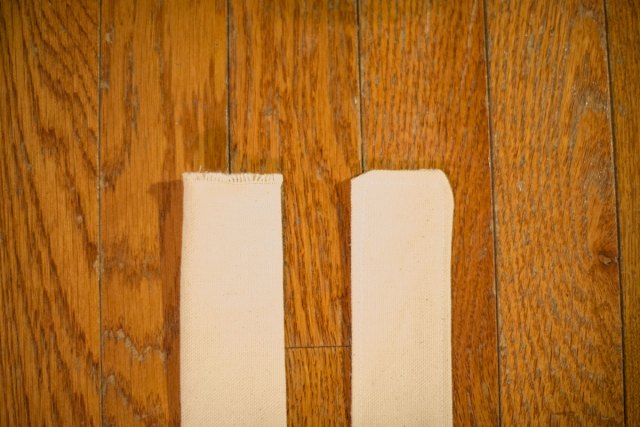
14. Cut two rectangles of CC canvas to 4″ by 22″.
15. Fold longwise and clip in place.
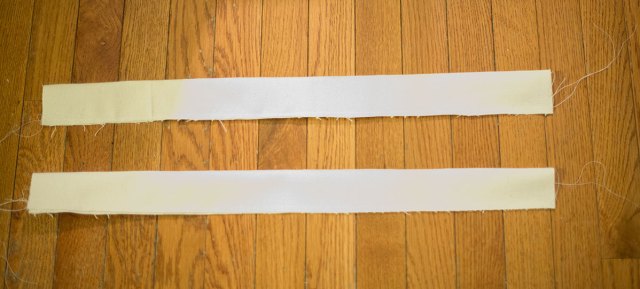
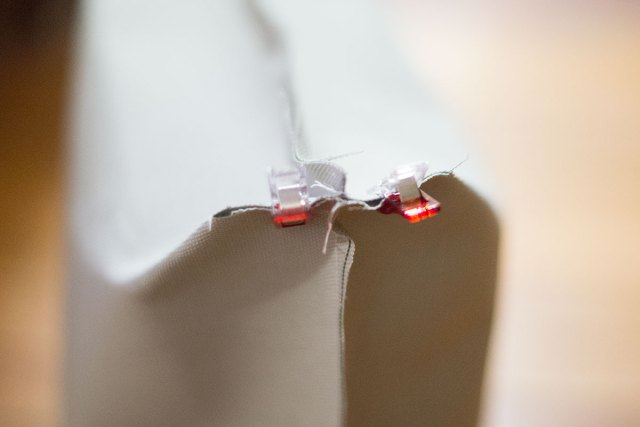
16. Sew along the long edge and just one short edge with a 1/4″ seam.
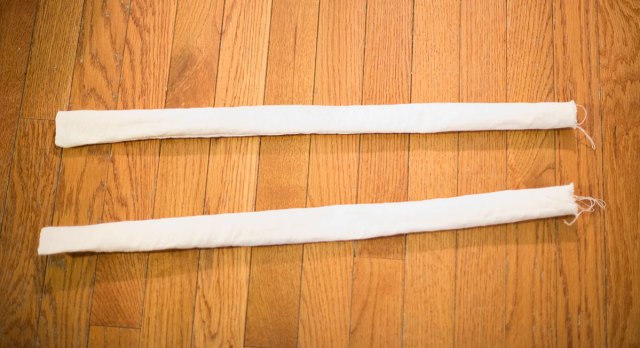
17. Using a pointy implement (like maybe a knitting needle) for help as needed, turn each piece inside out. Iron flat.
18. Close the open ends by folding the raw edges in, and top-stitching them closed. Now you have two straps!
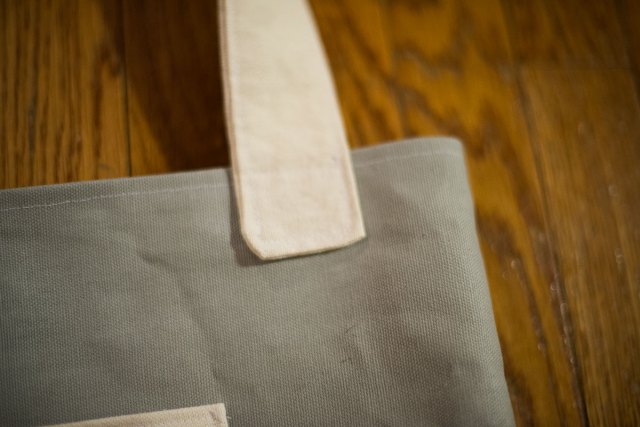
19. Clip both ends of one strap to the front of your bag. Sew in a square, attaching the ends of the strap to the bag.
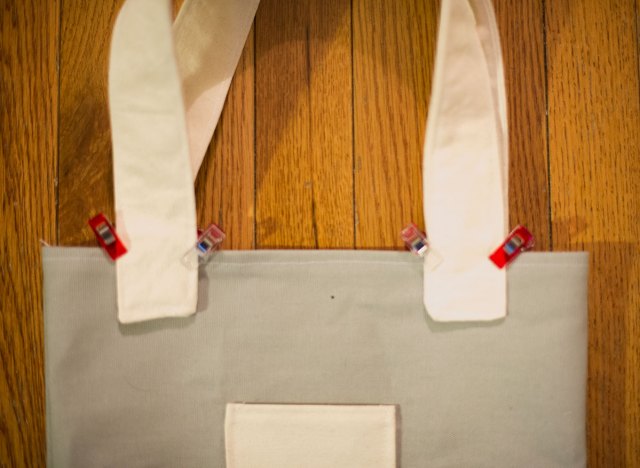
20. Do the same to attach the other strap to the back of the bag.


Comments
Excellent! I can’t wait to try it.
Neat. You can also add some waterproofing (and style) by waxing it with Otter Wax. I just bought some to re-wax some jeans. There are plenty of YouTube tutorials on how to do it.
this is so cute! also i’d never heard of sewing clips and now they’re all i want on earth.
i was gonna say “this is so cute!” but then laneia said “this is so cute!” so
I went to the craft store to wind down after a long week (and it’s not even over) and I accidentally bought too much canvas for another project of mine. I came home and while wondering what to do with it I saw this! Fate? I think so! Thanks for the great idea!
good post, I love canvas tote bag. I will also make a bag for me.
canvas tote bag
Okay, so I actually made this!

It took an hour or two, and the instructions were very straight forward. For those of you who like perfect edges and seams, it is more difficult to do. As a “beginner,” I quickly realized that was not going to happen. Also, my canvas started to fray on me, so just be aware. Overall I’m pretty pleased, and plan on making a second wider tote with my extra fabric, and possibly a pencil case. Joann was having a sale, so for fabric, thread, and bobbins the price was just over $5. Can’t beat that!
Oh, and I also reinforced all of my seams, especially the straps! As a person that likes to cram everything and anything into my bags I know it will need it.
BETTY I LOVE IT