

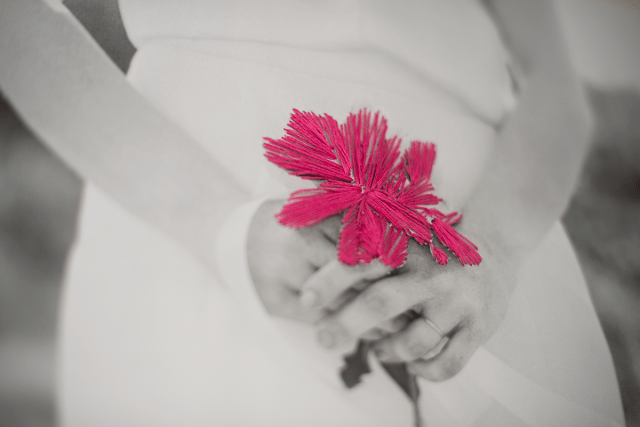
Got a black and white photo you just loooove and some embroidery floss in your craft stash? Stitching a design on an engineer print is a very affordable gift idea, or a way to take DIY decor to the next level. I used two of my fave wedding photos (by Love & Perry Photography) to share two different ways to decorate engineer prints with embroidery floss!
You will need:
- A high-resolution image
- Embroidery floss
- A size 24 tapestry needle (which you probably already have if you tried this project)
1. Make your image black and white. Be sure to save it in the highest resolution possible.
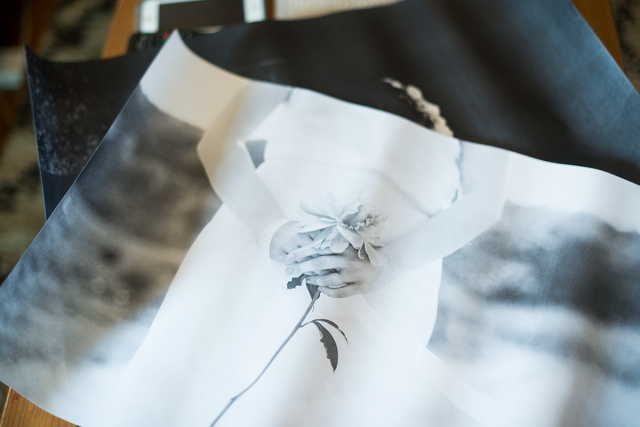
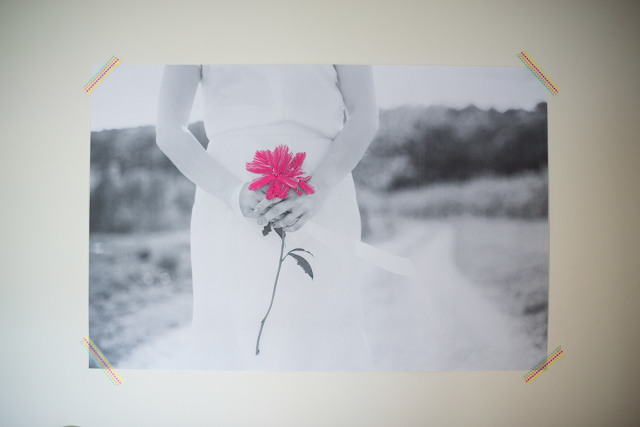
2. Go to a copy shop (like Staples) and have them print it as an engineer print. They offer a few different sizes; I chose 18″x24″ for this project.
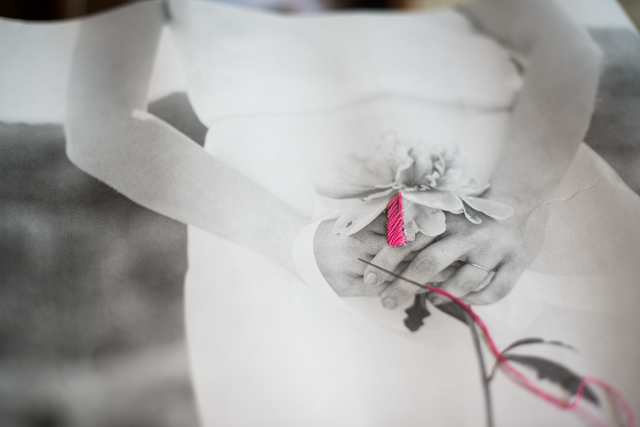
3. Cut a length of embroidery floss and separate it so that you have two pieces, three strands each. Thread your needle and begin stitching oh-so-carefully! The paper is flimsy and you don’t want to tug too hard and rip it. I decided to stitch over the petals in my peony.
Want to try it another way? A pencil comes in handy to add your own design to an engineer print.
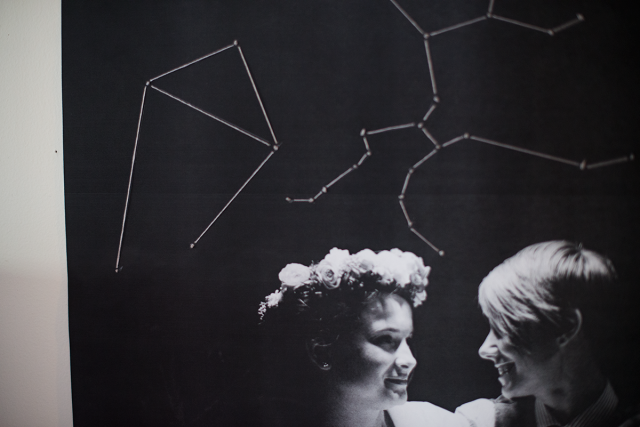
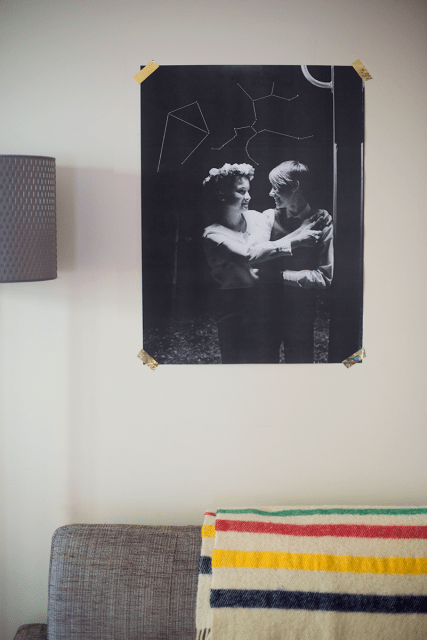
1. Draw your design with a pencil. I chose the constellations for Libra and Sagittarius (my wife’s and my astrological signs), and freehanded them above us in the photo, then stitched along the sketch.

Happy stitching!


Comments
THIS IS SO BRILLIANT. I LOVE embroidering (I embroidered a handkerchief with images from the school for one of my college applications cause I’m the coolest), and these would make great gifts for people! Awesomeness!
And did you get accepted? Did they appreciate it? Don’t leave us hanging!
well that’s just too dang cute
Love this, it’s something that seems to in my abilities and looks awesome!
This is gorgeous! Will be trying it out for some photos I want to put up in my new on-campus apartment. Also, I see you, throw blanket from The Bay. #canadiana
Super adorable!!!
Very cool ideas! And by the way, your wedding photos are absolutely gorgeous
Thank youuuuu!! We love them so so much <3
I especially love the constellation piece. So beautiful.
This is such a neat idea, thank you so much for sharing!
As a needle worker I can see the true meaning of art just by looking at them even without using sense of touch, specially the picture 6th I love the color combination, they are totally suited.
Thank you so much for sharing !!!!!!!!!!!!!!!
This is such a Great idea
This is the nice work for embroidery