

feature image via Shutterstock
It’s almost Autostraddle’s own Babe-B-Q weekend! We’ll be hanging out with each other August 15 and 16 to grill up a storm, and everyone’s invited! We’ll also be guiding you through the process of grilling up said storm and getting prepared for the big event all week. You can view all Babe-B-Q posts here.

Hello glowing embers! It’s your Autostraddle summer grilling correspondent here, ready to help you prepare for this weekend’s big Babe-B-Q cookout extravaganzapalooza! Maybe you’re reading all these posts about grilling with a knowing grin, confident that the portobello mushrooms you’ve had marinating in your fridge for three days in your secret recipe are going to be an even bigger hit than they were last year now that you tweaked the spices (they totally will!), but maybe you prefer to do your cooking indoors—where things make sense—and are intimidated by the possibility of fire trucks screaming down the street, dashing the hopes of your hungry guests. Fear not! Cooking food outdoors is easy and fun, and I’m here to gently nudge you toward the flames. You’ve got this.
Step 1: Acquire a Grill
Having a grill is an important first step toward successful grilling. There are a lot of Big Feelings out there in the world about charcoal grills vs gas grills and which type is superior and which will make your food taste better and which one makes you a Real Griller compared to a pathetic, sniveling counterfeit unworthy of the food you would deign to prepare. I am here to tell you this: it doesn’t matter. It doesn’t matter! There are pros and cons to each type of grill and you can prepare delicious food with either. Charcoal grills smell good, they burn super hot, and they make you feel like you’re doin’ stuff! Propane grills, while some may qualify them as “glorified, expensive outdoor ovens,” are efficient, easy to control, and make for quick cleanup. The kind of grill that makes the most sense for you will depend on your circumstances. If you’re really on the fence, there’s a good breakdown of the arguments for and against both types here.
Step 2: Prepare Your Grill
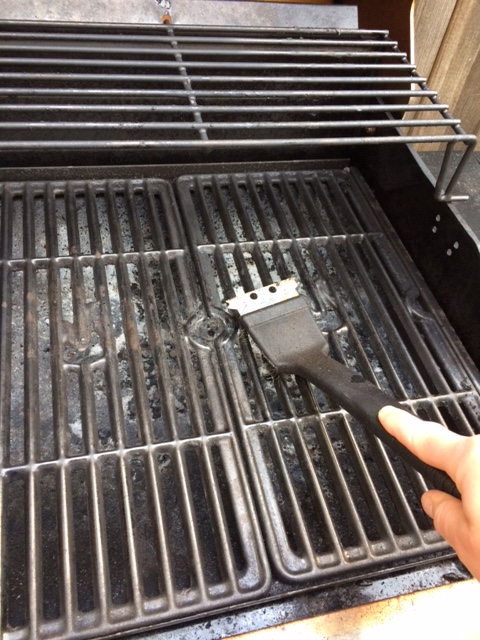
If you haven’t dug the grill out in a while, you might open it up to find the grate rusted to oblivion – especially if you live somewhere with humidity and temperature fluctuations. This is not the end of the world, but you’ll need to clean it up before you can cook on it. Rust can often be removed with just an abrasive scrubber like a wire grill brush and some soap and water, but tougher or deeper rust might require a more complicated solution, like a vinegar/baking soda/lemon situation, and maybe a soak. Try to stay away from harsh chemicals if you can, since you’re going to be eating off that surface. Keep rust from coming back by being careful to brush and oil your grill surface after you’re done cooking.
To clean off old blackened food bits, use a wire brush or half an onion pierced with a fork. A ball of tin foil will also work in a pinch, but watch out for aluminium residue. I find it easier to heat the grill up a bit before going at it. Once it’s clear, oil the grilling surface with a brush, rag or paper towel (avoid aerosols near flame and heat). You’re doing great!
Lighting a gas grill is a simple as opening the propane tank valve (lefty loosey righty tighty), turning the dial on the grill to start the gas flowing, and hitting the striker button. Charcoal is a bit more complicated. My preferred way to light charcoal is with a charcoal chimney, since it’s efficient and doesn’t require lighter fluid. Pour the charcoal into the main compartment of the chimney, stick some balled up newspaper in the lower compartment, light the paper, and wait. Once most of the charcoal is covered with a light grey ash you dump it in the bbq and off you go (lump charcoal doesn’t ash though, so just give it about 15 minutes). If you’re more into playing with fire there are some different torches out there, or low-tech methods like filling an egg carton with briquets and lighting it on fire. I saw one guy on youtube who covered his pile of briquets with an olive-oil soaked paper towel that he then lit on fire, and that seemed to work fine as well. Really the most important thing is to avoid lighter fluid if you can, since it (unlike propane) imparts a nasty chemical flavor to the air and the food (and match-light charcoal is just briquets soaked in lighter fluid, so avoid that too!).
If you have to go the lighter fluid route (which, again, I advise against in the strongest possible terms) I recommend spreading the coals out, hitting them with the fluid, then rearranging them into a pyramid shape before lighting from the bottom. Spread them out again once they’re coated with ash.
Step 3: Grill!
Ugh, finally, right? Whose idea even was this? If you haven’t ordered in yet, there are different ways to approach grilling depending on what you’re preparing.
1. Direct heat
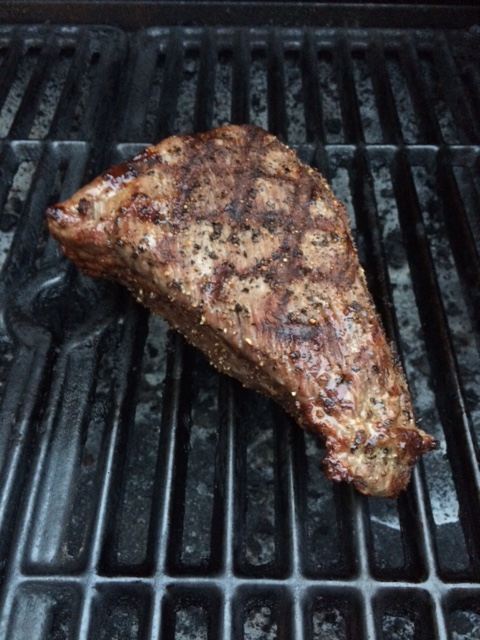
This is just what it sounds like — you light your fire, you place your food items above said fire, and flame them into becoming their best selves. This method is good for things like steaks, burgers, sausage, chicken legs, kebabs, corn cobs, and veggies. When cooking meat like a steak or a burger over direct heat, give it a 90-degree turn when it’s halfway done on each side, to get those sexy grill marks, and try to avoid flipping meat more than once. If you have a gas grill that came with searing plates, use them to get a nice crust on the outside of your steak.
2. Indirect heat
Indirect or convection cooking is when you cook food by heating up the air around it. To do this you need a 2-zone temperature setup, where you’ve got higher heat on one side of the grill and lower or no heat on the other. On a gas grill you can easily adjust to a 2-zone setup via the burner dials; with a charcoal grill it’s a bit less precise and involves piling your coals on just one side. This method is used for low-and-slow cooking, or for when you need more temperature regulation throughout the cooking process or are grilling foods that cook at different rates. Indirect heat can be used for things like roasts, whole chickens, ribs, brisket, pork shoulder, and certain delicate fish and vegetables. I did a beer chicken this way recently on a gas grill and the results were fantastic.
3. Smoking
Proper smoking is really best achieved with an actual smoker, but charcoal and gas grills can be used to add delicious smoky flavor to your food too. Get some wood chips and soak them in water for at least an hour before cooking, then make a foil pouch: dump the chips into the center of a large sheet of tin foil, then fold it over on itself and seal all the edges tightly. Poke lots of holes in the top for the smoke to escape. Place the pouch on the coals or over the burner until smoke starts to emerge from the holes, then move it somewhere off to the side that’s not directly beneath your food. Open the grill vents and close the lid to let the smoke swirl all around inside and flavor your food. Delicious!
Bonus tips!
A digital oven thermometer is your best friend — the one on the outside of your grill lid, in addition to probably not being very accurate, is really just reading the temperature at the top of the inside of the grill and not down where your food is actually cooking. So much about grilling is controlling temperature and understanding at what temperature your food needs to be cooked. While you’re at it you should get yourself a decent digital meat thermometer too.
Let your meat come to room temperature as best you can before cooking it, and salt it liberally. As it sits the salt will dissolve into the meat, re-emerge as liquid, then re-absorb again — it’s neat! Just as important as letting your meat sit before you cook it is letting it sit after — this is called resting, and it’s super duper important. Tent that hunk of protein with some foil and let it sit for at least 10 minutes, or longer if it’s a big cut. This way when you cut into it you won’t find yourself swimming in a sea of unruly meat juice. Also it’ll taste better.
Don’t be intimidated by the idea that in order to create a delicious finished product you need to have some complicated family-secret spice concoction to rub all over your food – most decent cuts of meat are best-served with just salt and fresh ground pepper, and the same goes for veggies, which I usually just toss in a little salt, pepper and olive oil. If you’re feeling adventurous there are lots of marinade and rub recipes out there, though — Bon Appetit’s 4-3-2-1 spice rub works in a pinch if I’m doing a shoulder or something, mainly because it’s easy to remember and I am bad at remembering things. Making your own barbecue sauce is also pretty simple and you probably already have what you need kicking around (ketchup, sugar, spices, acid, etc). IN FACT we just published some handy recipes on this very website this very day!

Do you have your own favorite marinade or rub or fire-starting tip to help us all avoid lighting our sleeves on fire? Want to declare me a complete lunatic for daring to suggest that charcoal isn’t the only acceptable way to apply heat to food? Tell me all about it in the comments!


Comments
Good one, Marni
I always learn so much from you
We just finally got a grill this summer and I’ve been pretending I know what I’m doing for months. So this is really genuinely helpful. I recently burned like a ridiculous amount of food on our grill a couple weeks ago because I walked away from it and the temp was WAAAAAAY higher than I thought it was. I didn’t know you couldn’t trust the temp thingy on the outside.
I believe in you KaeLyn!
I recently bought a little Weber Baby Q for my balcony and I’m in love with it. I will have to try the smoking option you’ve given as I do like the flavour that charcoal gives over gas – might be able to peg some of that back.
I’m pretty anti-charcoal but I do have a lighting tip for them, fireplace matches. If you can find them they provide an excellent amount of distance. The ones I grew up with were about 8 maybe 9 inches long. Your average hand-held butane grill lighter just doesn’t compare.
This whole week I’ve been trying to not unload all my grill feels that are rather mashed with Katrina feels. I come from a grilling family, we grill all year round, every week and sometimes used the grill to cook the the T-Day turkey or the New Years game hens.
The grill that I grew up til the age of 15 with looked like something someone salvaged from a junk yard and that hardy buzzard survived the fury of 170 winds, water and untold debris. It was a gas grill on a “post” my dad jury rigged out of some left over tubing from god knows what.
The water damage took out the stove and the oven in the house so until our FEMA trailer made it’s way to us about a year or so later the only way we had to cook something was that grill and 2 microwaves.
Bless grills and grill skills.
But fuck card tables, I never want anything to do with a card table as long as I live.
Okay so I have some recipes I’ve been dying to share but one of them a rub (and glaze) is for things the size of an American turkey breast and I’ve never done a reduction for it, but it’s just so good.
Rub
2 tbsp garlic powder
2 tbsp black pepper
¼ tsp ground cardamom
¼ tsp ground cloves
1 tsp saigon cinnamon
1 tsp turmeric
1 ½ tbsp ground cumin
Glaze
¼ cup honey
¼ cup of butter melted
1 tsp of the rub
What You Are Doing
Mixing the seasoning throughly and then rubbing it all over the surface of your meat.
In the last 30 minutes of cooking combine reserved 1 tsp of dry seasonings with the honey and melted butter, brush over bird(s). That is how you make a glaze kids just a fat, some honey and spice ain’t it nice?
Note: Um yeah all those spices make up about a 1/3 cup (80ml) in volume so um something smaller than an American turkey breast and easy for a smallish grill would maybe be 4 game hens or so and if you’ve got the skill a whole split chicken. Or just mix the rub and keep it stored and on hand for whatever small things normal people grill.
Marinade #1 for Kebobs
1 cup plain yoghurt
Juice of 1 lemon
1 tbsp dry parsley
2 cloves crushed garlic
½ tsp salt
¼ tsp nutmeg
¼ paprika
¼ ginger
¼ cloves
¼ saigon cinnamon
¼ fenugreek
Cut your meat for kebob’n before putting in the marinade not after, see Laura’s post on tenderizing if you’re thinking but whyyyy. Do keep shrinkage in mind when cutting the meat into pieces. Some shrinkage will be because of the marinade, but the majority with be from cooking.
Now for some general advice
A marinade doesn’t have to be a big production depending on the meat. Something like flank steak you can just douse in teriyaki and sprinkle with onion flakes with some powered garlic. You just need to be aware of the toughness and have a general idea of the acidic strength of the sauces or liquids you’re considering. Not saying there won’t be some trial and error, but boo this is a thing you can do.
Saigon cinnamon is the best cinnamon and it goes with everything except fish.
Lastly bring mustard to the beach with ya in case of jelly fish because white vinegar and turmeric, it’s soothing and deactivates the nematocysts.
@gunna-see-the-light Bookmarked this whole page into my “recipes” folder, cuz I’m loving your BBQ wisdom. Cardamon is my favorite spice.
Thank you, but oh dear barbecue is not the same thing as grilling. I may be from the Rosary Belt and therefore not a true Southerner, but I gotta say it at least once this week.
Barbecue is low and slow, it’s the rough tough cuts the oligarchy wouldn’t eat and what the poor could afford and wrenched tenderness out of, it’s hardship made into an edible art. It’s something of Southern heritage to proud of that anyone with a functioning tongue and parts can embrace and enjoy too.
Cardamon is a good one.
I think I’ve used on duck before, but def used it in the breading for fried chicken at least once.
Safe cooking and good eating to you, Dante.
Oooh, I’m definitely going to try that rub. Your dad seems cool!
Do tell me if you try it on a non-poultry meat, I’ve never done that with and I’m kinda curious but too lazy to try it.
He is pretty special :P
*****IMPORTANT THING********
By “plain yoghurt” I mean plain strained yoghurt, or as we say in the States greek yogurt.
If you’re looking for a longer smoke, I would suggest getting the A-MAZE-N pellet smoker (from the site, not Amazon. Every time I order from the site, the owner usually throws in little extras like a bag of pellets). I got one for my Masterbuilt electric smoker because I didn’t like how the chips smoked in it. The pellet smoker lasts about 8 hours for me with a full tray. I also started using it in my offset charcoal smoker with excellent results. It’s also great for cold smoking if you’re into curing your own bacon.
Thanks for the tip! The fact that their website looks like it hasn’t been updated since 1994 makes me trust them more, because bbq.
This should be a workshop of some sort for next A Camp.
Believe me I’ve wanted to. Believe it or not the forest service isn’t the biggest fan of the idea.
Yeah, Southern California mountain areas are pretty much a no-go with open flames. I remember I went to a girl scout camp where they had to nix the campfire because of more strict forest fire regulations and so they would just put a candle (later, a flashlight) inside the massive fire pit instead.
But if we did it by one of the fire pits…..haha
You can use Fritos or tortilla chips to get that charcoal lit.Their greasiness burns nicely Yes you CAN spare a chip or 2…
This is excellent advice.
All the boys in the Family know to stay away from my grill…
Is it the olestra? O_O
I enjoyed how authoritative this was. I feel like the bbq knowledge was droppedddddd.
I’m definitely going to try that tip for smoking! I’m very much a grill newb but we do have a decent little charcoal grill we fire up for burgers/steaks/chicken every now and again. Grilling gives such a unique and awesome flavor and it’s something I want to learn more about so thank you for all this solid advice!
Just desire to say your article is as astonishing. The clarity on your post is just cool and
i can think you’re an expert in this subject. Well with your permission allow me to
grab your feed to keep updated with coming near near post.
Thank you one million and please keep up the rewarding work.