
Last time we went through all the parts you will need to build your PC. Now it’s time to put them all together! We’ll be physically installing and connecting all the components, right up to the point where you turn the damn thing on.
You will need:
Everything from last time! Which, to jog your memory, is—
- CPU and heatsink/fan
- motherboard
- RAM
- hard drive(s)
- optical drive(s) (i.e. DVD or Blu-ray)
- PSU
- case
- power cable
Optionally, you may have acquired:
If you bought all your components brand new, they should have come with all the screws and cables you need. Some components, such as PSUs, may also come with handy cable ties, twisty ties or velcro strips, to help keep your cables neat and tidy and out of the way. However, it’s always worth getting your hands on extras. Also keep hold of any instructions or manuals that came with your components!
Finally, you will need:
- a screwdriver — a standard crosshead type will do the job
- (optional) another PC/phone/tablet for looking stuff up if you get stuck
- at least two cups of tea. Not because it will take a long time, but because you will forget about the first one and it will go cold.

For this assembly, I’m going to use pretty standard components, installed in pretty standard ways. However, all self-built PCs are special little snowflakes just like their builders, which means some of your bits and bobs will be slightly different shapes or sizes from mine. If your stuff looks radically different, don’t worry: even if their instructions are wildly confusing or in an actual foreign language, no problem is farther than a Google away.
And of course don’t be afraid to ask questions in the comments!
I feel like this is becoming a body-positivity workshop instead of a PC building class, so let’s get started.
1. Getting started with the motherboard
At the rear of the case, you’ll see some screws around the edges that are keeping the side/top attached. Whip those screws out, and slide off whatever comes loose: in most cases, one or both of the side panels of the case will slide out. Sometimes, both sides and the top will come off in one big piece.
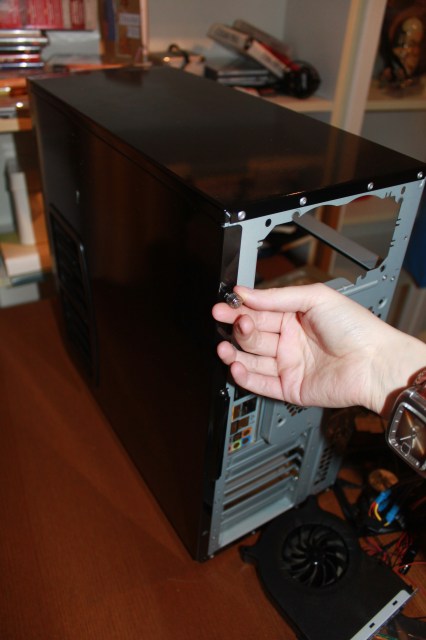
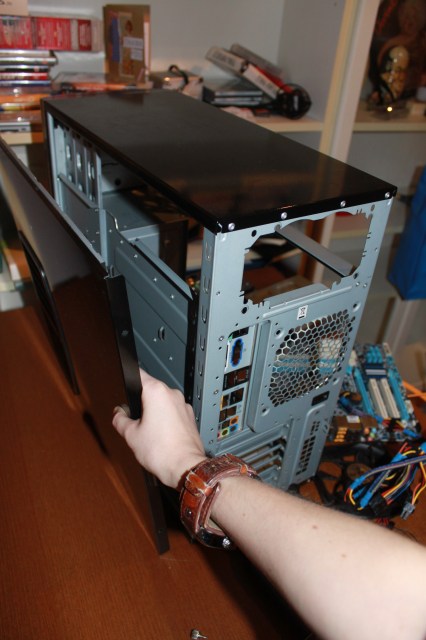
You’ll notice some cables inside, that appear to lead to the front of the case. Tuck those to one side for now.
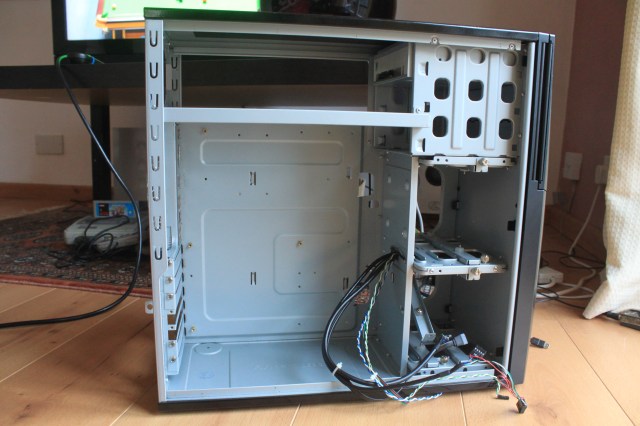
Lay the case down flat, with the metal backboard at the bottom. You’ll see the metal dotted with screw-holes. Some of these screw-holes will need to be fitted with motherboard standoffs — a type of screw that will allow you to attach the motherboard, raised at a safe distance from the metal backboard, so the two won’t make contact and short-circuit the motherboard.
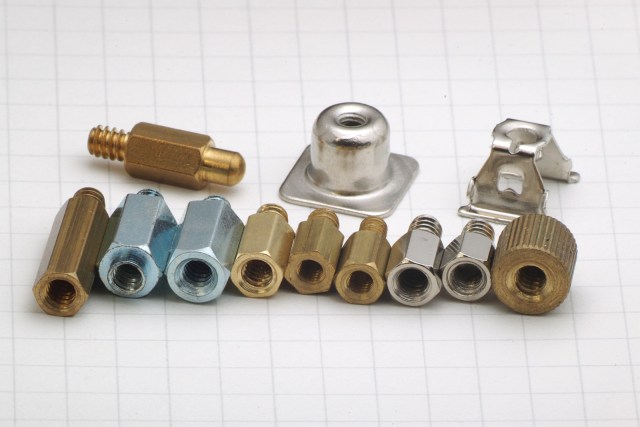
Some motherboards may come with the standoffs already soldered into place, but it’s common that they’ll come loose with the rest of the screws, and you’ll have to fit them yourselves. Screw them in (or push, if they’re the peg-like variety), choosing holes at sensible positions to provide support to your motherboard.
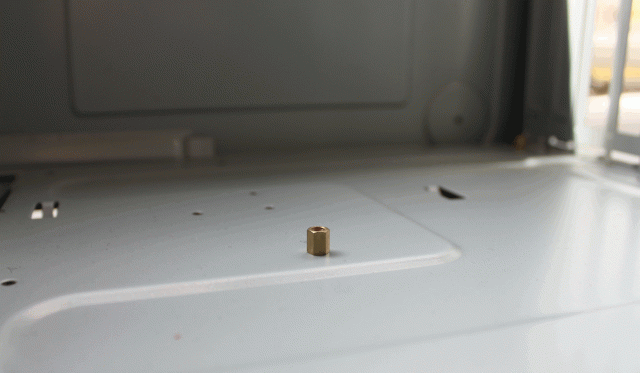
Before we attach the motherboard to the standoffs, we’ll need to fish out and fit the I/O shield it came with.
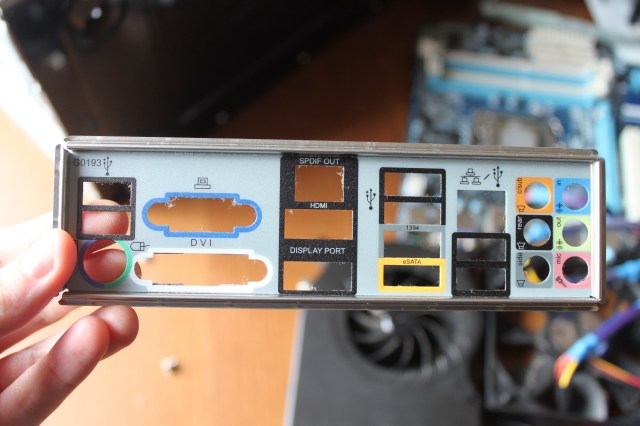
This thin piece of metal will help keep dust out of the case and support the ports on the motherboard. There will be an oblong hole in the back of your case. Firmly push the I/O shield into this hole from the inside, it should fit snugly.
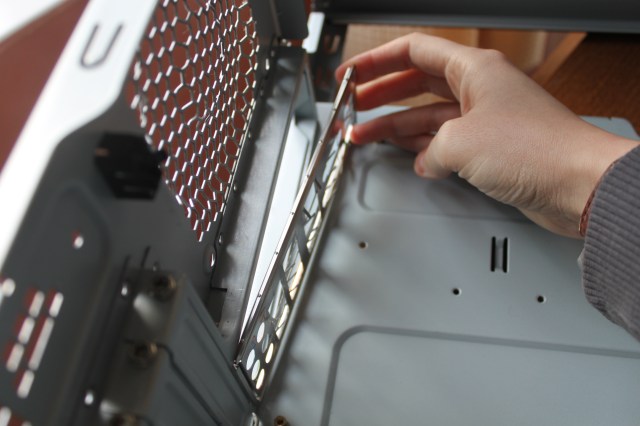
Now we can fit the motherboard, lining up all its external ports — like the USB, ethernet and monitor ports — with the appropriate holes in the I/O shield.
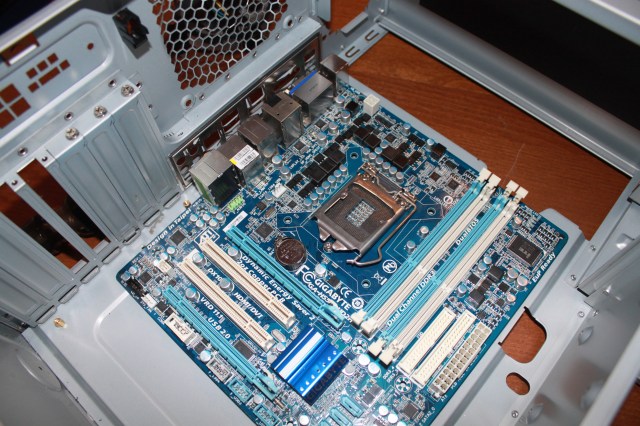
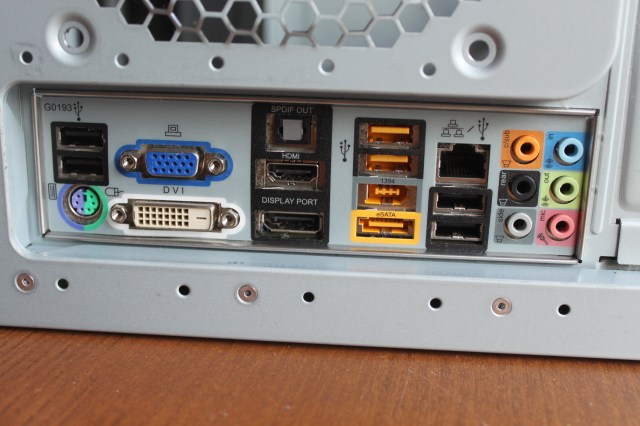
Gently push the motherboard until the ports are through, and you should start to see some of the screwholes in the motherboard line up with the underlying holes on the metal backboard. As soon as you’re happy that you can get the screws in comfortably, get that shit locked down. Don’t get over-excited though, because sadly not all of these holes are intended for screwing; typically four or five will line up with holes in the case, allowing you to attach the motherboard securely.
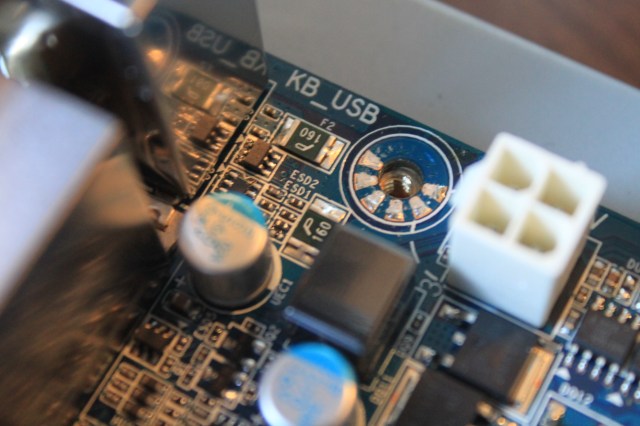
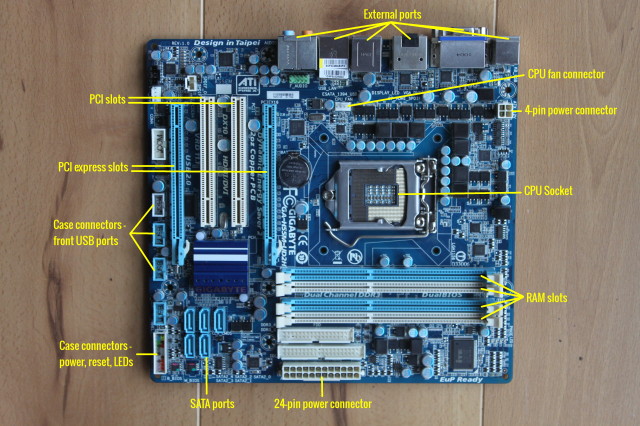
Once the motherboard is fitted, it’s time to start filling up all those slots with your precious goods!
2. CPU
Find and open the CPU socket on your motherboard. There may be a plastic blank in the socket, protecting the connectors — you can remove that.
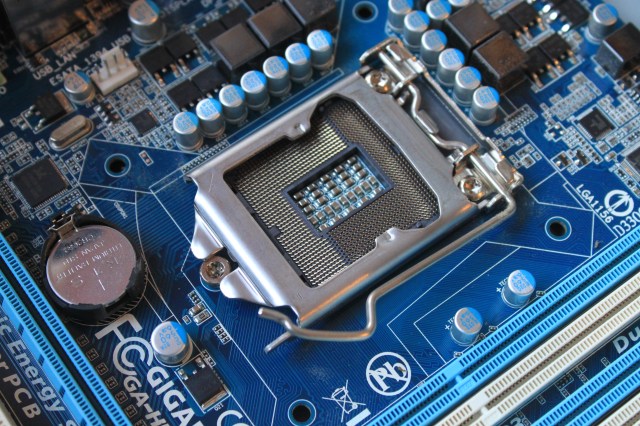
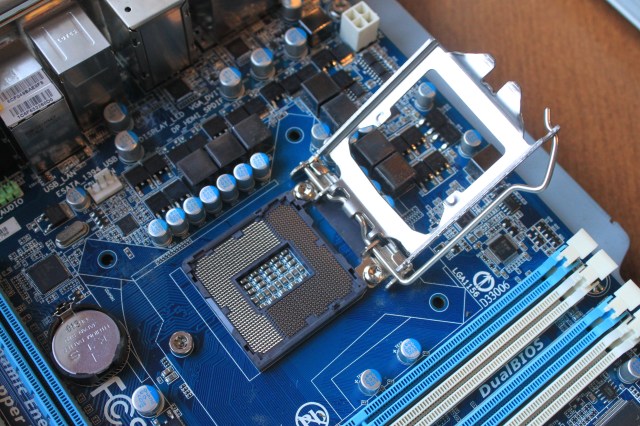
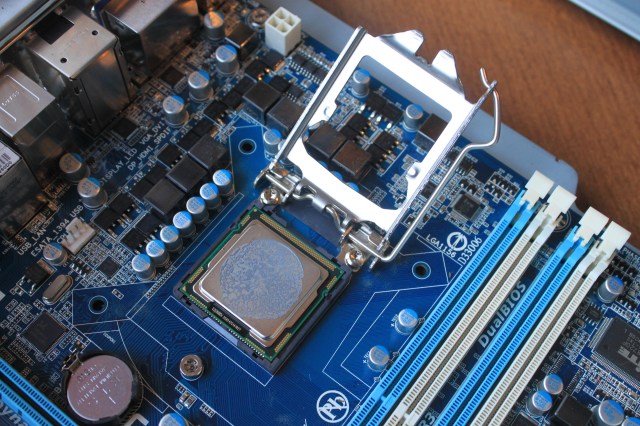
Plop your CPU in there, connector-side down. It will only fit in one orientation because of the notches on the side, and many chips have a handy arrow that will point to the bottom left corner.
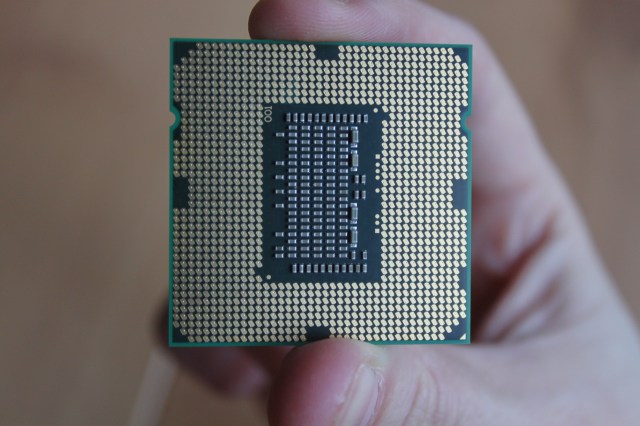
When handling the CPU (or any other component with exposed metal connectors) try your hardest to keep your fingers off the connectors and handle only from the side. You want to avoid scratching the metal or getting any dirt on it, which can damage or completely break the connection.
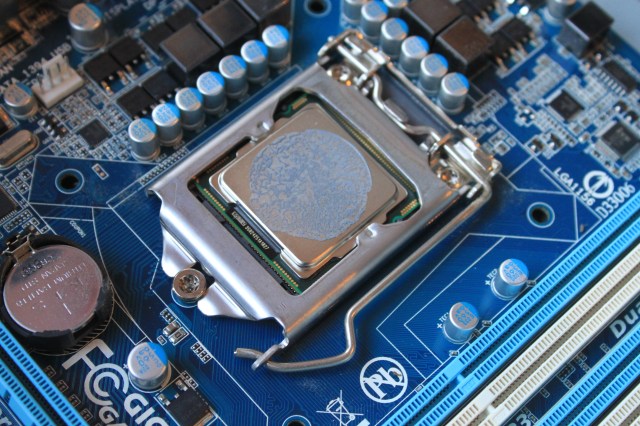
Once the CPU is snug in the socket — it shouldn’t wiggle around at all — pull the lever down and lock it in.
3. CPU Heat Sink and Fan
Next, we’re going to install the fan and heat sink that sits on top of the CPU to keep it cool.
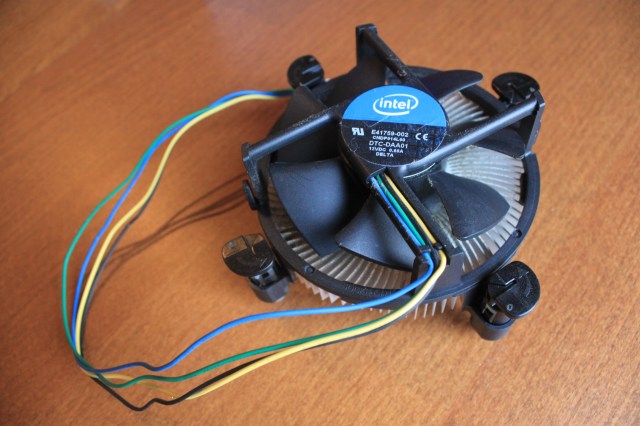
To make sure heat gets conducted efficiently from the CPU to the heat sink, it’s important to have a thin layer of thermal paste between the two.
Stock heat sinks (i.e. ones that come bundled with the CPU) usually come with a square/circle of thermal paste applied to the underside — check yours to see if it has some.
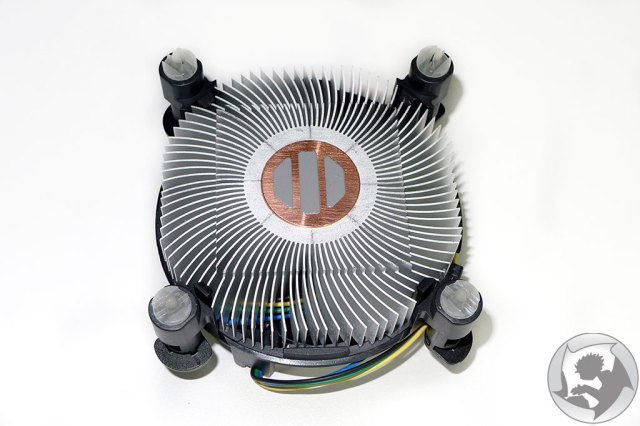
If your heat sink doesn’t have any thermal paste already, you’ll have to apply it yourself — it’s much easier to apply it to the top of the CPU once it’s in its socket.
Check the instructions specific to your paste to find out exactly how much to use because compounds will vary in thickness. Generally, you’ll need only a tiny amount, about half a pea size. Splodge the paste onto the middle of the exposed side of the CPU. You can either spread it out into a thin layer, using some rigid plastic like an old credit card, or just rely on the weight of your heatsink to spread it out once it’s on. Have a look here for a guide with pictures.
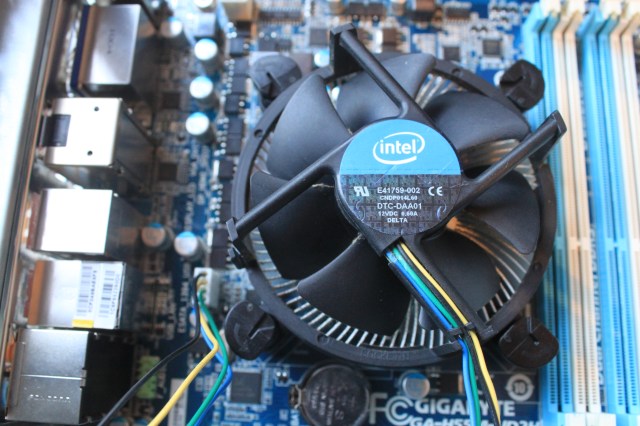
CPU heat sinks and fans tend to be one of the components that vary the most in their design and method of installation. I’m going to be installing the stock heat sink and fan that came with my Intel i5 CPU, and it’s really really easy to install. However, others can be a real pain, often involving tricky levering action and a bit of force. I do recommend Googling for pictures or videos if yours looks nothing like this.
The current standard Intel model has four legs, each with a plastic peg that attaches to the motherboard to lock it in place. Sit the unit on top of the CPU, aligning the pegs with the four holes around the CPU socket.
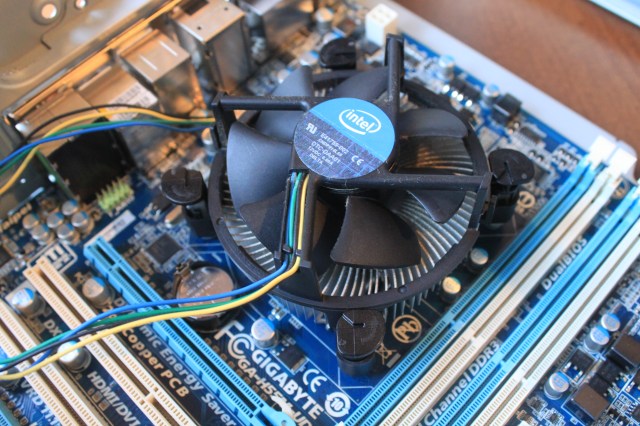
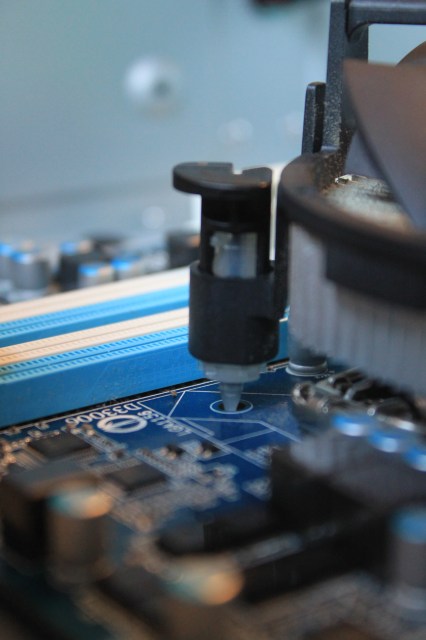
Push down on the top of the plastic legs to push the pegs through the holes, then twist the legs anti-clockwise to lock them.
The unit should be securely fastened — if it moves when you wiggle it, that means at least one of the legs hasn’t been fastened properly, so give it another go.
Once the heat sink and fan are nice and tight, you’ll need to connect the cable dangling from it to a socket on the motherboard in order to power the fan. If you’ve got a fancy heat sink that requires no fan, then you can skip this bit.
Look for a small four-pin connector near the CPU socket, which may be handily labelled “CPU fan” and plug in the fan cable.

3. RAM
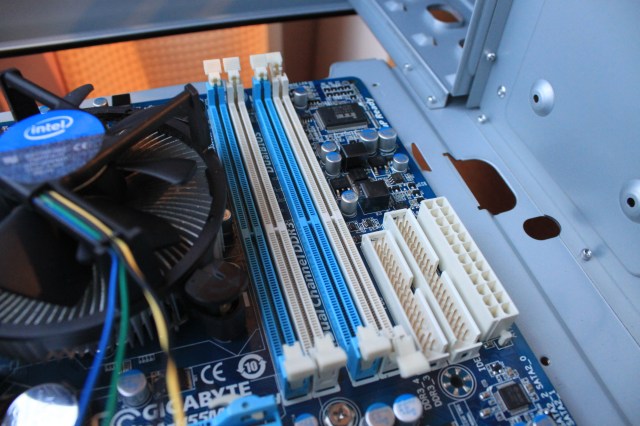
RAM sockets are typically the longest on the motherboard, and each socket has a clip at either end. For each stick of RAM you need to install, pull back both clips and line up the notch in your RAM with the notch in your RAM socket. It will only fit one way. Like with the CPU, ensure you’re only handling the RAM from the side or top, avoiding skin contact with the metal connectors.
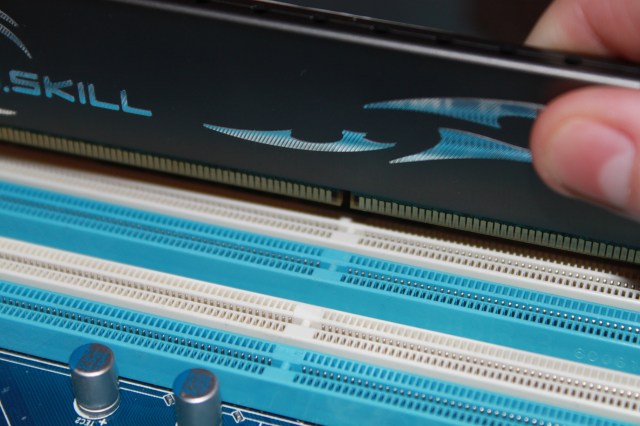
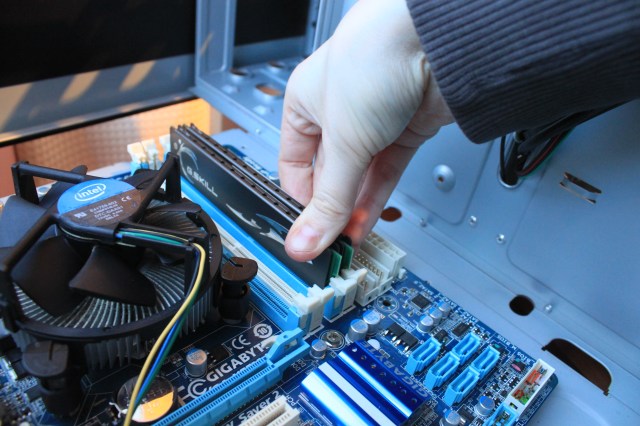
Push the stick down into the socket. If it’s fitting correctly, the downwards motion will push the end-clips back in. Repeat this for each RAM stick you have.
4. Case connectors
Before you start filling the case up with any more hardware, it’s a good time to attach any of those loose cables you saw when you opened up the case for the first time.
Each of those cables will link to lights, buttons or sockets found on the front of the case, most importantly, the power button that will let you turn the PC on!
Look at the connectors on the end of the cable, and they should be printed with what they link to.
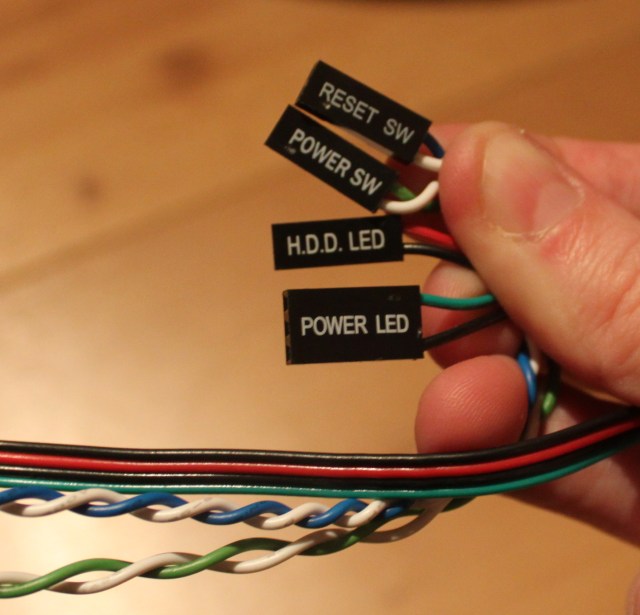
Usually, there will be one big socket for all of these front panel connectors, with lots of pins, and you need to identify the right pins for each of the cables. The pins should be labelled right by the socket, and will roughly match up to what’s written on the cable connectors.
You’ll be able to find a diagram with fuller labels in your motherboard’s instruction manual.
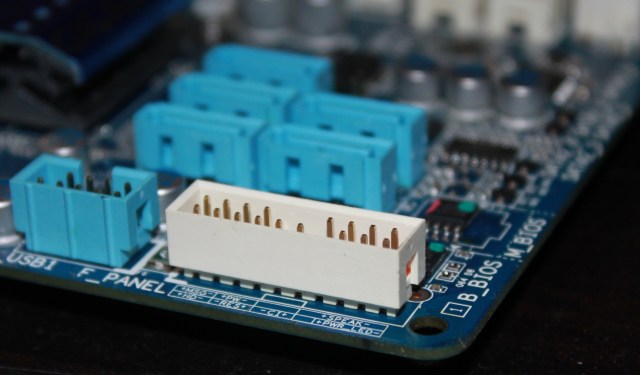
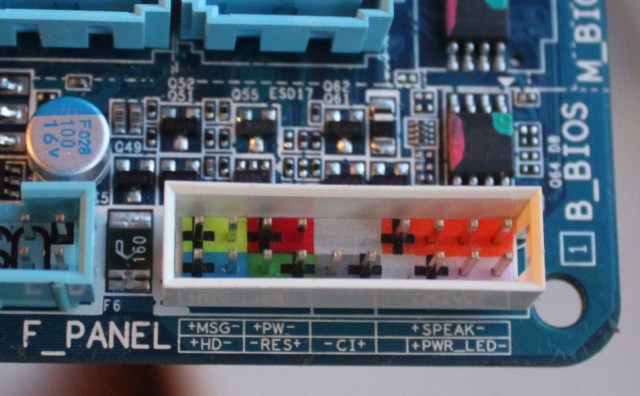
There may be further cables coming out from the front panel to hook up USB and other ports. You should be able to find sockets for these on the motherboard with “USB” in the label.
5. GFX / Sound Card / Other PCIe Cards
The last bits of hardware that you will want to install directly into the motherboard will be any graphics cards, sound cards, or other cards that will consume PCIe slots. If you don’t have any of these cards, and are relying on the graphics and sound built into the motherboard, you can skip over this bit!
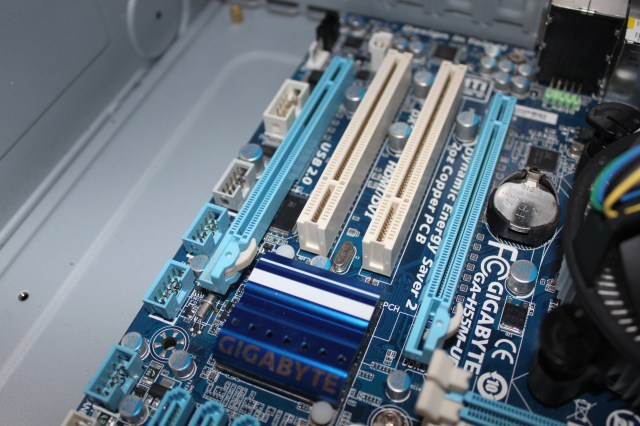
A quick word of warning: many graphics cards are pretty bulky and, once installed, can make it hard to access some of the sockets and other components on the motherboard. If you’re worried that’s going to be a problem, you may want to skip installing any graphics cards for now, and come back to it once you’ve got everything else connected.
Your graphics card will have ports on the back of it for connecting to monitors etc. In order to fit the cards and get access to those ports, you’ll need to remove the metal blanking plates from the rear of the case, which just requires removing a single screw. Many graphics cards are big beasts that will require removing two plates.
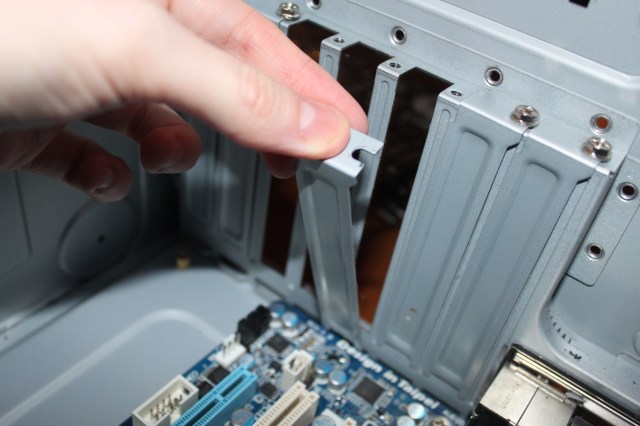
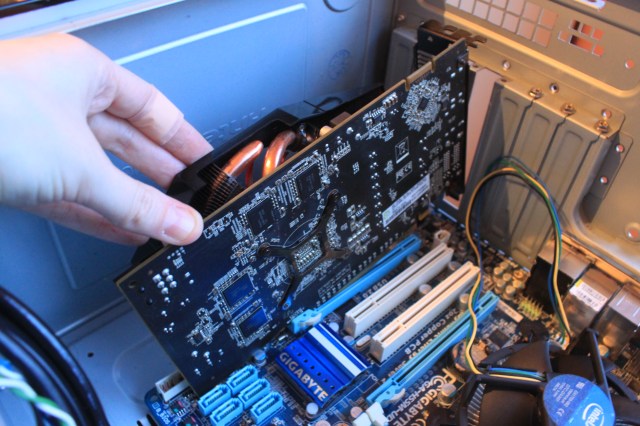
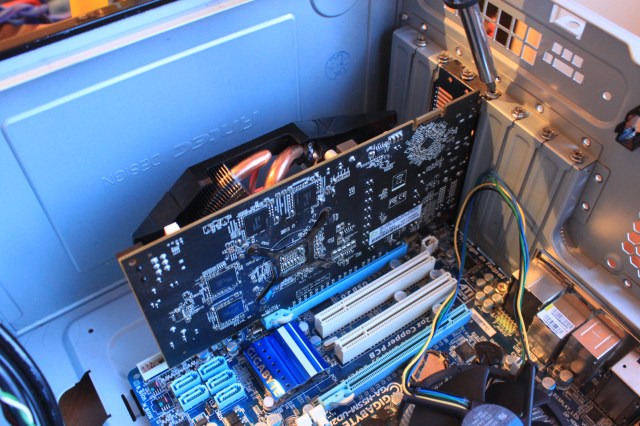
Slip the card into your chosen socket — angle it back slightly then push the rest of the card down, ensuring the metal lip stays within the case. Once it’s snug, fix it to the back of the case, using the same place/screw that was holding the blanking plate.
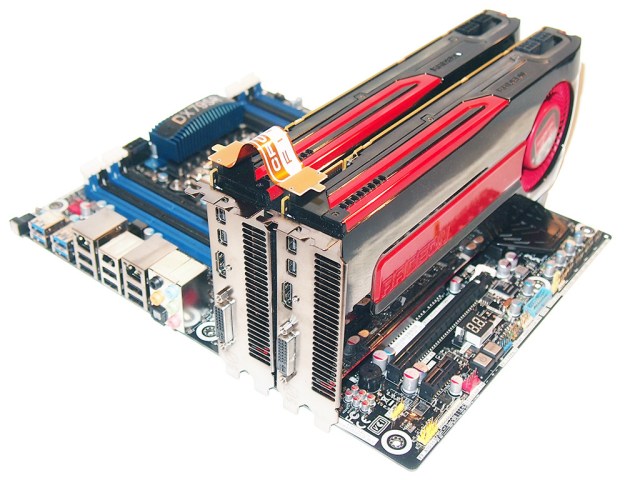
If you have Crossfire or SLI graphics cards (i.e. two separate graphics cards that can be connected together for more oomph), you’ll need to position both cards next to each other, so that you can lasso them together with a bridging card/cable.
Rinse and repeat for any more PCIe cards you have. If you realise that you removed too many blanking plates, then be sure to re-attach them — leaving any holes can muck up the airflow and cooling inside the case, as well as inviting dust and literal bugs inside.
6. Hard Drive(s)
The rest of the components we’re going to install will all have homes elsewhere in the case. Hard drives typically live in “bays” — metal shelves found towards the front of the case, that can be oriented horizontally or vertically
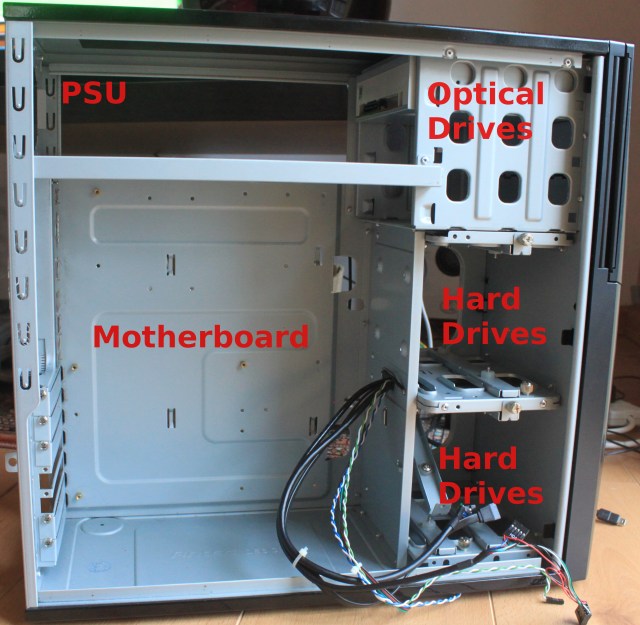
Usually, you slide your hard drive straight into these bays and screw them directly to the metal sides, two screws on each side. My case, though, has fancy noise-dampening rails that attach to the drive, which you then slide into the bay.
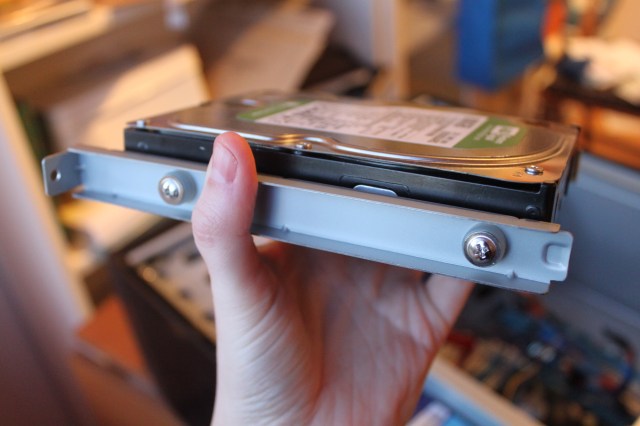
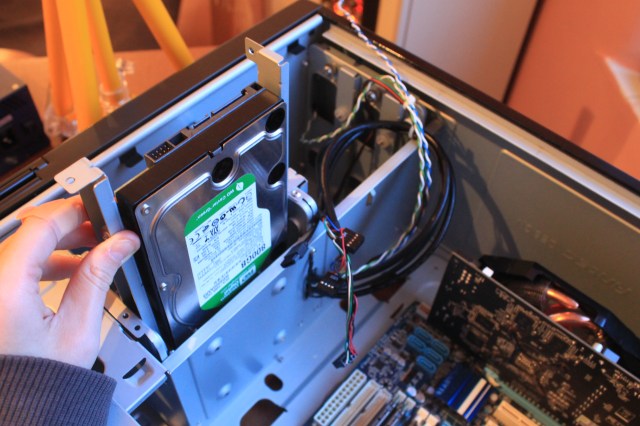
Whatever way your drive is installed, you want to make sure that you can see the data and power connectors on the back of it, so you can connect it!

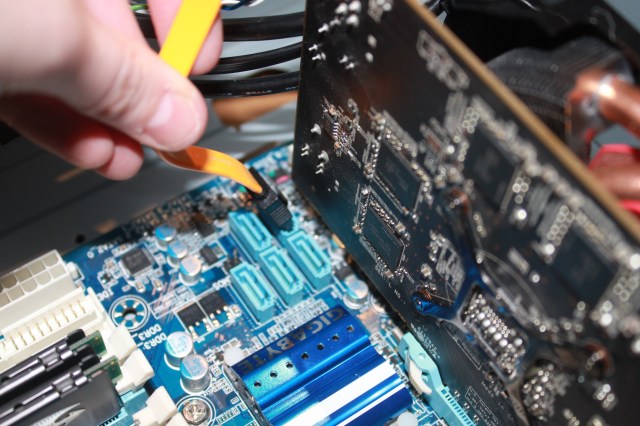
For a typical SATA drive like this, connect it to the motherboard using a SATA cable that has the same L-shaped connector at either end. You should find several SATA sockets grouped together on the motherboard, quite easy to spot because of their unique shape.
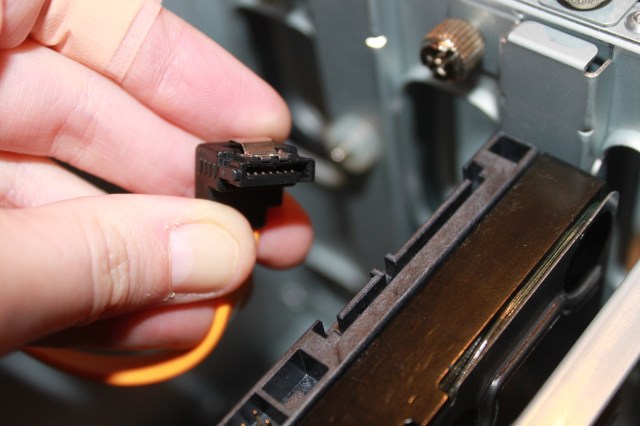
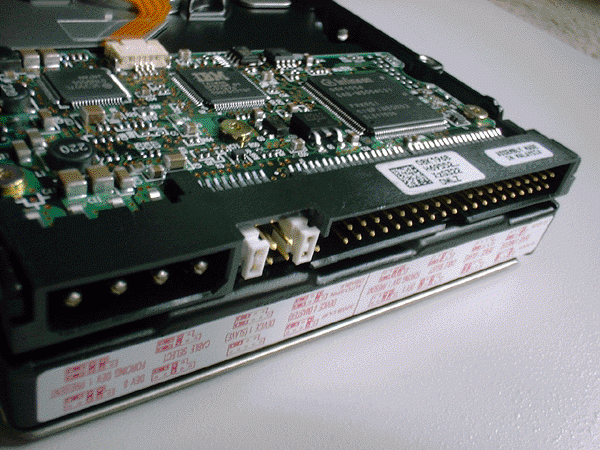
Side-note: if you’re installing an old-school IDE drive, it will have a ribbon-style cable with a coloured line on one edge. When you attach the cable to the drive, make sure the coloured line is closest to the 4-pin power connector. If you’re installing multiple IDE drives using the same ribbon cable, you’ll also need to attach jumpers plugs to the rear of the drive, to designate which drive is the “master” and which is the “slave,” which is not nearly as kinky and exciting as it sounds.
Screw in and connect any more hard drives you have. If you have spare drive bays in your case, you may wish to space your hard drives apart to keep them cooler.
7. Optical Drive(s)
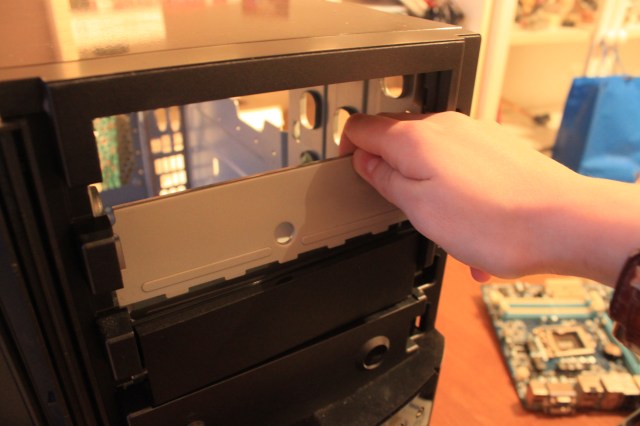
Optical drives are fitted in much the same way as hard drives, although they will always lay horizontally. You’ll also need to remove a blanking plate from the front of the case, so you have access to put discs into the drive. Front blanking plates rarely have screws in them; they should either be made of plastic that you can poke out, or metal that you can twist off. In my case: both.
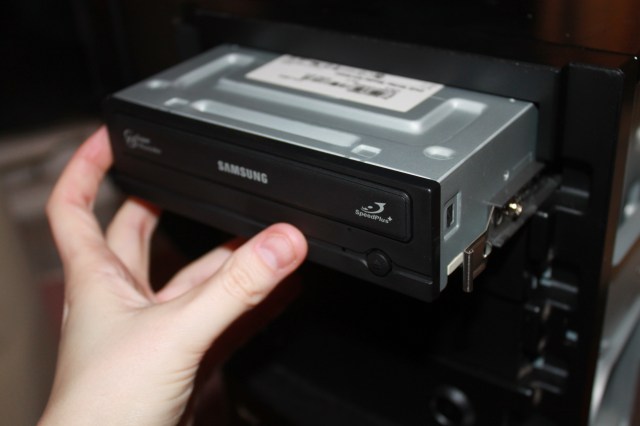
Depending on your case design, you’ll either have to slide the drive in from inside, or through the front of the case. Again, I’ve got some rails to attach to the side of my drive, which let me slide it in through the front until it secures with a satisfying click. More typically, you’ll just screw the drive straight to the sides of the bay.

Install any more drives you have, and connect all of them to the motherboard. Optical drives use the same power/data cables as hard drives, so you’ll want to use SATA cables (or, rarely these days, an IDE cable).
8. PSU
That’s almost everything we want to put into our PC, so now it’s time to get power to it all. Time to install the PSU and its scraggly bunch of cables!

The PSU typically lives at the top-rear of the case. You’ll find a big hole in the back of the case that it sits behind, and possibly a small metal lip or shelf for it to rest on. It may take some maneouvering to get your PSU into the right position, but it’s easy enough to affix, with 4 or so screws at the back.
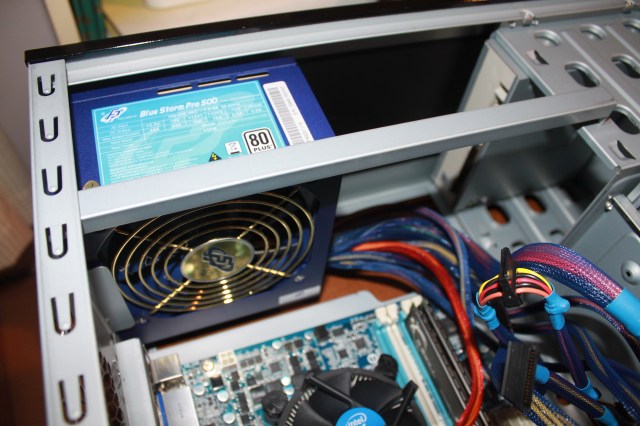
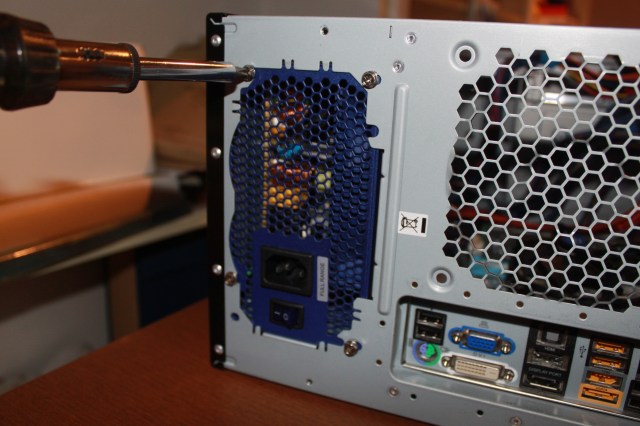
Looking at the bundle of cables, you’ll notice that there are all sorts of connectors mixed up in there, and we need to fish out the right ones for each component.
a) Motherboard
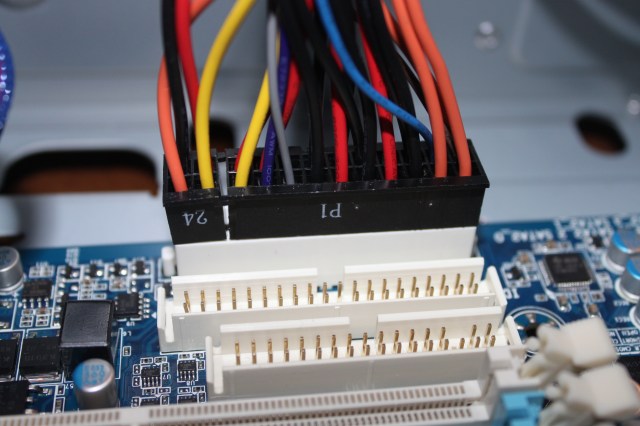
Firstly, you’ll want to find the rectangular ATX main power connector, which will either come as one whole 24-pin connector, or a 20-pin version with an extra 4-pin square dangling off the side like this:

Locate the socket(s) for this, somewhere around the edge of the motherboard, and plug the connector in — it should only fit in one direction, as should all of the power connectors we’ll be talking about.

Secondly, dig out the 12v connector for powering the CPU, most commonly a square, 4-pin connector. This will go into another socket, usually somewhere near the CPU.
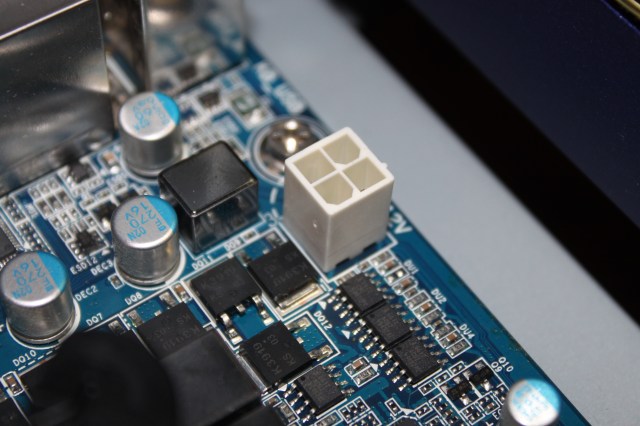
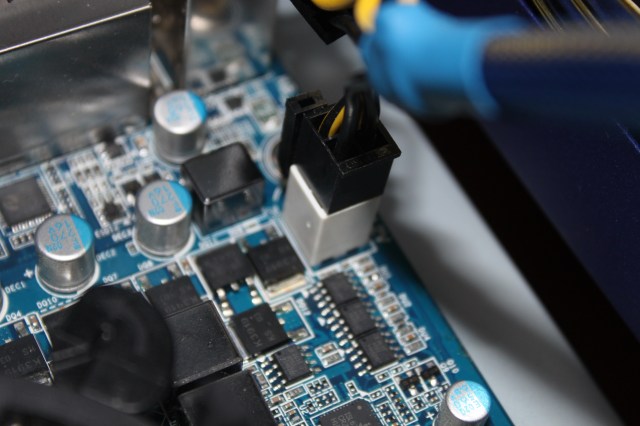
Sometimes, a motherboard may use an 8-pin socket — just plug two 4-pin connectors into this, side-by-side.
Double-check your motherboard instructions to ensure you’ve got all its power connections covered.
b) Hard Drives and Optical Drives
Your PSU should have several SATA power connectors. Often you’ll find multiple plugs on the same cable, so you can connect any devices that are close to each other with one cable, slightly reducing the overall tangle.
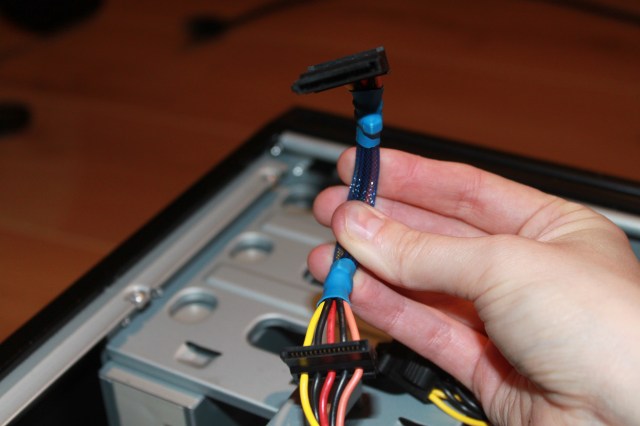
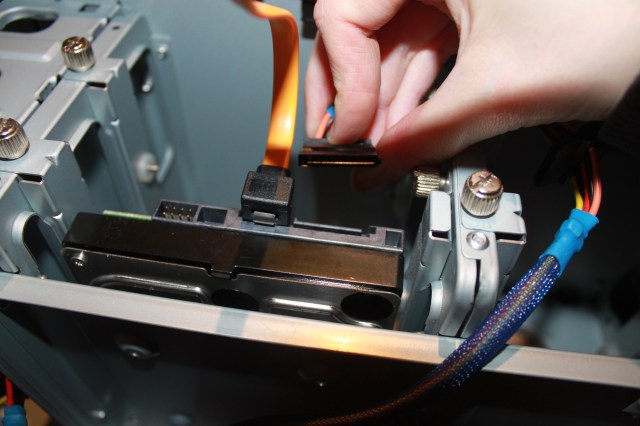
Use as many cables as you need to connect power to all of your SATA hard drives and optical drives.
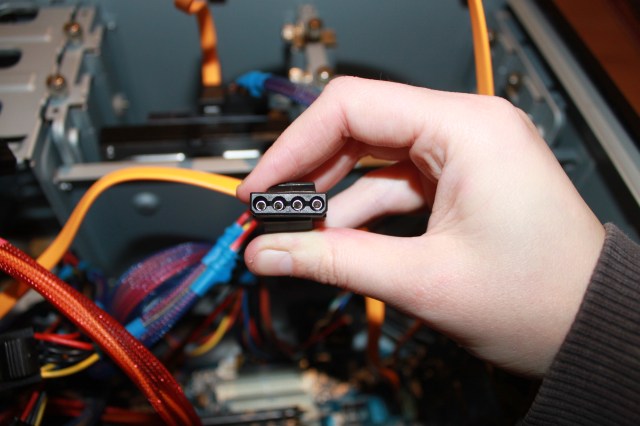
Older IDE drives use 4-pin molex connectors like this for power:
c) Graphics/PCIe cards
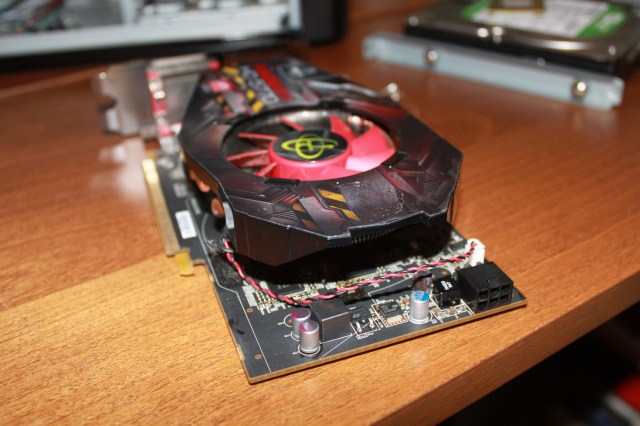
While some graphics cards will happily draw power from the motherboard, many cards will require some extra juice from the PSU.
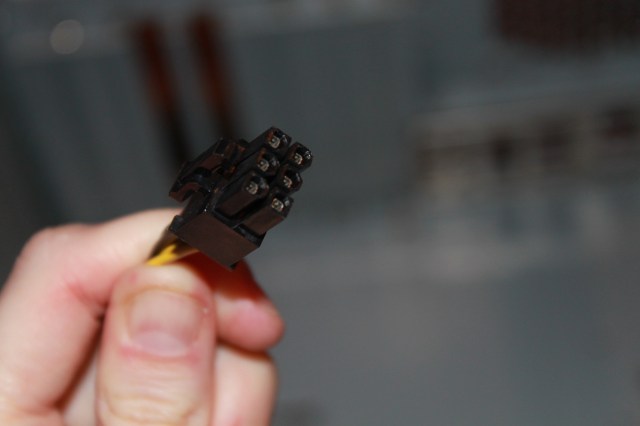
This requires one or more 6-pin (sometimes 8-pin) connectors, which will connect to a socket on the end of your graphics card(s).
9. Case fans
Finally, it’s time to install any fans that didn’t come already attached or built-in to the case.
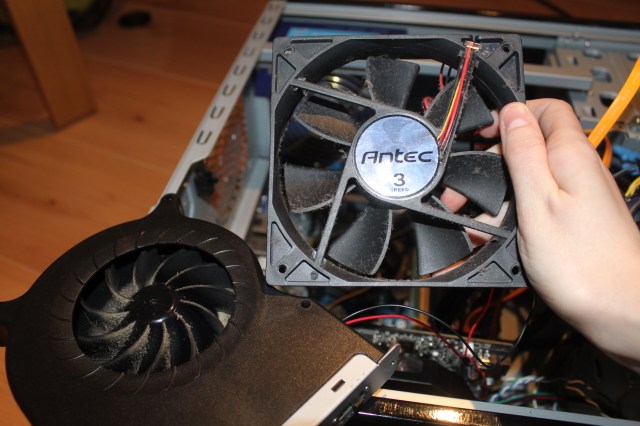
Most cases will have a grille at the back: screw the fan here, and ensure it’s facing the correct direction so hot air will get blown out of the case, and not vice versa!
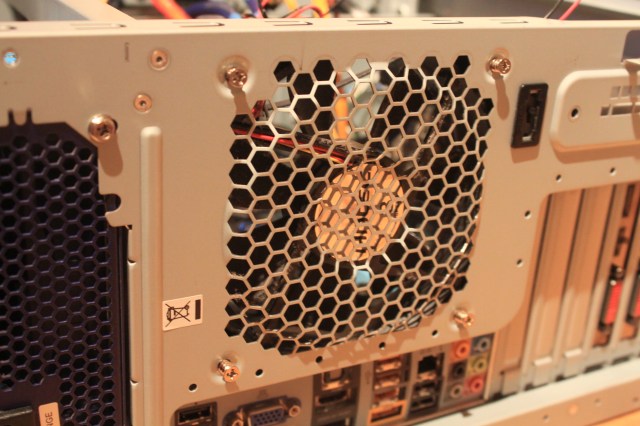
Some cases will also have places on the front or side to attach fans. For those fans, you want to make sure they are drawing cool air into the case. If you can’t work out which way round any of your fans should go, wait until you power on the PC and hold a piece of paper in front of them to see if they suck or blow! Just remember: suck from the front, blow out the rear.
You’ll need to get all your fans power, including any that were pre-fitted into the case. They’ll each have a 4-pin molex dangling off them somewhere, which you can connect to a PSU cable.
10. Close it back up, plug in power cable and turn it on!
If you are a responsible kind of person, you’ll want to spend a few minutes tidying all your cables, using cable ties or velcro to bundle them up. This will keep everything neat, and ensure no cables are likely to fall into a fan and get chewed up. Or you can just leave it a big mess like I do.
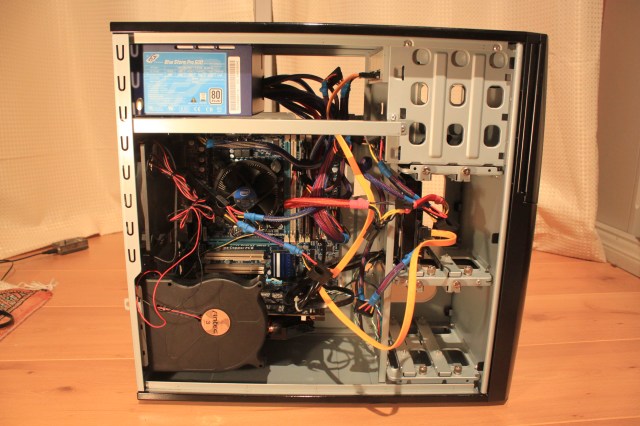
Once you’ve tidied/shoved everything in, re-attach the sides of your case and root out the power cable that should have come with your PSU. If your PSU has its own switch on the back, make sure it’s off before you connect it to the mains to prevent surge damage; it’s generally good practice to have your PC plugged into a power strip with surge protection anyway.
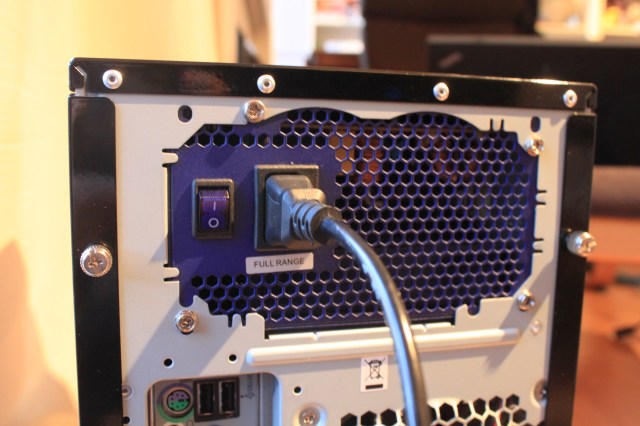
Once you’re plugged in, flip the PSU switch if you have one, then hit the PC power button on the front of the case. You should hear the sweet, droning sound of fans and the promising flicker of LEDs, as your creation boots into life!
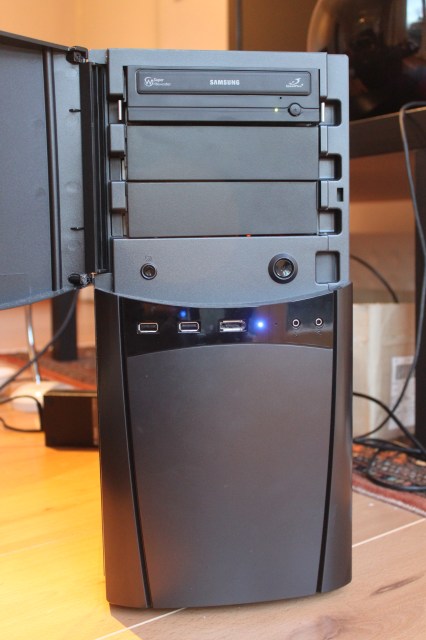
If nothing happens when you switch it on, don’t be disheartened! The most likely cause will be that something isn’t connected properly, and you’ll need to whip the case off and investigate what that might be.
Try going through checklists of common problems, and re-check your power connections and internal cabling. Helpfully (or not), there are lots of forum posts out there from people that will have experienced similar problems to you, and reputable sites like Tom’s Hardware are a good place to start.
Of course you can feel free to comment here with any problems, questions or suggestions you may have!
Next time: Booting up and installing the operating system!
This has been the seventy-seventh installment of Queer Your Tech with Fun, Autostraddle’s nerdy tech column. Not everything we cover is queer per se, but we talk about customizing this awesome technology you’ve got. Having it our way, expressing our appy selves just like we do with our identities. Here we can talk about anything from app recommendations to choosing a wireless printer to web sites you have to favorite to any other fun shit we can do with technology.
Header by Rory Midhani


Comments
What a cool read! Probably one of my favorite ones on technology!!! It’s so cool that you can build a PC and it sounds even better when it comes from AS. Definitely helpful article. Great follow up from the first one! Thanks!!
I think you’re maybe missing a point about screwing in the motherboard standoffs (the gold hexagonal screws that come with cases) somewhere along the line (although I can see one in one of the photos!) It’s a super important step because you can seriously damage your motherboard if you screw it straight on to your case. It can short circuit and damage a lot of your other components once you try to power it on and it’s no fun trying to work out why nothing is working when the motherboard is to blame.
This is a great and important point! On my case, the motherboard standoffs came pre-soldered on I think:
However, most mobos will come with them unfitted, and you have to screw or push them in yourself. They should come bagged with all the other screws, but are fairly easy to pick out, because they have their own threaded screwhole, to allow you to attach the motherboard at a safe distance from the metal backplane, preventing shorting.
Here are some examples:
Thanks for the reminder, I’ll see if I can get this edited into the article!
Blammo! This amazing information is now in the article proper! Thank you!
10. Meaningless LEDs, for a display of Japanese trucker (http://i1.ytimg.com/vi/pCq288XQPyQ/maxresdefault.jpg) understanding of good taste, only indoors.
11. Close it back up, plug in power cable and turn it on!
I really Like your information about this topic, visit here to get info about GFX Fix here: https://goappsplay.com/gsmfixfortnitemodapk/